Architectural Colour Scheme in Excel with LIST
The first process I did Architectural Colour Schedule in Excel used VLookup() to lookup a table on a separate sheet, but it did not show you the choice of selections.
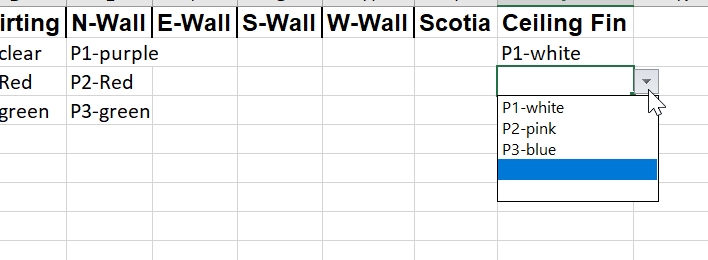
This time I want to be able, when looking up a room finish, to see what the selections are, so that I can choose an alternative one if necessary. So I want a pick list to choose the specific selection.
Process
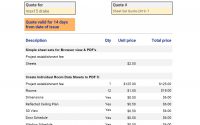
Here is a copy of the spreadsheet.
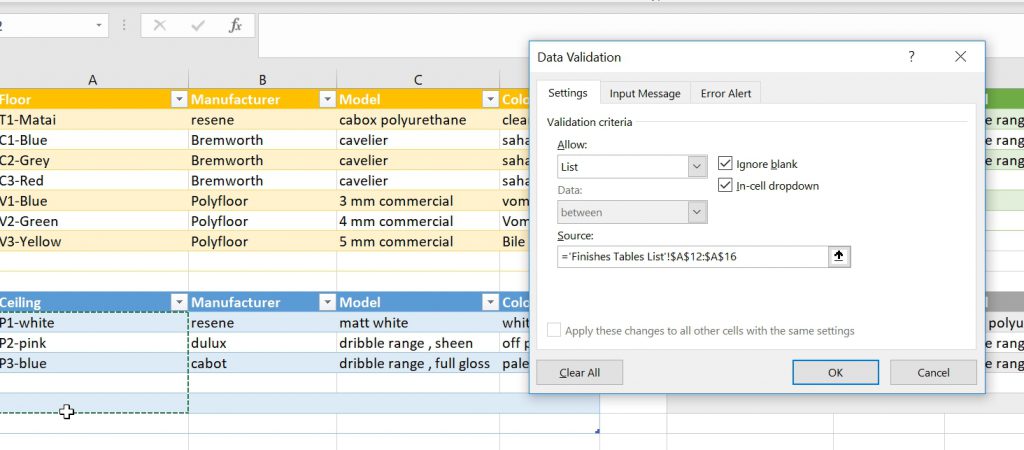
I copied the sheet setup from the previous example, see post above. I made a separate sheet of tables of finishes, as I wanted to add the colour in the label I was looking up. Note- A negative of this is it looks up the cell value, so if you wanted to change P2-Red to P2-Green then you’d have to go and re-name your Conditional formatting to implement that change.

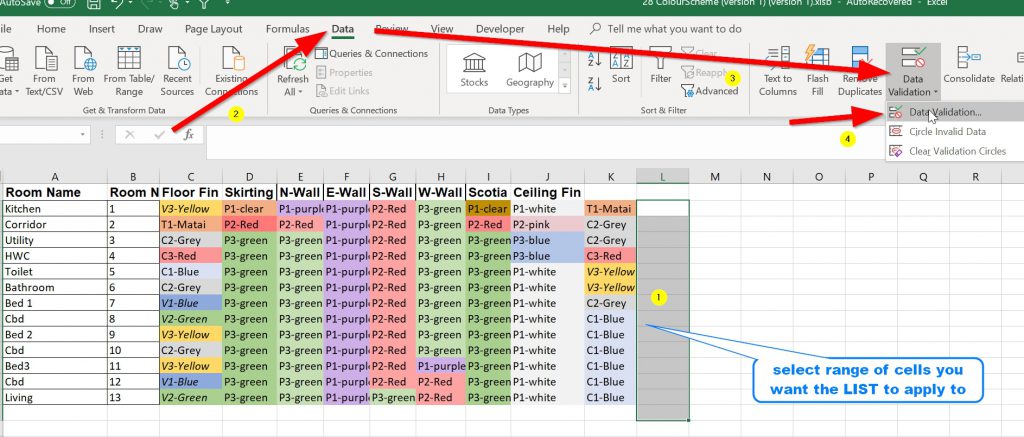
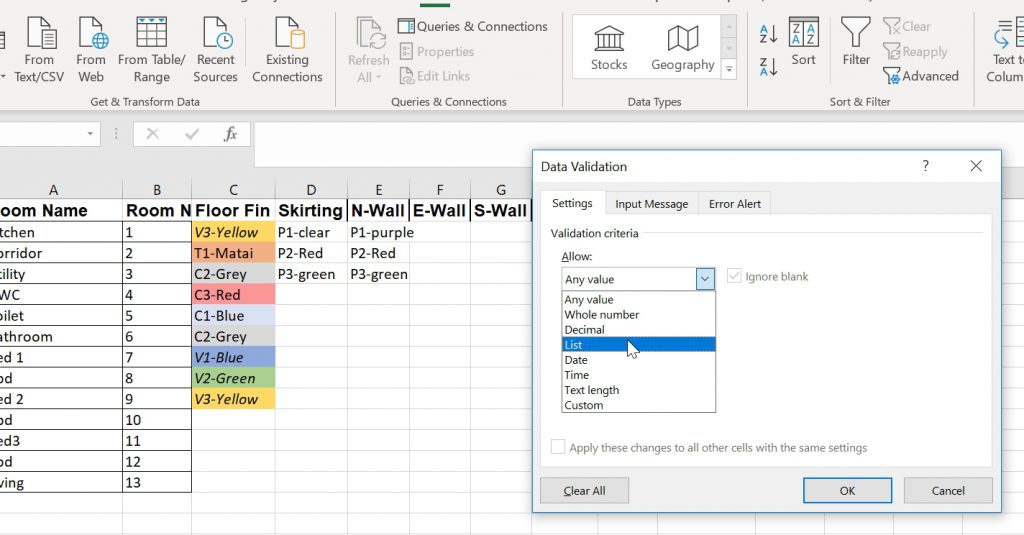
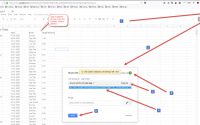
Next, on the main colour scheme list we need to create the lookup and need to use Data Validation from Data tab in Excel. See video below on process
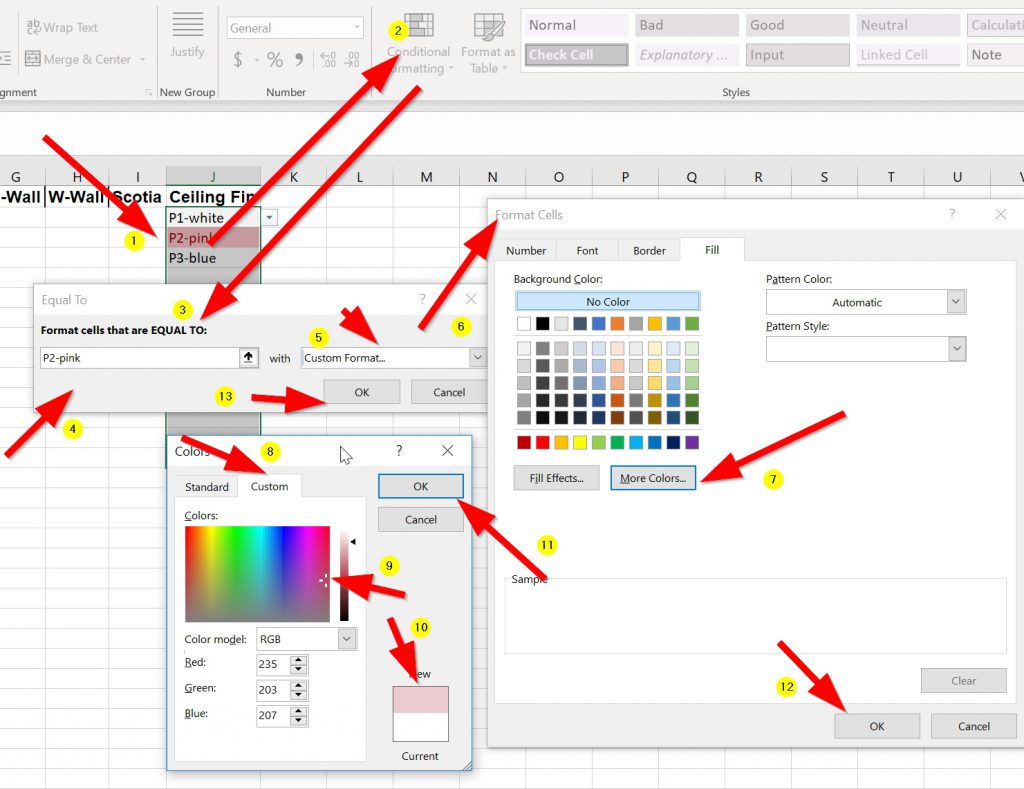
I followed the process as shown in images below
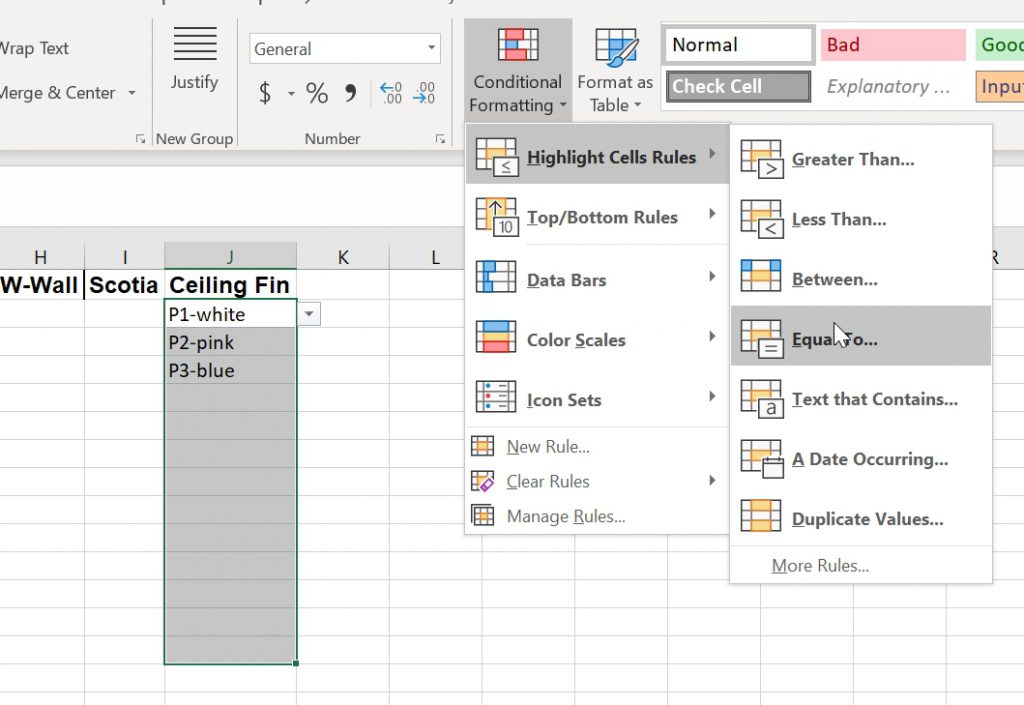
Next, you need to take the list and do a conditional formatting on that range of cells, I found the Highlight Cell Rules and Equal to for the cell was the best way. I tried formulas but that did not seem to work as well.
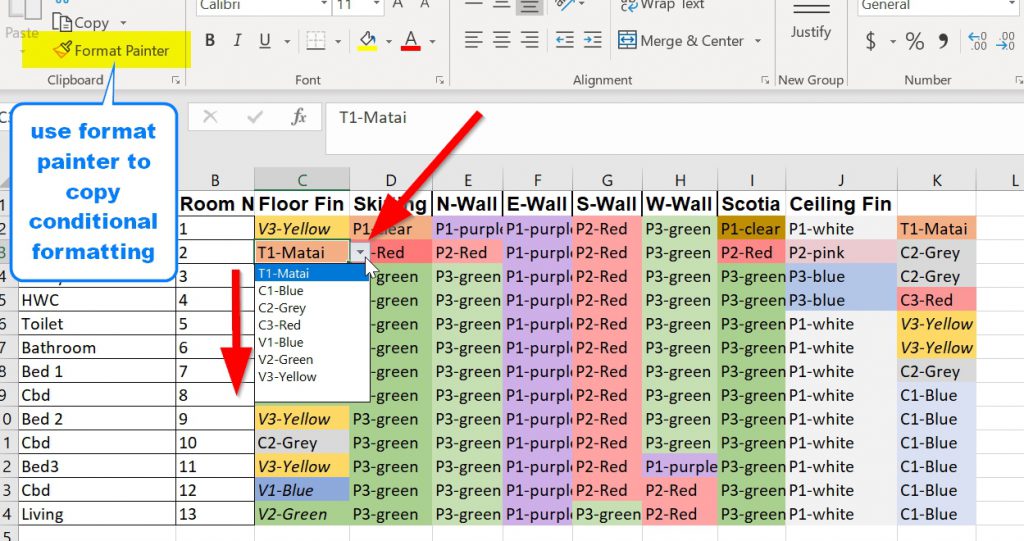
This is a really handy article on Copy and paste conditional formatting to other cells. It definitely speeds up the tedious process of setting up the conditional formatting.
I only found out about the Format Painter after I’d finished doing the Conditional formatting, so had to test it out on a new range. The nice thing is, it takes all the formatting rules from the first cell and applies it to the new range. Then you only have to tweak any changes.
List limited to one cell
So, on this main page you’ve selected from a Palate of Materials and colours your colour scheme choice, based on the manufacturer/model/colour (MMC) in your table. But, unlike VLookup() the list only applies to one Column range, so how do you get all the rest of the information (MMC above) tabulated to put in a schedule.
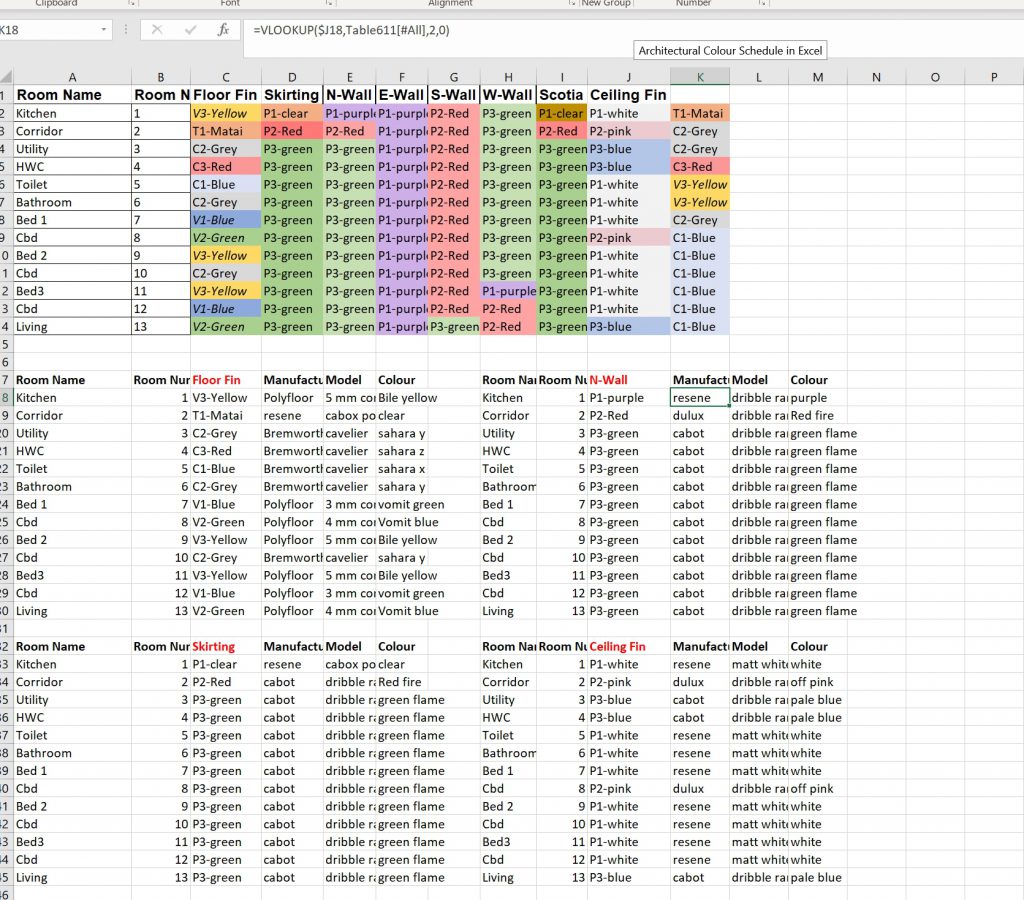
Well, we can set this up on a separate sheet and so organise it as we wish. Below I’ve just put some of the associated data in the sheet as a demonstration. Formatting is not that pretty, but you can setup your Finishes schedules in a well structured tables or sheets so that you can copy/paste into an exported Revit Schedule to push the data into Revit if you want. (I’ve also seen a screenshot of the Excel Tables pasted into a Revit Sheet- Not pretty and definitely static, also it pixelates at higher resolution in an exported PDF)
In the examples below I’ve just used the Vlookup to lookup the selected Floor finish cell C2:C14 and go and look up MMC of the associated item from the Tables sheet. See previous post on colour schedules (link at top) for how to use Vlookup()

End comment
I prefer this pull down lists compared to the Vlookup() process for colour schemes, although the colour annotated in the lookup cell may have issues with changes, you could always add more codes to the bottom of the table (you’d still need to do conditional formatting for the new rows and rename the original lookup value that you don’t want anymore). To change an element you do not have to go to the Tables sheet to see other choices, they are there in the list.
I admit, I wasn’t impressed with the lack of copy/paste for conditional formatting, a tedious process. I do like the Format painter tool though, that really speeds things up a lot.
Because of using the Vlookup() to setup how you want to display the data after you have worked out your scheme this allows you to setup separate sheets for mapping directly to Revit with whatever schedules you have in the project. The positive about this is that it can be structured to match your revit schedules in whatever order you wish, so you can have a Floor schedule, a wall schedule or a combined room finishes schedule.
I’ll have to see if I can do this process as easily in LibreOffice and Google Sheets.
Creating embedded form with alternative choices in Google Docs
Web Data 1. Capturing Web data via Google sheets and Displaying on Web Page