Revit- Crowd seating, visual numbering, colouring ordered and random
Capturing auditoria, theatres etc for AM/FM and for ongoing use of the model for seating planning can be useful. With numbered seating you can allocate different prices for different seating, you can also change pricing for different event configurations for multi-purpose arrangements.
I have done seating on a number of buildings in Wellington when working for WCC (Wellington City Council) for their buildings. I was hoping that the models could be used as part of the marketing of the centres for different event configurations. Alas, to date that has not occurred.
- Speed up the tedious stuff and enjoy designing and documentation more
- Works in all versions of Revit
- Information to PROVE your increased speed
I have since been working with a small architectural firm and have been trying to set up some scheduling for the seating. In this instance there were different coloured seating which had a randomness about it, that was later tuned to the designers preference.
To start with, a seat family is required. I did use another family for earlier work but found the
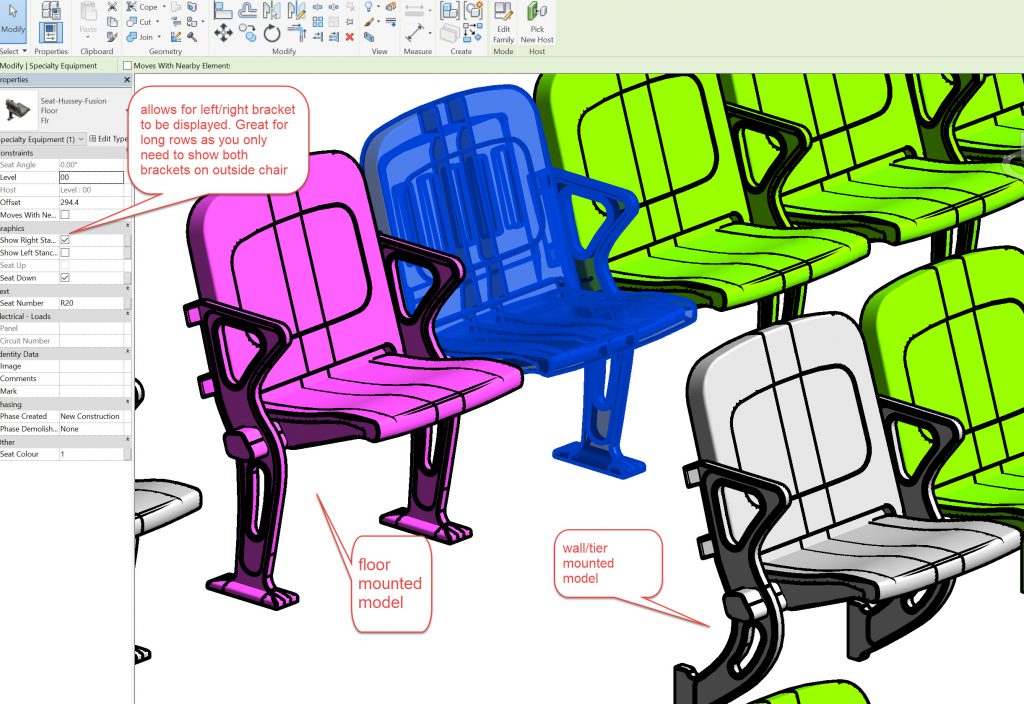
Hussey Families very well modelled and adaptable. The seat below is the Hussey Fusion. There are even some neat ones with cup holders. The one below can be displayed with seat up or down too.
The seat family can show floor or wall fixings, also showing Left/Right side brackets with tick boxes in the properties dialogue for the family.
A very nice family from Hussey, thank you.
Seat numbering
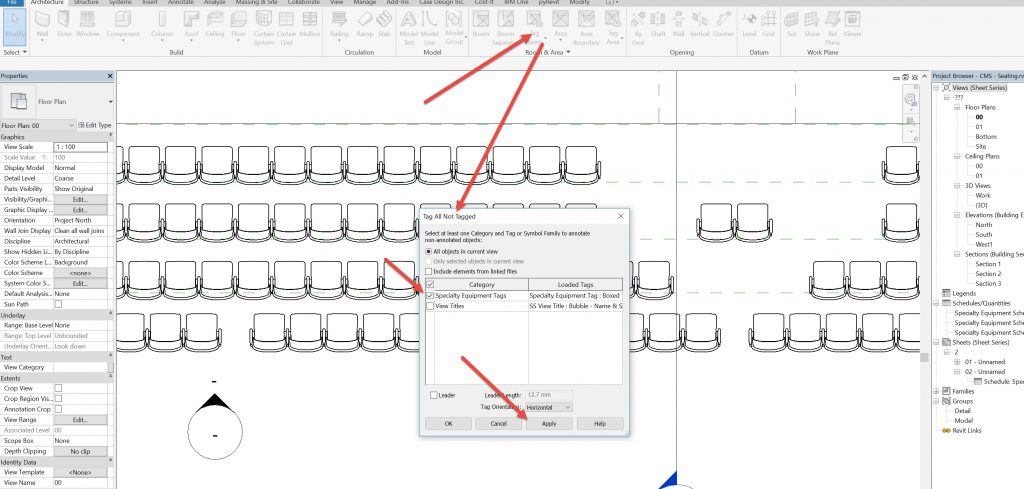
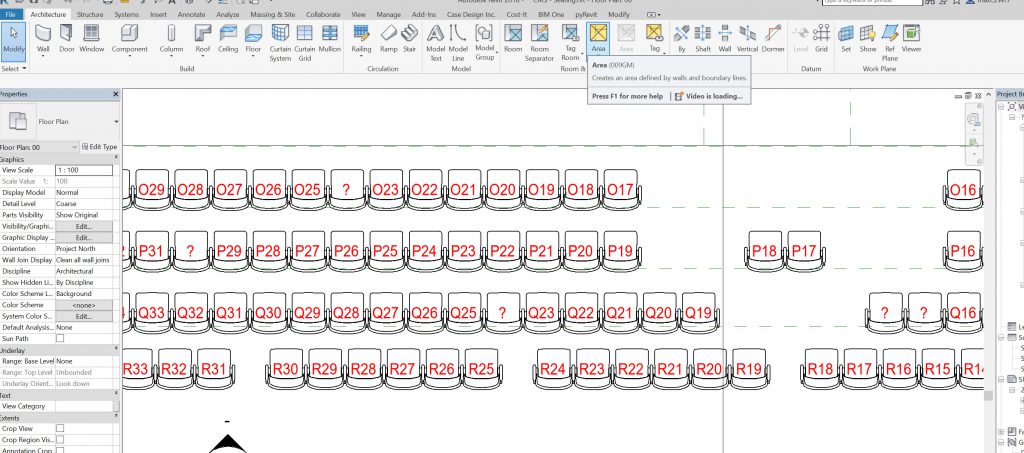
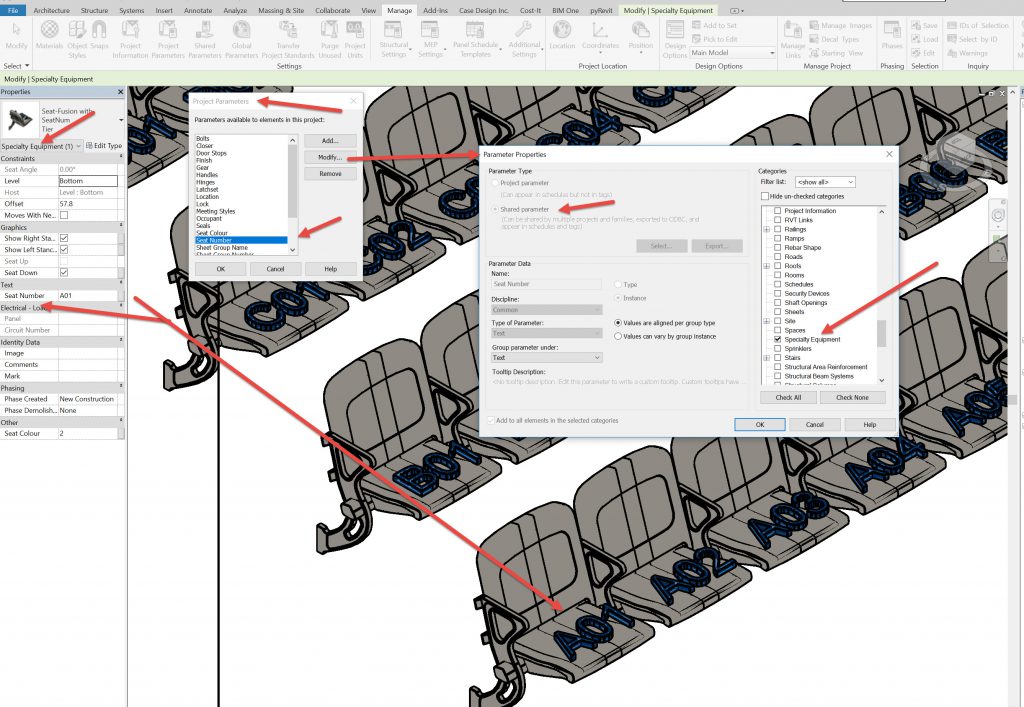
We can just add a project or shared parameter to the Seat category, in this case it is under Speciality Equipment Category. Then we can schedule them. But if we want to tag them then it needs to be a Shared Parameter as project parameters can’t be tagged. So I created a Shared Parameter called “Seat Number” so now the seats can be tagged in 2D as in the 2 images below. This is fine if you want to just display seat numbers in 2D plans. But what do you do if you want the seat numbers in 3D views?
Seat numbers in 3D
what we do in 3D is add some 3D text into the seat family. This allows us to display the 3D text in 3d views. I float the 3D text over the seat, although you could have it vertically in front of the backrest too, then it would be clearer in elevations. You could also have a visibility tick box to either display it or hide it (I haven’t tried that yet).
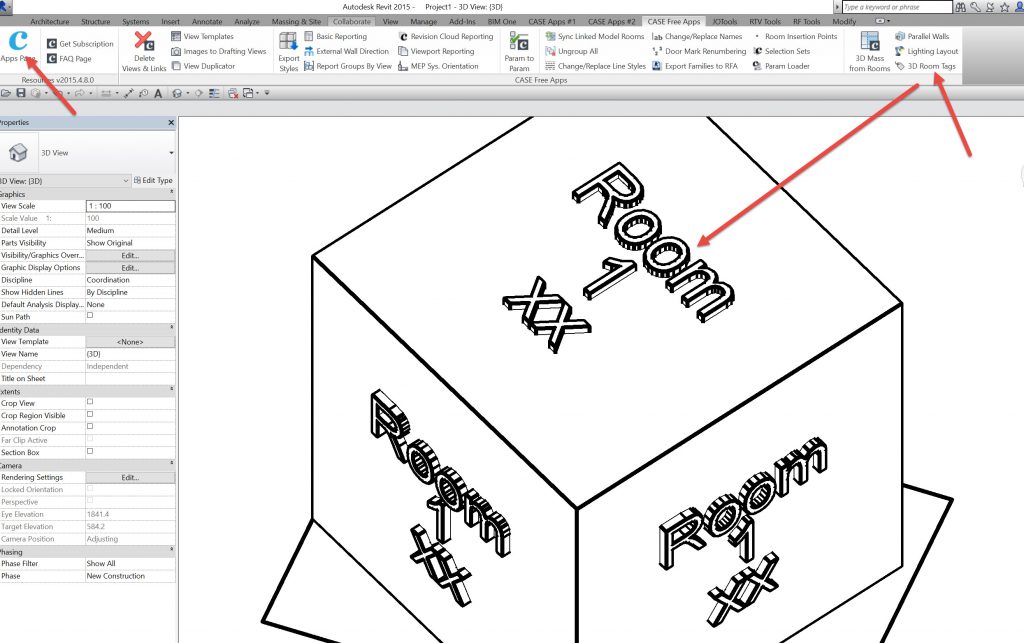
I use the 3D text from the Room Name cube from the Case App Add-in. These already have parameters attached to them, so its just a matter of selecting annother parameter and putting the 3D text onto the Speciality Equipment Category. Then it all works. I have found that the install from BimOne for the Case Apps does not work, but Don Rudders Github link works, unfortunately only for 2015,16 and 17 versions so far (so set up 3d text in older version of revit and send your family to a later version).
Actually numbering all the seats
Going and writing all the seat numbers can drive you cracked.
I have a couple of techniques. First, I select a complete row and give the selection Seat Number parameter it its letter A,B,C…. so you can see all the row with the same letter on.
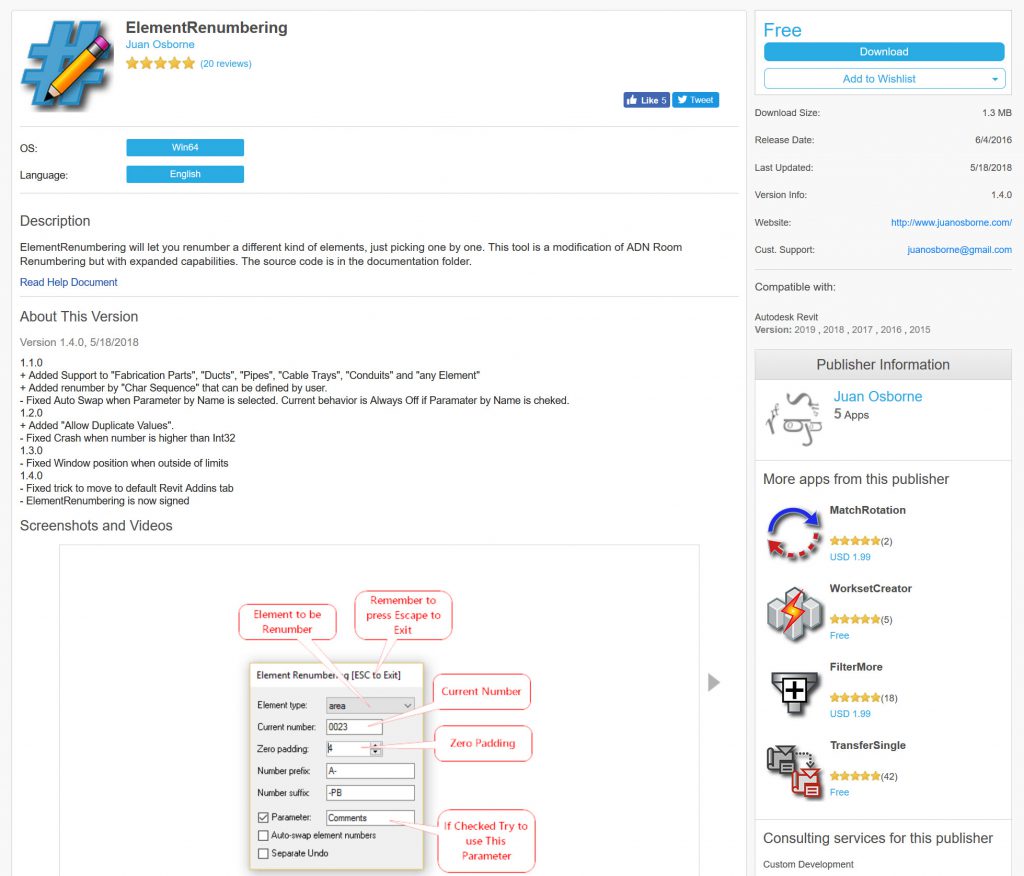
Then I use a Renumbering Add-In. These are pretty good as they will do sequential, also adding prefixes and suffixes and Zero Padding ( which is good for numbers 1 to 9 (or rather 01, to 09) as this helps with sorting in the schedules.
The current free numbering add in is ElementRenumbering by Juan Osborne (thank you for this tool Juan).
I have used others, some paid , others free. The first one I used was WIIP numbering which I used in the 2015 version and that was a good tool. I also used the Redbike AutoRenumber when it was free, now you have to pay for it.

The re-numbering add-in is a useful tool at times. Sometimes you can send the schedule out to Excel and manage the numbering there, sometimes the renumbering tool inside revit works best. With the seating its great, especially if the seats are tagged (2d or 3d) so you can see that you are picking the seats in the correct order. Once you have them all numbered then they are great for scheduling and exporting to Excel for sorting and adding things to.
Back to the 3D seat numbers. Issues with model size and speed.
On the theatre/event centre models I did with WCC I had all the seats in the models with 3D text. The models were big. In the architectural practice I was working in they linked the seating into the main model. This is a great idea as the seating, once arranged, is only used when you are printing out your document set, so can be unloaded while you are working on the rest of the model, thereby speeding up your work.
This is particularly true with the 3D numbers being in the Seat family. On the project I was working on it had about 1000 seats. When the seats were in a model on their own, the size of the Revit file was about 6Mb even with the shared Seat Number parameter for each seat filled in.
When I put the 3d text into the family and have each seat separately numbered the file size goes from about 6Mb to about 45Mb, so quite scary. So in this particular project I have 2 seating models, one with 3D numbers in and one without, and link whichever one I want to display.
Colours/Options for seating
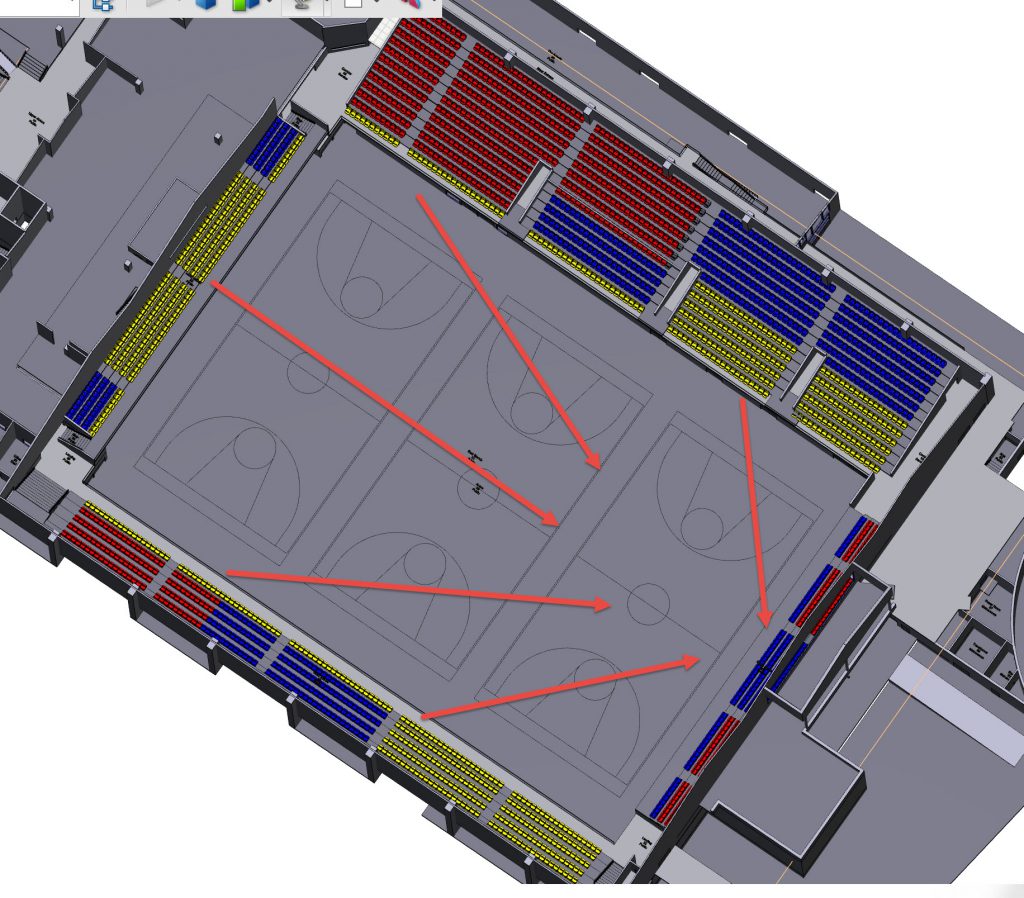
You can colour seating for different events depending on orientation/location of seats with regard to proximity and visual sightlines. The first image below would be set up for a stage/concert/catwalk. The ones nearest the event (Yellow) are the best seats, the ok ones are blue and the cheaper ones are Red.
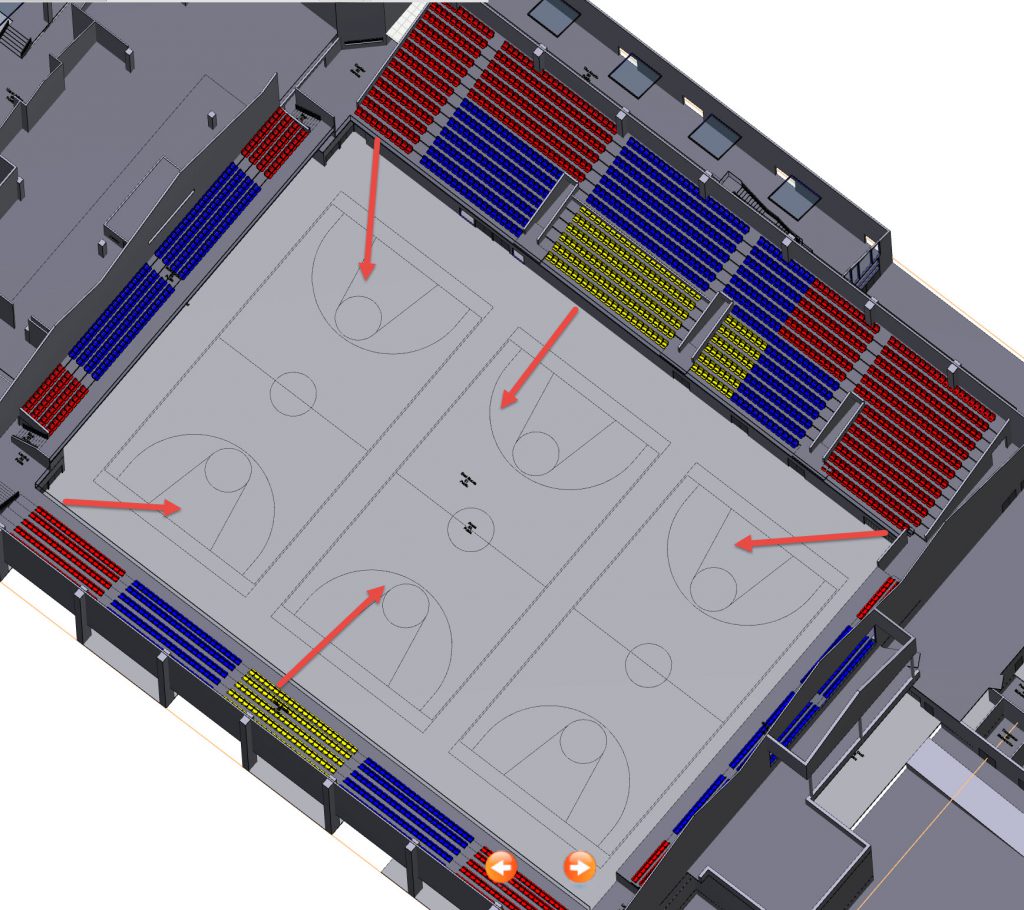
For a basketball event the orientation would be different and so the seats would have a different value. ( I actually think the centre court would be rotated 90 degrees otherwise the yellow seats get a view of the back screen of the hoop), so Yellow high value seats, blue average value and red low value.
Another way to use colour is actual colour of seats, so that a design pattern for the seating can be developed. In the one below I used a random number generator in Excel for numbers between 1 and 3 and used that formula on the seating.
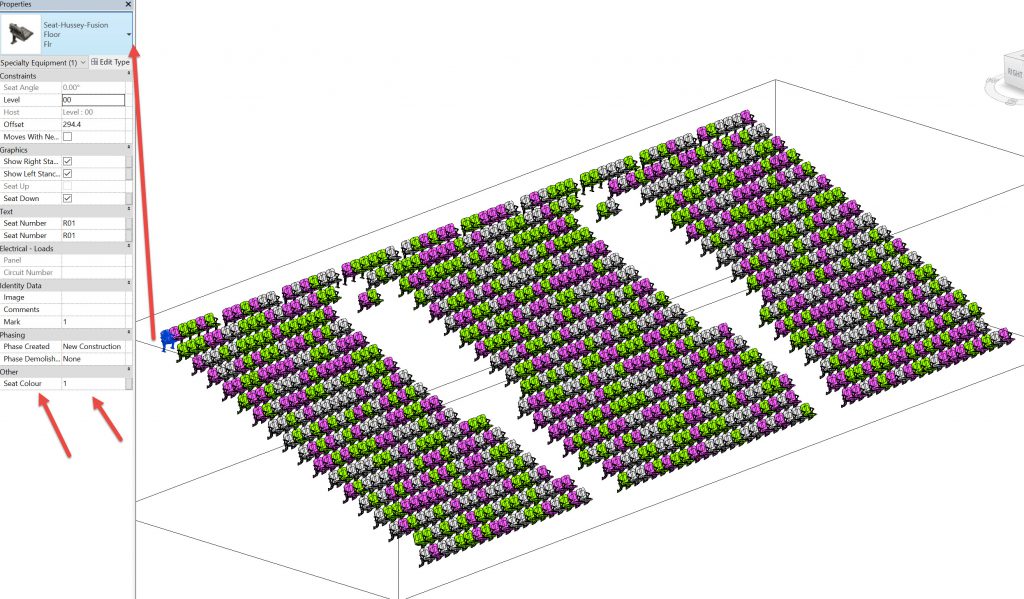
In the top case I used 2 project or shared parameters one say BBCol (Basketball Colour) the other CC (Concert Colour) which i can assign numbers to.In the 2nd example, I just used a single parameter called seat colour. You could extend these parameters, then assign the colour to the back of the seat and the base of the seat if you required more complexity.
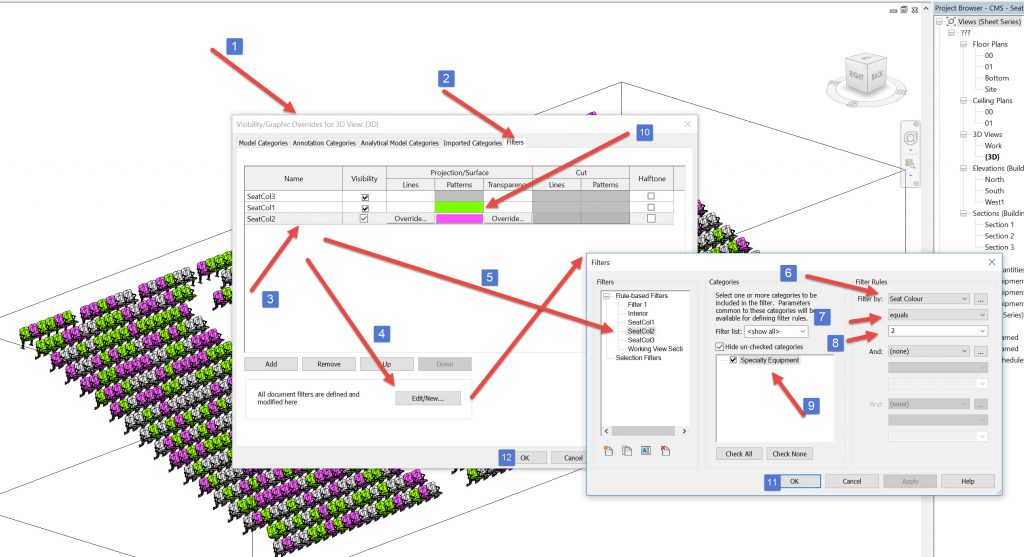
So how do we actually show the colours? Using FILTERS
We set up a filter for each number that is likely to occur, in this case, 1,2 & 3 and then if it filters to a number then choose a colour to display.
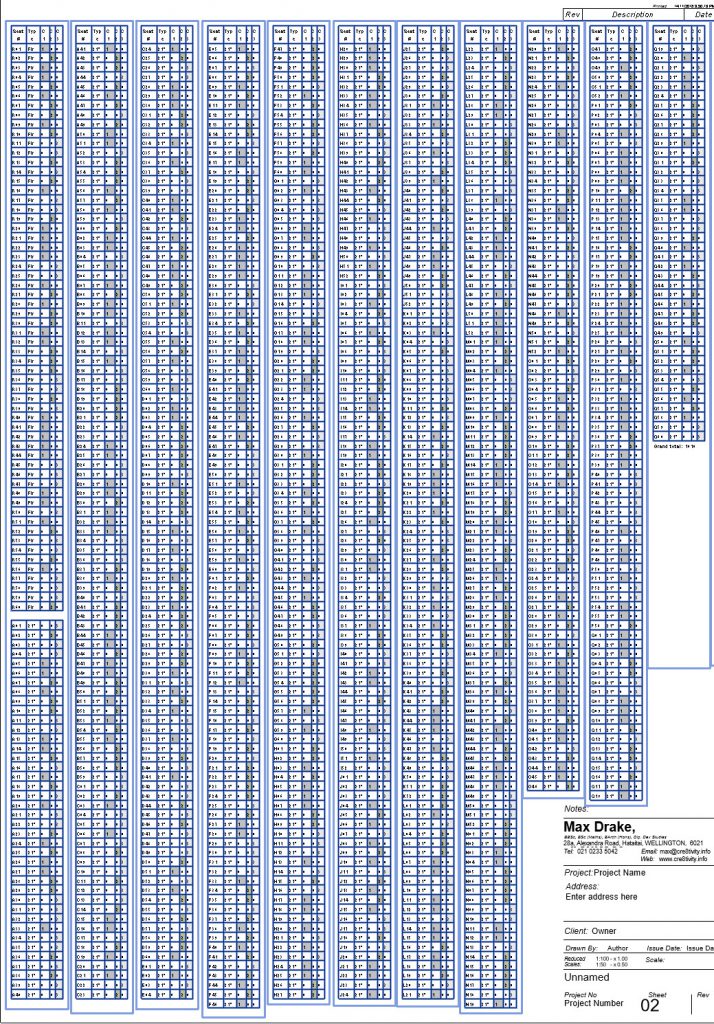
As well as geometrically displaying the seating by colour, you can also do it graphically using schedules and using conditional formatting to display different colours for the seating 
So that you can itemise each seat by number and colour and with type and count as well. Below is schedule on a sheet for 1010 seats.
You can also do a more simple table by not itemising each separate seat and only doing it by type. In this case, floor fixed or wall fixed.
Randomising colours
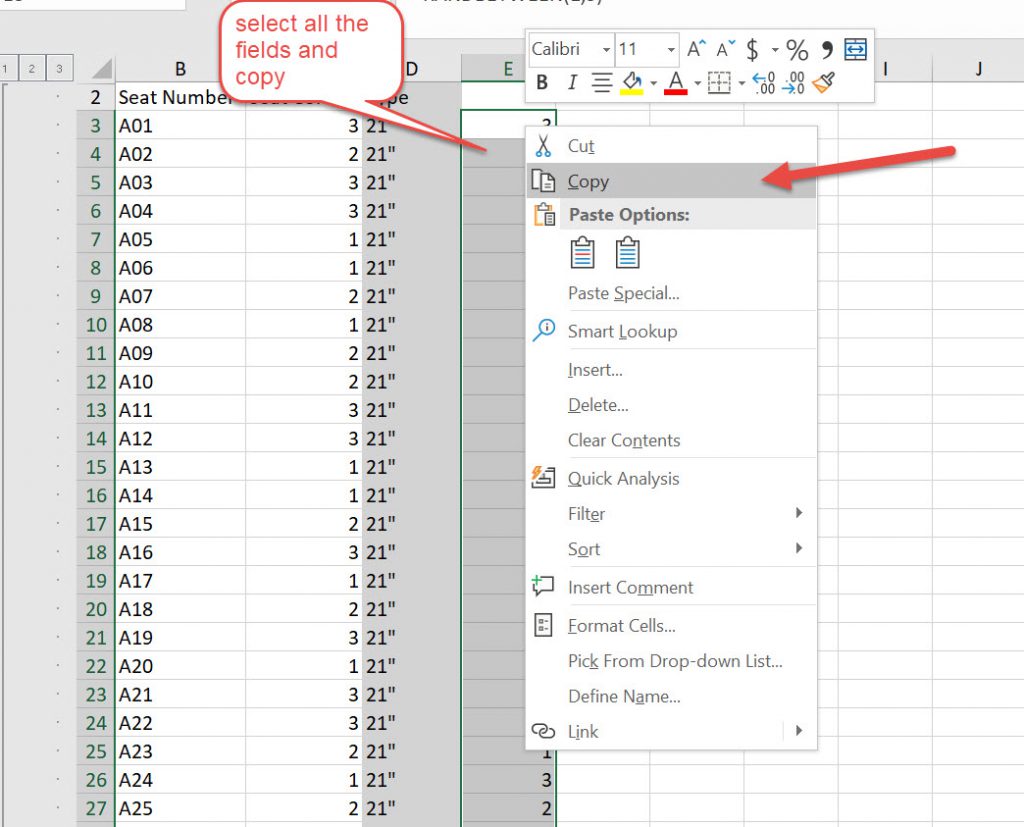
To be able to randomise the numbers of the seats between 1 & 3 or 1 and 10 (if you want 10 colours) you need to export the schedule to Excel, there you can use some formulae.
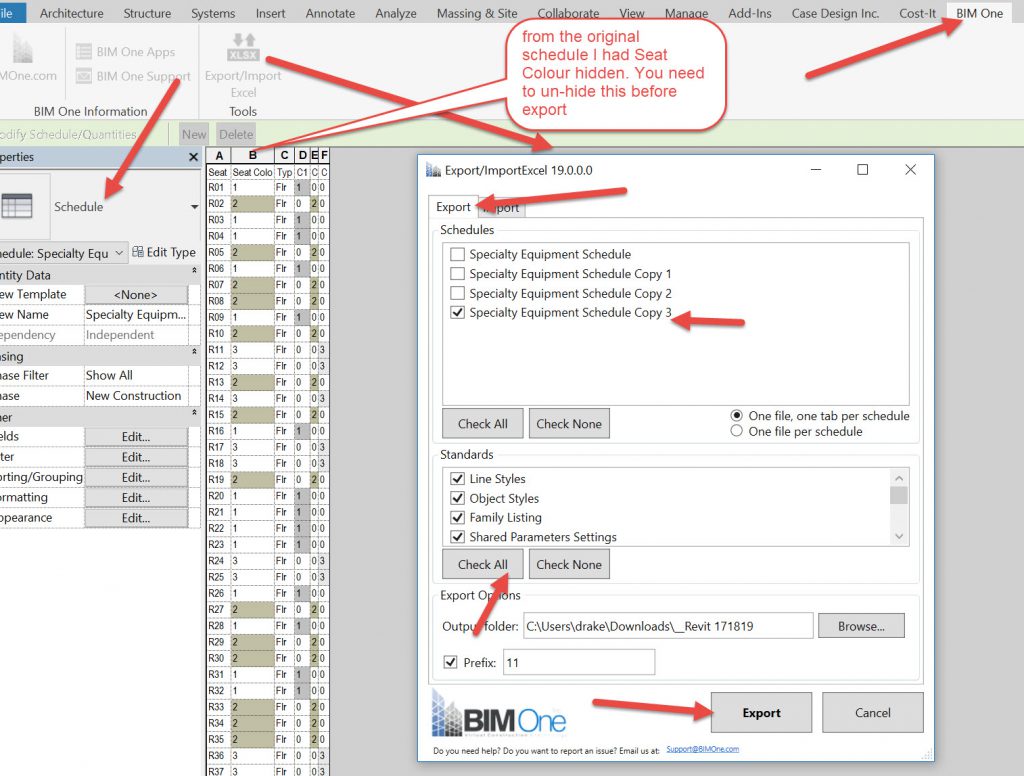
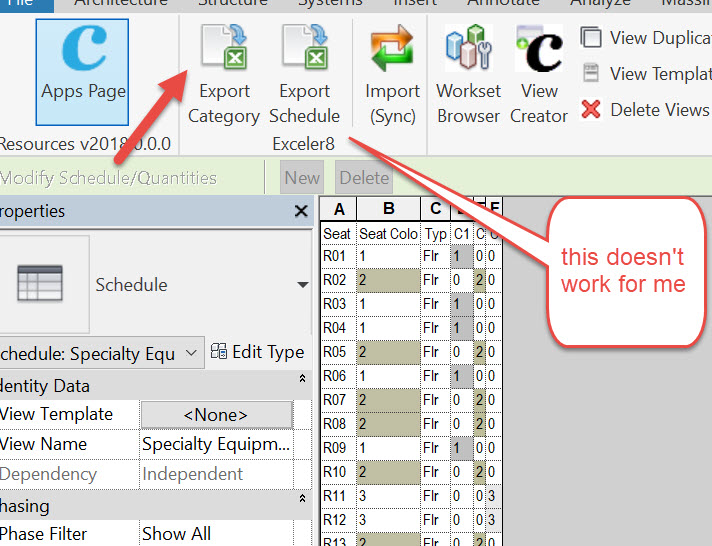
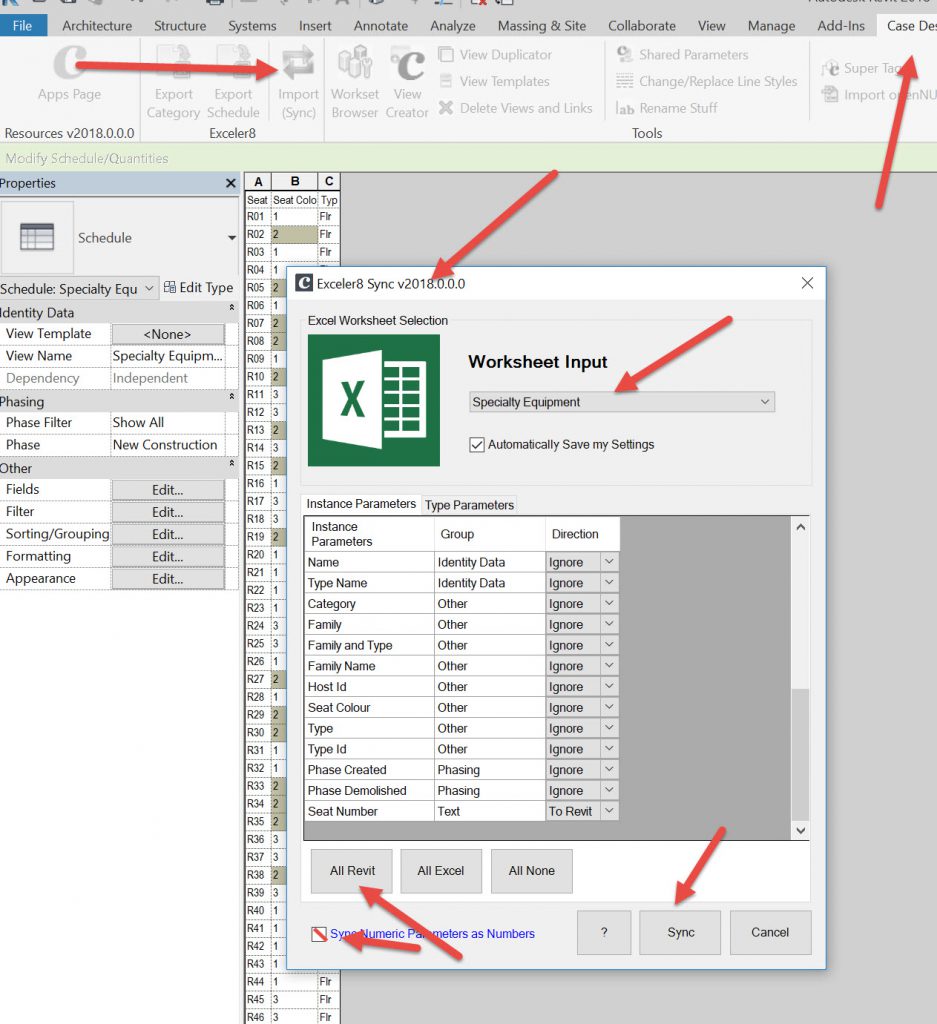
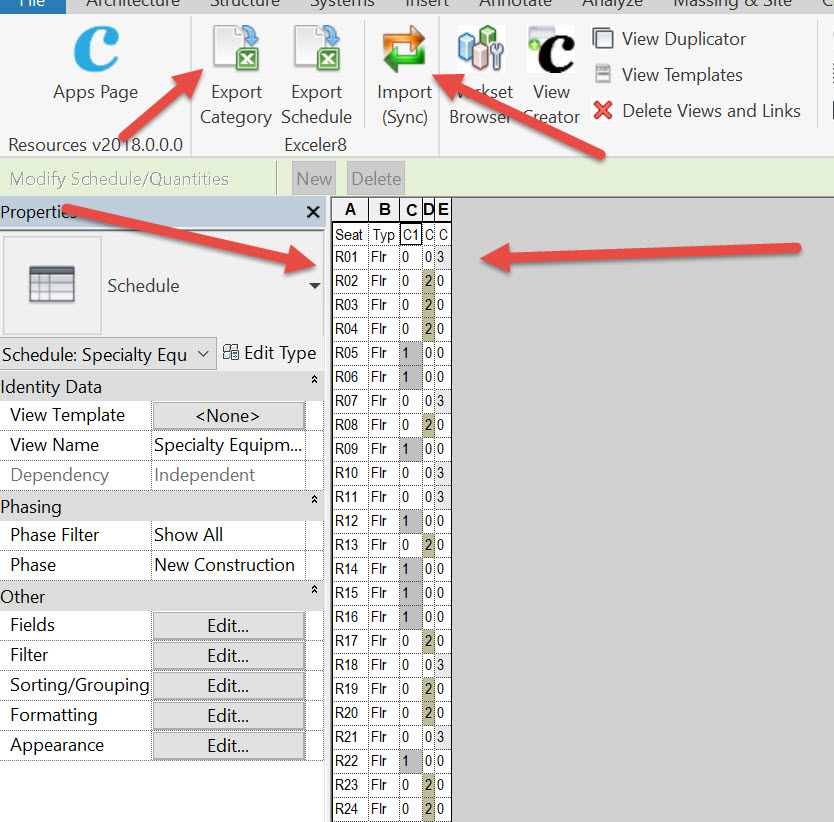
I use BIMOne Export/Import to excel as its free and easy. I sometimes use the Case Apps for exporting categories to Excel (the export schedules to Exceller8 doesn’t work in my Case Apps) and synchronise (see the 3rd image down). There is also another free one out
Free SheetLink – Synchronize Model Data with Spreadsheets but I think that dumps out Categories rather than schedules, so you have to hide a lot of columns to be able to view the data that you want to look at.
The first time I was using BIM One for this the Seat Colour column data would not come out, and I’ve just realised that its because I had it hidden, oops!). Anyway, export to Excel
So we have the export to Excel
This is another method of exporting/importing data free form to Revit/Excel using the Case free apps.
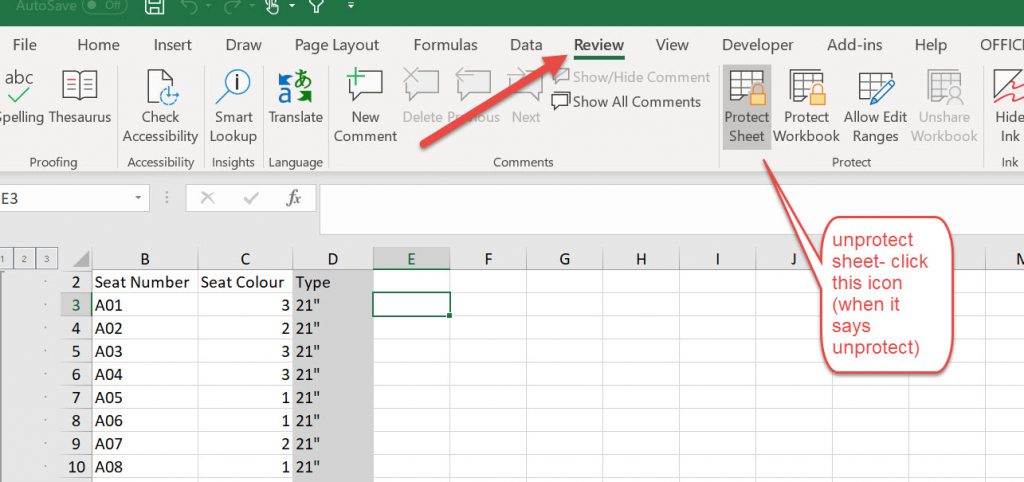
So after unprotecting the sheet
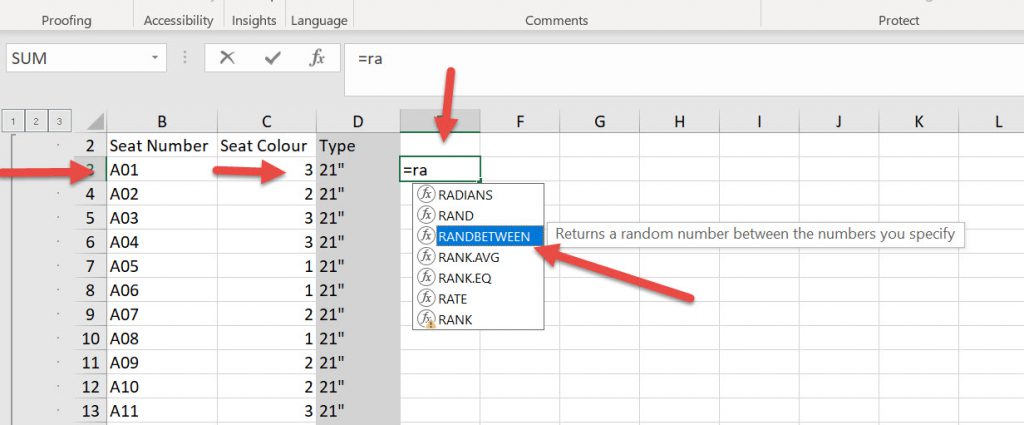
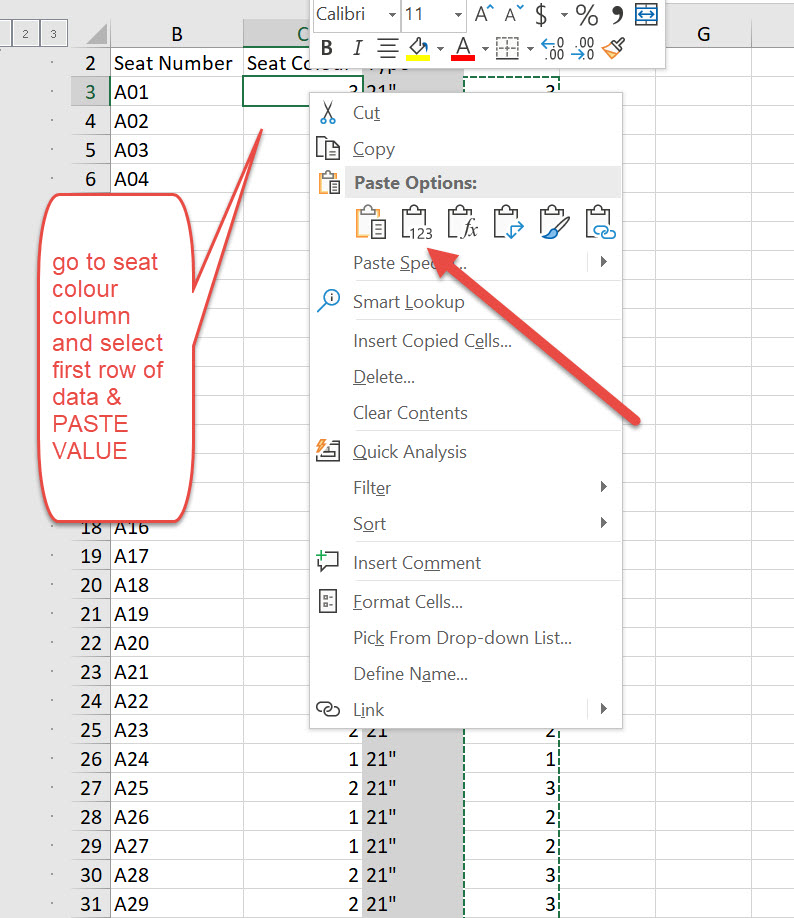
Type in the formula in an empty column on the first line of seats
=RANDBETWEEN(1,3)
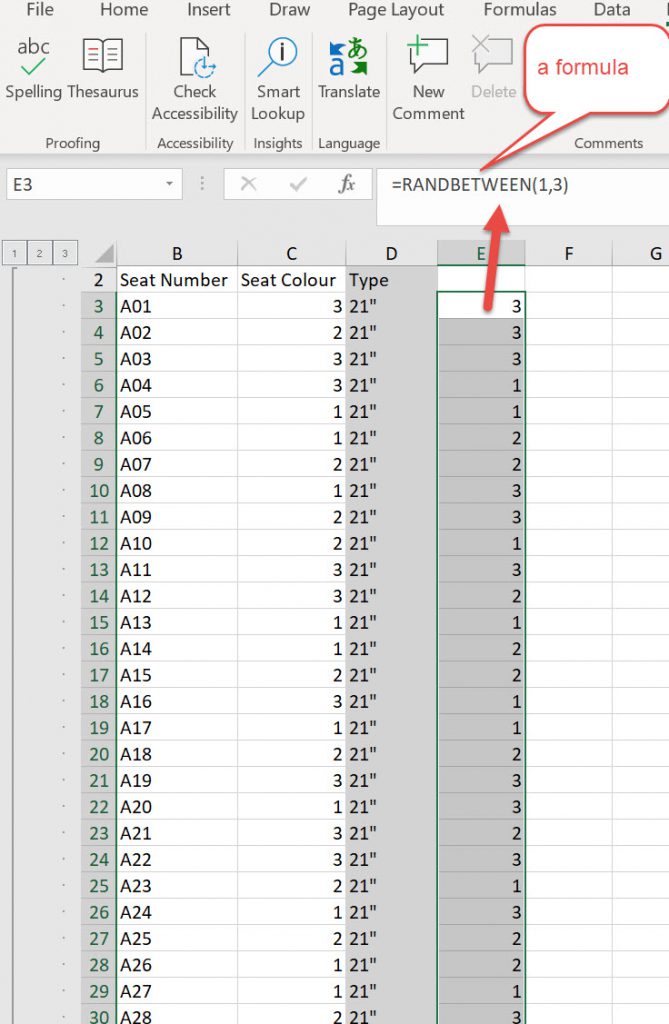
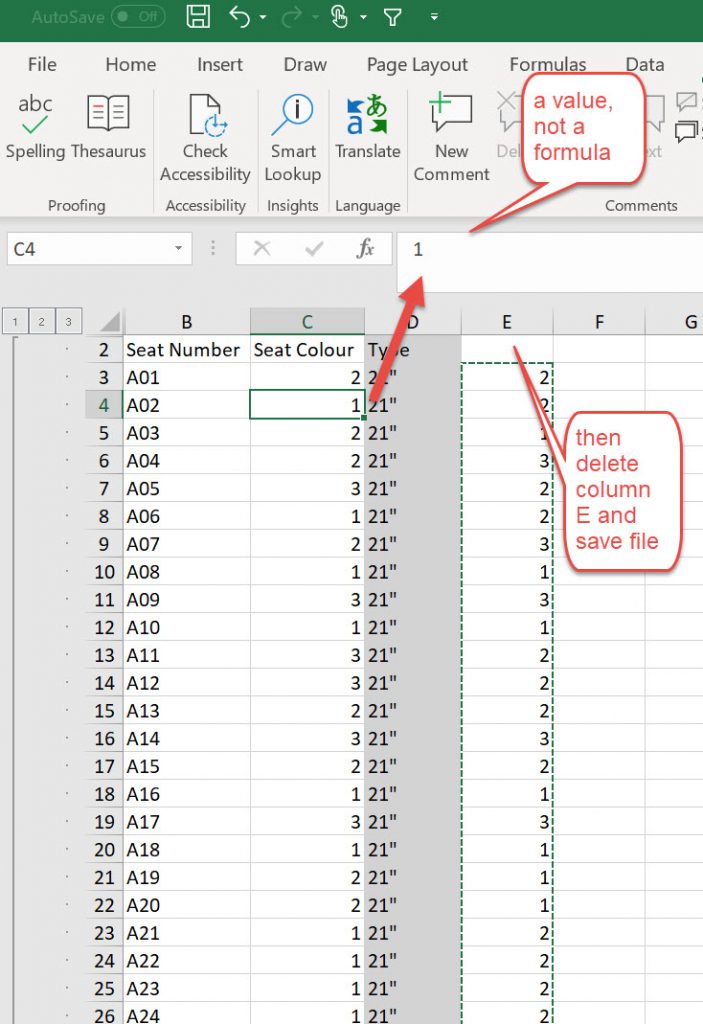
Then copy this down to all the cells, remember that there is the formula in the actual cell, so you need to copy VALUES ONLY otherwise you just copy a formula into the Seat Colour column and that doesn’t work when being imported back into revit Schedule.
Then use BIMOne to import the excel file back into Revit. Actually, this gives an error.
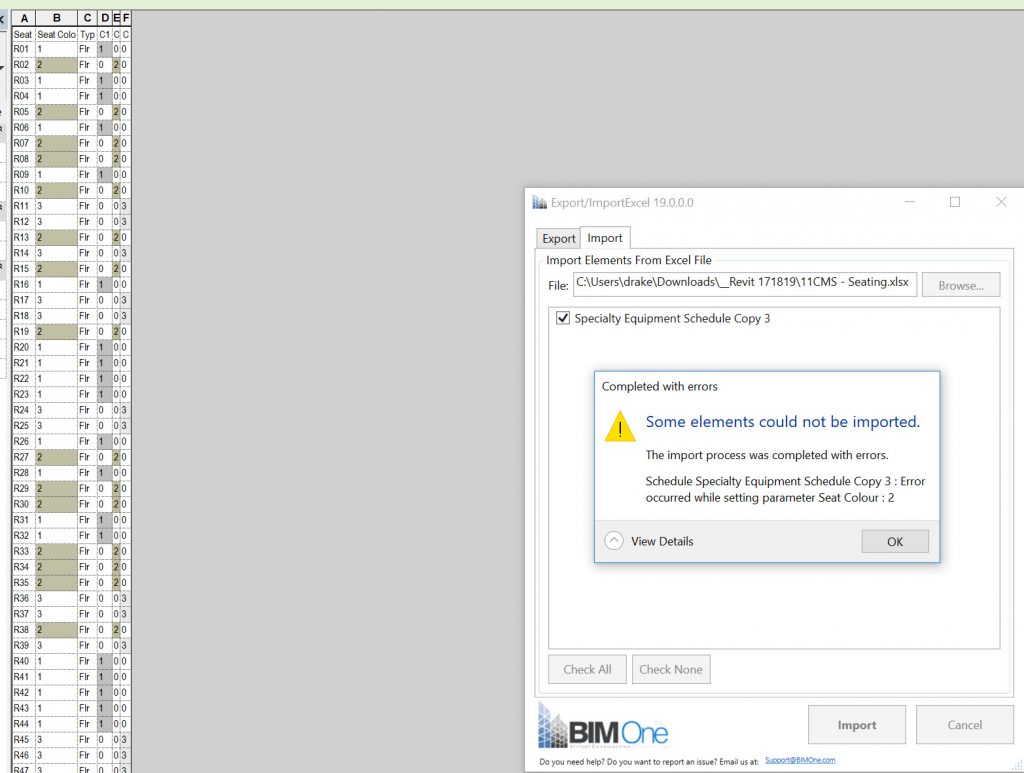
That is why I used Case App for Categories. I forgot about BIM One not working.
The Case Sync is slower, but more thorough. I highlighted a number for seat R01 as Seat Colour 3 (which it was not originally)
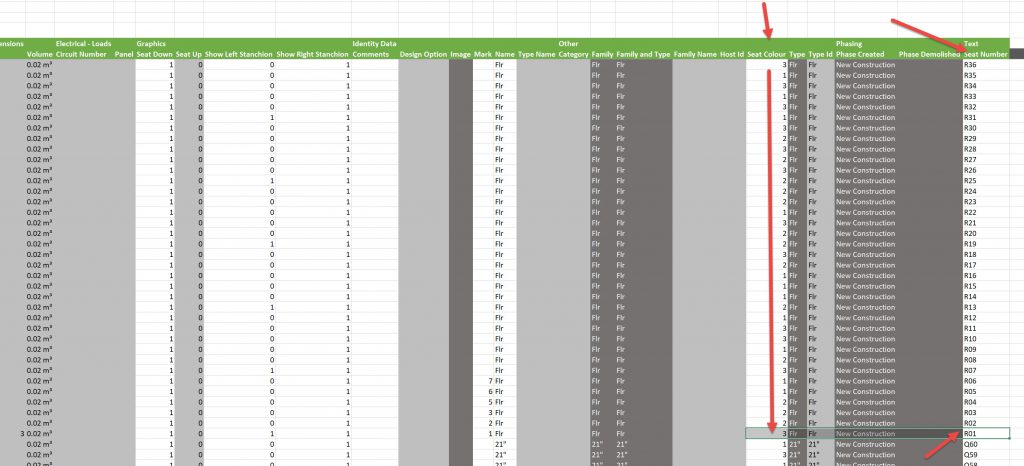
and it comes back into the scheduler as 3 for seat R01.
This populates the Seat Colour column and then you can adjust it by eye./ If you do not like it then re-run the radomiser again and you’ll get different numbers as a base start point
Another model colouring method using Color Splasher
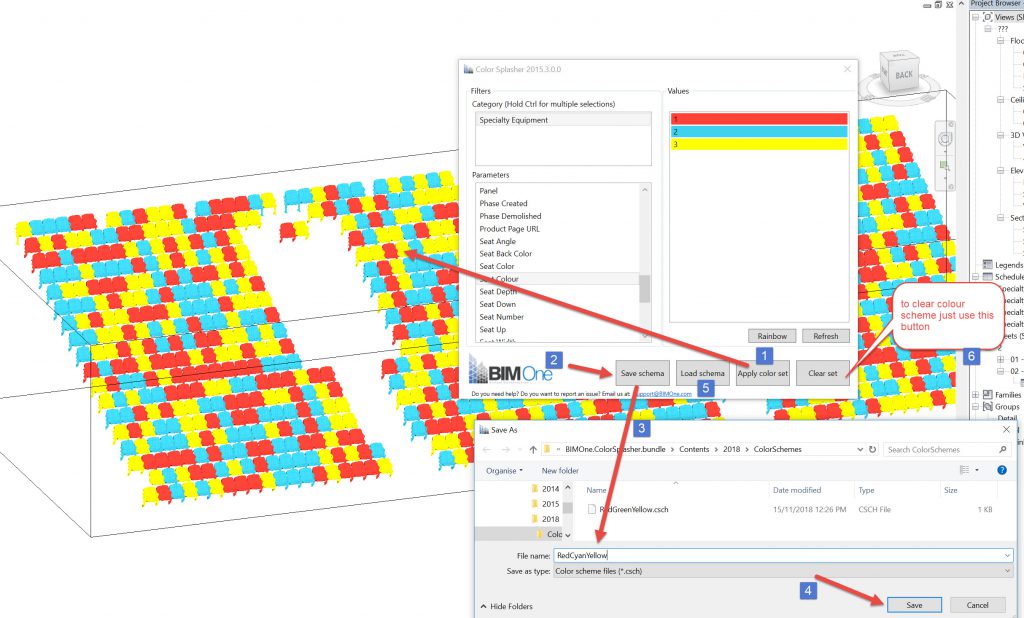
A quick way to check out colour schemes is to use Color Splasher add-in by BIMOne. After opening the add-in select the category that you want to colour, in this case Speciality Equiptment, then choose the parameter that you want to colour. In this case we want Seat Colour. As soon as you have this parameter selected it shows all the instances of that parameter with a different colour against each instance, in this case 1,2 & 3. If you click on the instance, you can select an individual colour to change it, then when you are happy with the colours, you hit the apply color set button and the category will be coloured.
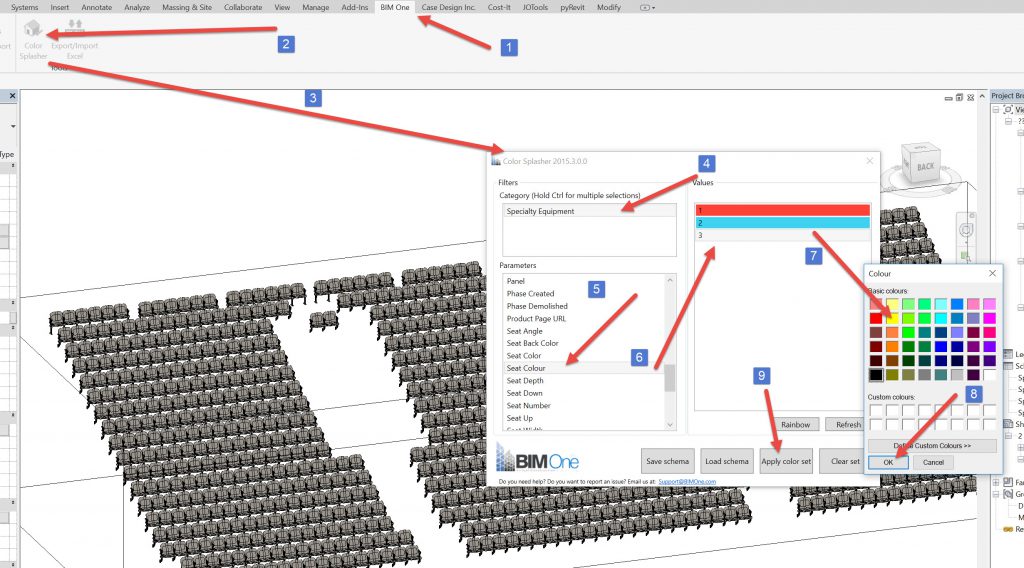
To clear the colour scheme just hit the Clear Set button in the bottom right hand corner.
You can also make a unique colour scheme and save it, also you can load that scheme for re-use.
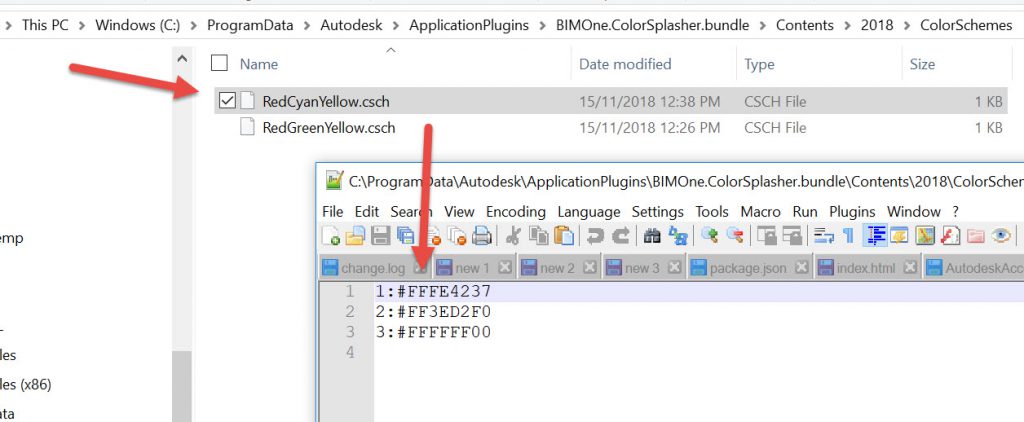
The colour scheme file is pretty simple, using hex codes (plus “FF” at the front of the code) for colours, so you could write your own codes in if you knew the instance values that you had to work with. This could be quite useful if you were fine tuning colours.
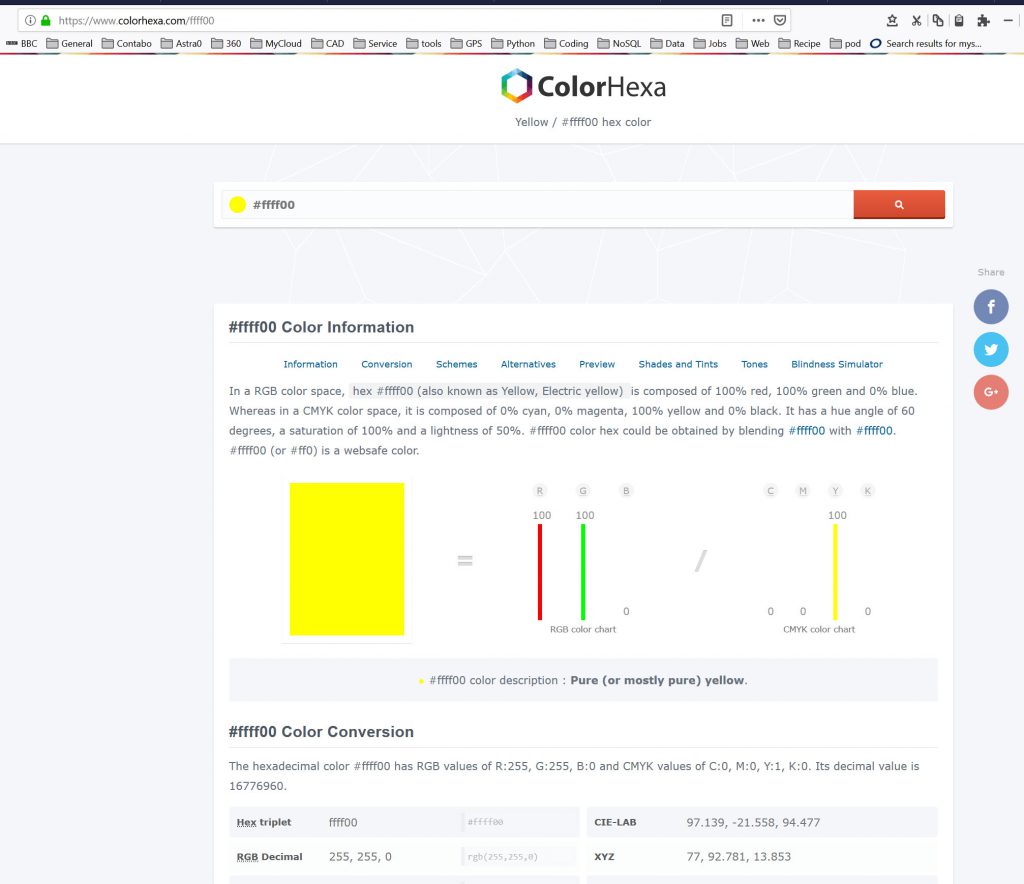
The Hex colour code page where you can put in your Hex number to see the colour and other information about it.
End thoughts
I do recollect I had a lot of frustration with the Excel import/export from BIM One, but their color splasher tool is absolutely brilliant.
The Color Splasher to paint a view using the number perameters, much quicker than using the filters and easy to manipulate on screen without going into the visibility graphics pop-up and selecting filter tab etc.
This process is something that has evolved over time. Each time I have another attempt at it I find ways to make it either easier (using links) or more complicated (using randomiser). The nice thing is that these are all free add-ins that are used.
The one tedious bit is going along the rows numbering each seat consecutively. I suppose I could consider a Dynamo method of doing that, maybe later.
Some of the processes can be extended so that they can be used on things like external cladding panels or floor tiles where a randomness factor may need to be included.
JavaScript Template Literals to help Covid dashboard
Google searching, free Web Scraping tools and free Extract Tables from PDF tool.