Lidar to Dwg- Getting contours from Lidar map
Note- WordPress seems to be having issues (or maybe just me) with uploading some images. I’m not sure why as they are screenshots (and small) , but some images are missing in the article below. They are loaded into the WP Media library, but do not wish to be displayed. Apologies until I can rectify the issue
I have been doing some Topography stuff on Zoe’s site recently, and Karl has been doing surveys of specific areas, as they are based on Relative datums to features on the site, they do not cross-relate, so I have a few different areas setup differently in the models I have. They are Fit for Purpose for the specific areas for specific buildings but are a bit frustrating when trying to link roads/fences between these different areas.
I read an article on Stuff A New Zealand you have never seen – how 3-D laser tech reveals the ‘bare’ West Coast about how they have been doing Lidar across the country, the article specified the West Coast of South Island. I thought that the area was a bit obscure so I wondered if there were lidar maps of major cities etc as well. Then started thinking about Zoe’s site as previous searchesd on Linz & Koordinates does not have very good data on their area in the Waikato.
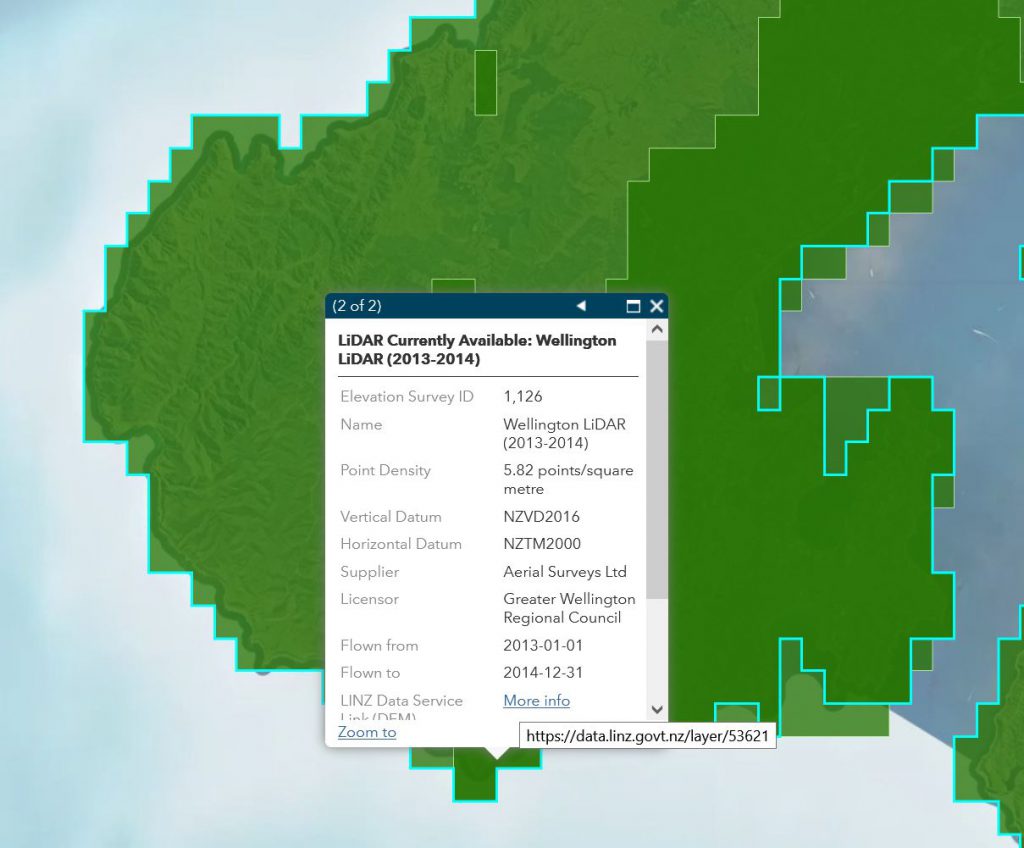
The article has a link to an arc gis site that shows what has been covered and is available and what is coming out next and what they are still working on. Zoe’s farm is in the “manana” timeframe, but Wellington had the Lidar maps.

So I thought I’d do a little project to get contours from Lidar for Mt Victoria Wellington.
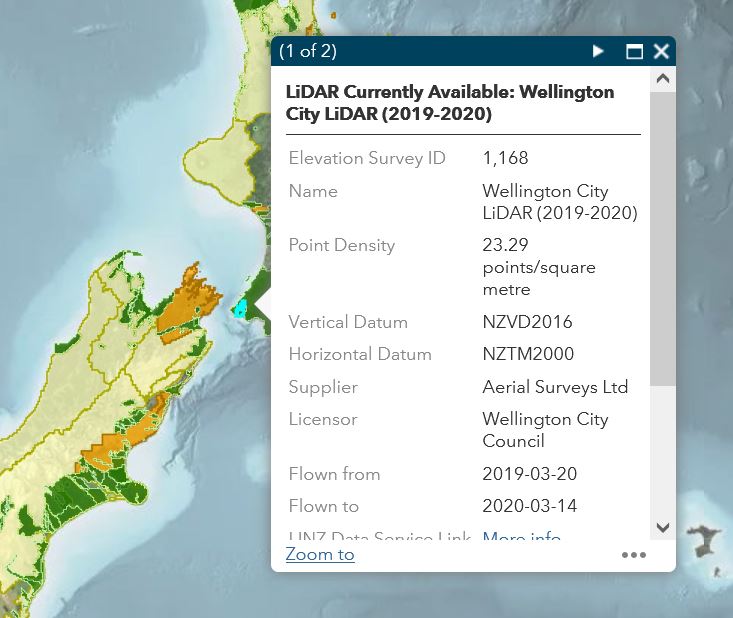
So I Zoomed in on Map and clicked on Wellington and there was a Pop-up. On 2nd tab of pop-up was a link to Linz data service page for the Wellington region
And on this page you can zoom in and check layers that you want , and after logging in can download some information for free. If area/quantity of data too much they can charge you, but for smaller areas you can get free. You need to make a free account/login to be able to access the information.
I selected Lidar for Mt Vic but it downloaded about 400 tiles for the whole of Wellington, in a Zip file. They send you a link to your email address when download ready and after downloading you need to right click on Zip file and go to properties and unblock the zip file before extracting it (although there are no .DLL’s in the zip file some programs get a bit temperamental about blocked files.
So I had the files/tiles and needed to view them.
QGis to view Lidar ArcGis ascii raster , geoTiff & DEM ??
Apparently Lidar is a DEM file so is 2 files ArcGis ASCII raster & a geoTiff (image). So I downloaded Zip and unzipped to a directory and fired up a new QGIS file. I then had a blank QGIS file and didn’t know what to do next.
Well, I ended up linking to the files, so not importing into QGis and linked to the unzipped data, I just selected all the files apart form .txt files in the directory where I was storing downloads. I used the Browser item to link.

QGis is a free mapping program and is slow, it is a fearsome mighty program and needs a supercomputer to run smoothly, my Laptop struggles with it on the most basic commands.
As its slow its not my go-to program and I have to use Mr YouTube to figure how to do things in it. Anyway, after figuring how to import the lidar info into Qgis, I found I had a whole lot of tiled images of the region in Wellington with 3 files of each tile, a .asc, a .xml & another .xml fie with a shape symbol to the left of the name, so maybe the 2 .xml files have shades and contours in their datasets. All magic to me.
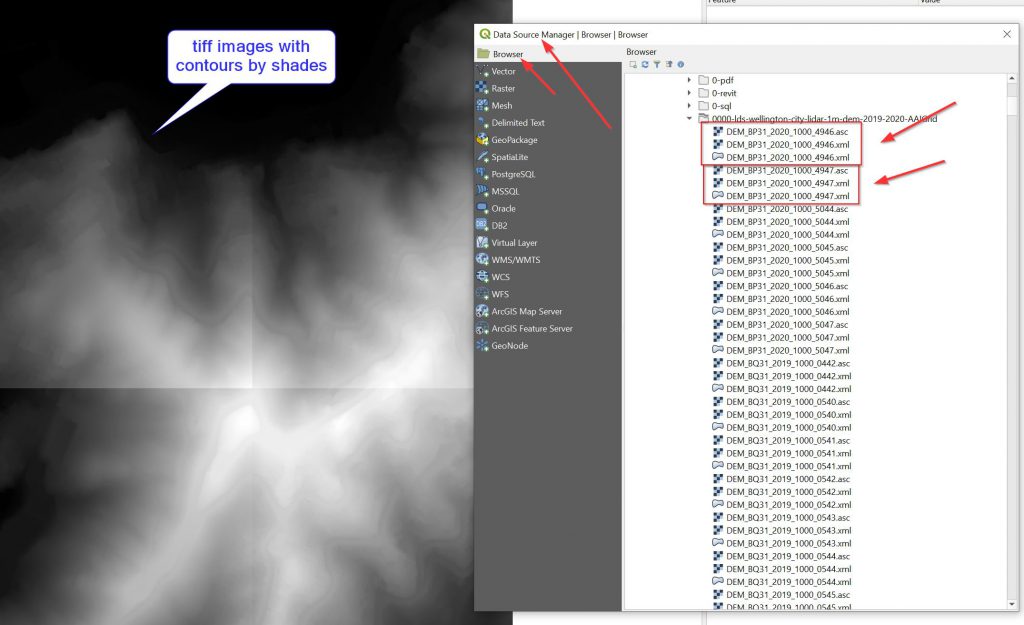
So I get a grayscale image on the =screen. I took a while to figure out how to Query the Tiles to figure out the ones I wanted and delete the others. It took me ages to figure that after selecting correct item for query that you “Right Mouse Button Click” to get the info, lefty click did nada.

After figuring out tiles I wanted, I deleted the others (to speed up the process due to less tiles needing to be loaded).
Then I could get onto creating and exporting contours.
Creating contours in QGis
Now I have raster images imported into QGis but need to create contours that I can then export to a CAD program. To do this QGis has a cool feature:
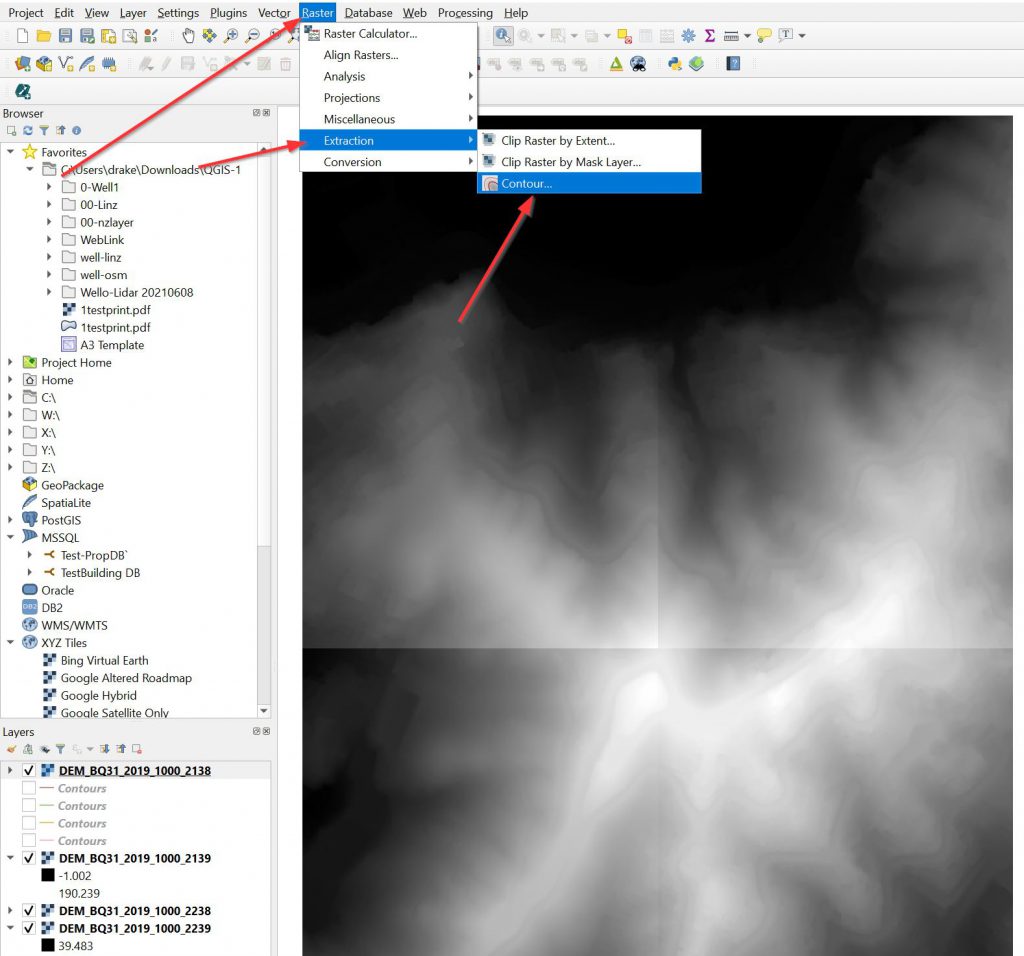

The LINZ lidar said it had 1m contour accuracy so I reset contours from 10m to 1m and then hit the run button. The Contour tool only works on one tile at a time, I think that is why there is the Run as Batch Process button in the bottom left of the pop-up box if you have lots and lots of tiles. As I only had 4 I did them manually. The process created a new Contour layer for each tile:

I think the different colours are to make it clear they are different processes. Although all 4 contour layers are turned on you can only see 3 lots of contours is because the image on the top left is in front of the contours. If you turn the raster image off the contours can be seen behind. I thought initially it wasn’t working and ran that process 3 times and created 3 lots of contours on different layers , so I deleted the others.
So, after creating contours I turned off raster layers and Exported to DXF formatted file. Then saved the QGis file.
QGIS exports to .DXF which is a CAD File transfer protocol, and not directly to .DWG format. So doing a double file change (to .DXF and then to .DWG) there maybe data loss through those extra processes. Maybe there is a plug-in that will push directly to .DWG (although it may only do that for later .DWG versions (and that may be an issue -see below))


The first couple of times the .dxf file didn’t export correctly and maybe a few of the tickboxes and encoding options needed to be modified. What I have shown in screenshot above worked for me.
Importing DXF into Cad program DraftSight or nanoCAD
So, after opening nanoCAD (the free one, not Draftsight that I have trial version) I opened the export.DXF file. In Acad you can open .DXF files directly (then save as .DWG files). I’m using nanCAD, the free version as this only allows earlier versions to be saved/opened (2010 & 2013, nothing later) so I wanted to make sure the version I saved as could be opened by nanoCAD.
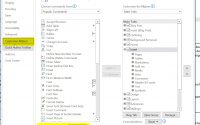
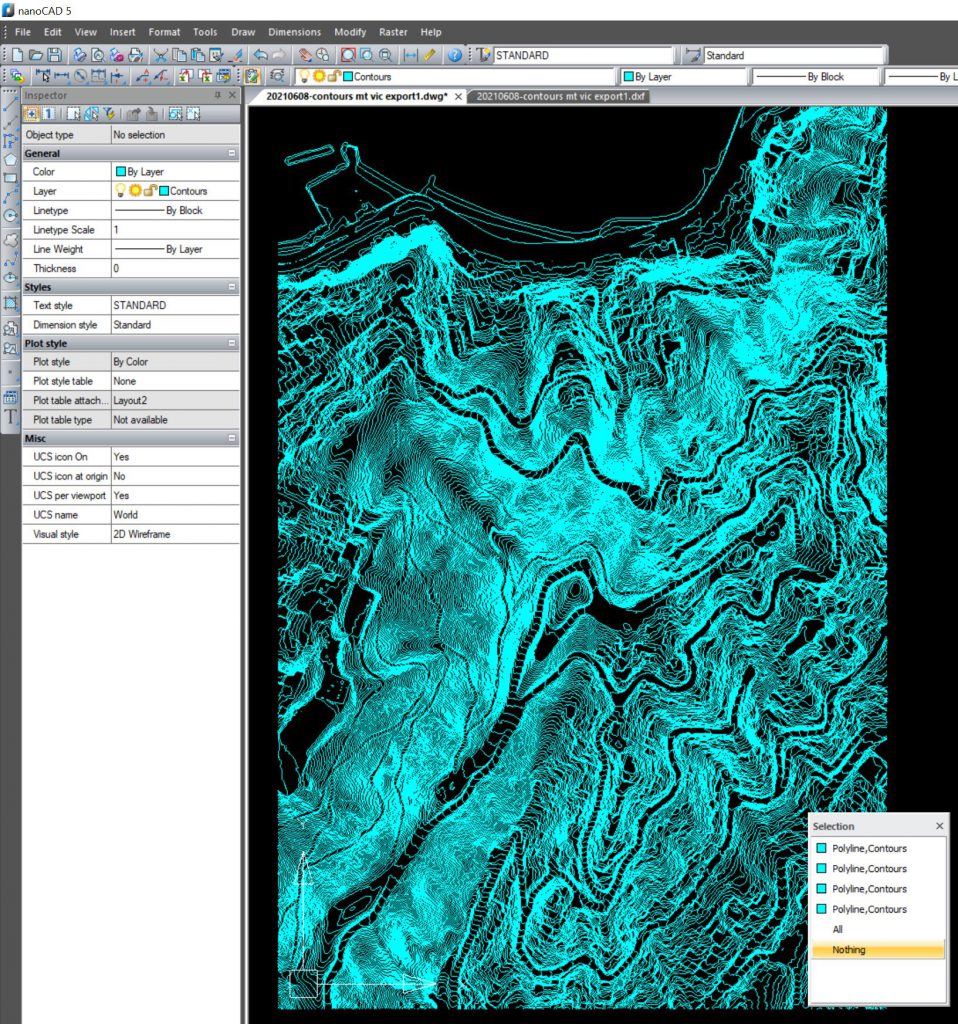
After opening nanoCAD and opening the .DXF file there are different coloured contours for the 4 tiles, although they have come into CAD all on the same layer “CONTOURS”. The 2 screenshots below show different selections but both showing “CONTOURS” as the layer.

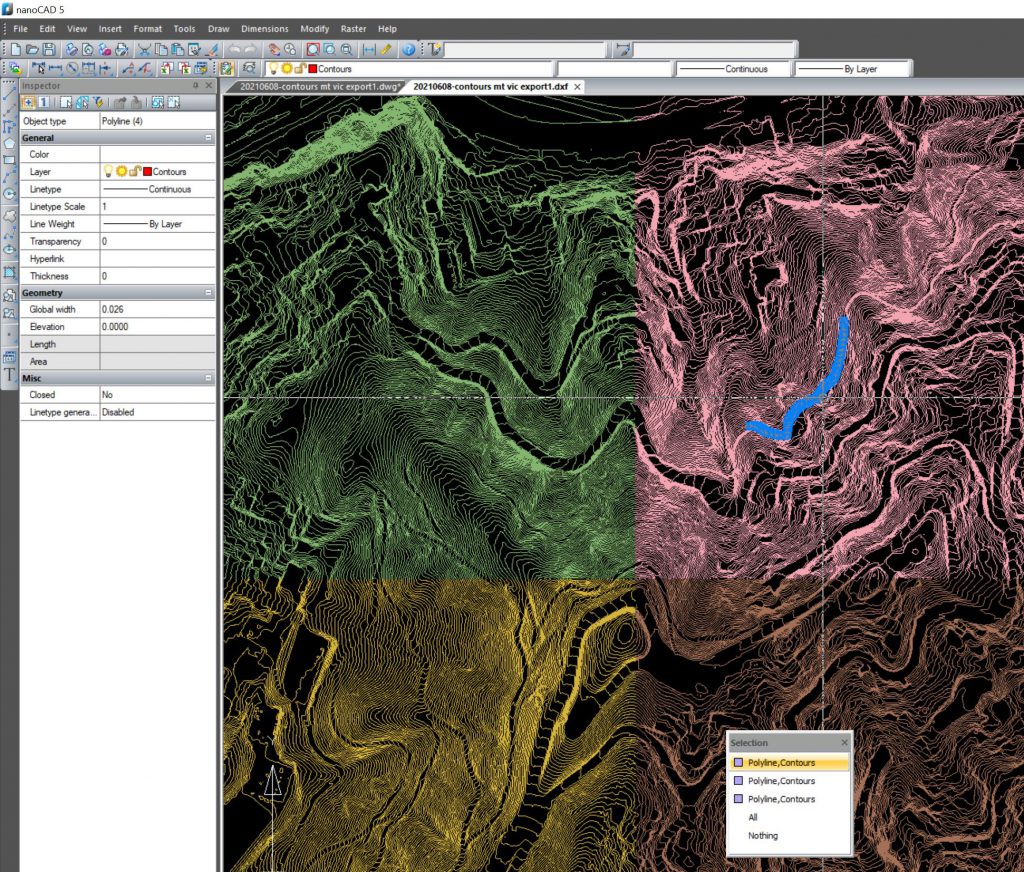
So I needed to select all of the polylines and make them Colour by layer , as below.
The issue being there is no contour data on the polylines, so this process did not add elevation or line ids to the polylines. Also the polylines have Z=0 so they are all flat.
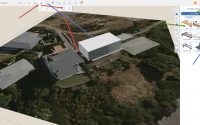
CAD to BIM
I can import a CAD file with contours into Revit, using LINK (so it doesn’t bloat the model) to create a topographical surface form the CAD file. Unfortunately this does not have any elevational data (although you could add it) and Revit will create contours based on the cad file data.

End comment
After reading the article I wanted to see if I could get lidar information from LIZ across to a CAD format. If I can get it that far I can import it into Revit to create a topographical surface.
From the brief exercise it looks like this is possible with the free tools I’ve been using. I rushed through the process to get the contours as geometry, but need to do a bit more research into bringing the data (elevation heights) across too.
That will be the body of another article in the future when I need to do that process for a real project with existing lidar data.
I’m happy with how the process went, it has its fiddly bits but the tools are up to managing what I want to do without too steep a learning curve. I’m happy to leave this exercise at this point as it was only a spur of the moment idea that I wanted to follow.
I’ve also got the files and resources all set up so to do some other tests later should be easier and quicker, after I’ve done the research on how to carry the data across.
I’m not that familiar with Map file formats and data transfer, and I think that is the rabbit hole I need to dive into next to get that full transfer.