Amazon Honeycode Timesheet App Part 3- Budget, budget screen & notifications
This video is accessible for Patrons on the All-Access Patron tier. To gain access please subscribe.
This is the 3rd video on using Honeycode to make a mobile timesheet app. I will review the app so far and what we have done, and then proceed on with adding a pro-active part of budget oversight for the team.
In this app we will be adding budget and budget oversight screens as well as notifications based on setpoints in budget expenditure.
Budget
To add budget to the project all we need is another column in our table with the total budget sum.
We have hours on our timesheet and we need to convert the time spentinto a sum, based on who is doing the work.
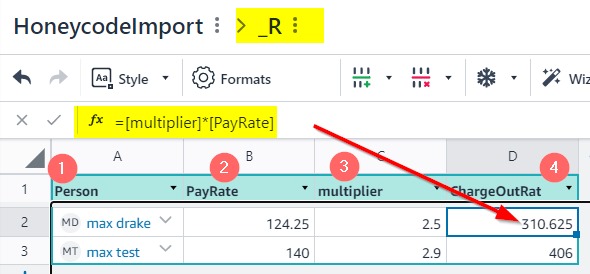
This exercise is based on charging out a service by hourly rate. There is the rate you pay the employee and the rate you charge to the client. The chargeout rate usually has a multiplier of the employees pay rate.
This is because the hour charged by that employee working on that specific clients project has to include things like Office rental, software and computers, desk, furniture etc, as well as holiday pay and also support staff salaries and part of managers salaries, marketing etc.
A simple way to do this is to add a multiplier, in the region of 2.5-4 So:
Employee hourly rate x Multiplier = Charge out rate.
There will be different levels of employees, say draughtsperson, engineer and project manager, all of who’s base salary is different and their multipliers may be different too.
So to recognise this, we need a new table , we will call it _R, where we will have the Employee, their base salery & the multiplier to give standard charge out rates for each employee.
Linking
now we need to link that data , as a lookup in the Timesheet Table to find the chargeout rate of each employee for a project, so we can get the sum of work that person has done on that project for that day.
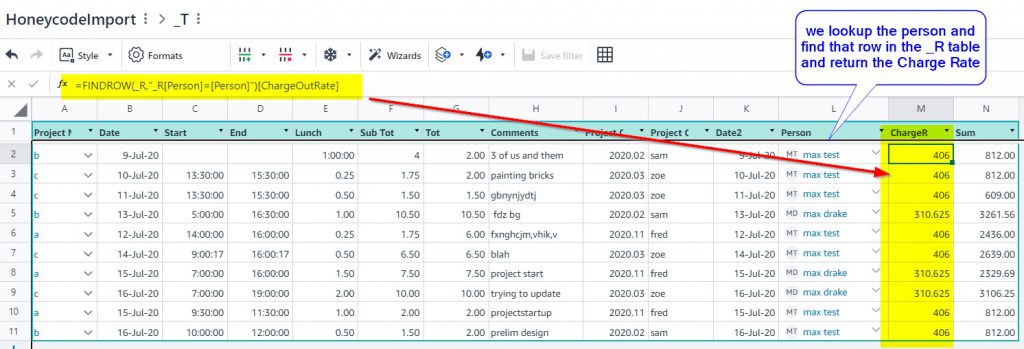
So we use the Findrow function to look up the person in the _T table and compare with the _R table to find a match, then copy across the ChargeOutRate column information.
=FINDROW(_R,”_R[Person]=[Person]”)[ChargeOutRate]
So now we can multiply the employees chargeout rate by the hours that they have put against that project, to get a sum. This sum can now be deducted from the overall project budget to see how much of the budget is left. How to we do that?
Linking Timesheet to Projects
So we can sum each row of the timesheet to get that rows sum. We need to gather all the sum’s related to that project together and compare with the project budget.
So, 2 steps, 1. Filter all specific project data together in one place, then 2/ sum that sub-total specific to that project.
So, on the Projects table we filter all the rows in the Timesheet Table that are specific to a single project

=filter(_T,”_T[Project Name]=[Name]”)
That then shows the number of rows in the Timesheet Table that are specific to that project.
Next we need to sum that Filter formula
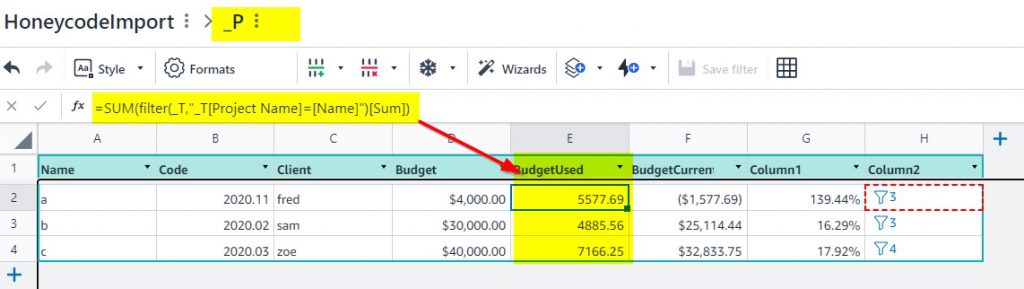
So we need to Sum the previous formula and add Sum as the relevant column. A bit confusing. There is a column called sum in the Timesheet Table, it should be Total but we used Tot for hours, so I used sum instead.
Then we are using the =SUM() function to add up all of the rows relating to that project.
=SUM(filter(_T,”_T[Project Name]=[Name]”)[Sum])
So now we have the total spend, to date, on that project we can subtract Budget – SpentToDate= CurrentBudget
So we can use SpentToDate/Budget to get a Percentage of total budget.
Depending who we want to show what information (only percentage or currentBudget and total budget we can adjust our app to suit.
User Interface of App
So we make a new screen (in fact the app wizard already made a screen so I’m using that one) and we use COLUMN LIST to create new filterable list of Budget data, adding a filter for Name (Project Name).

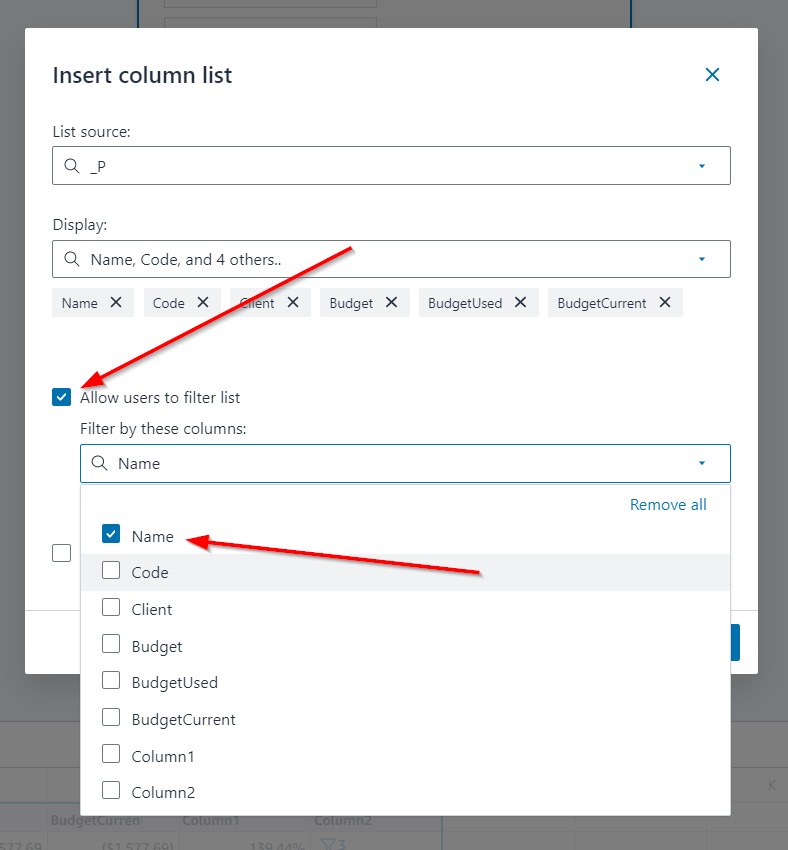
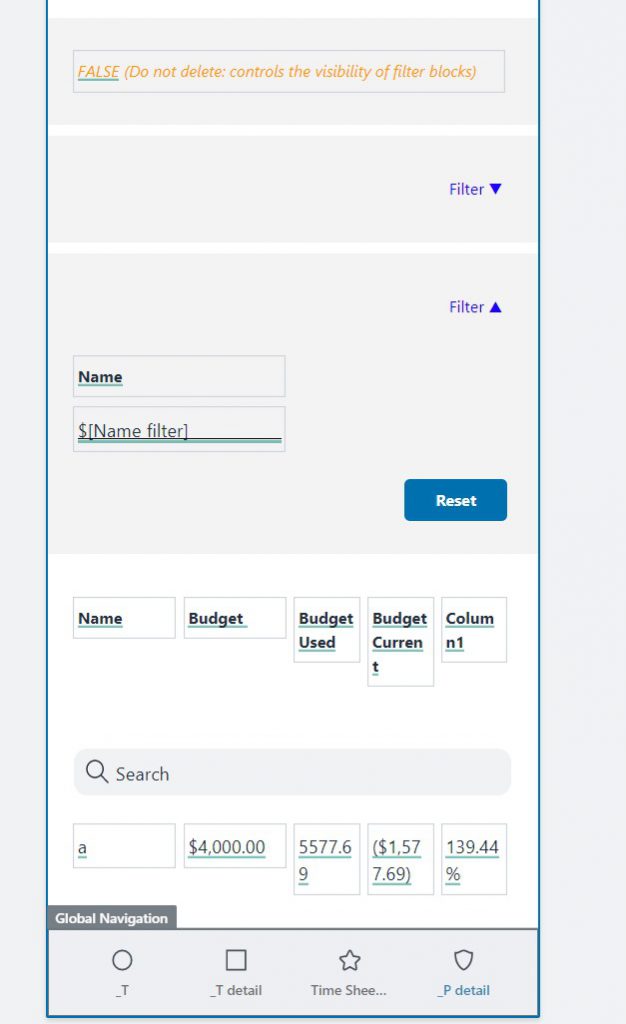
So the app now has this new screen interface

I discussed about filtering this to only projects specific employees are working on, but I didn’t build that. In an office with 50 projects you may want to add that filter.
Notifications
What happens when budgets blowout, or do you want to add trigger points at cirtain percentages of budget spend? Honeycode can do that via automations.
A lot of time people are focussed on getting the work done, so do not review budgets frequently enough.
One simple way of getting them to check on budget progress in the app is every time they add a new row of data and press the button, the app takes them, through an automation, to the budget page, that way they can look at where the budget is.
Another way is notification flags.
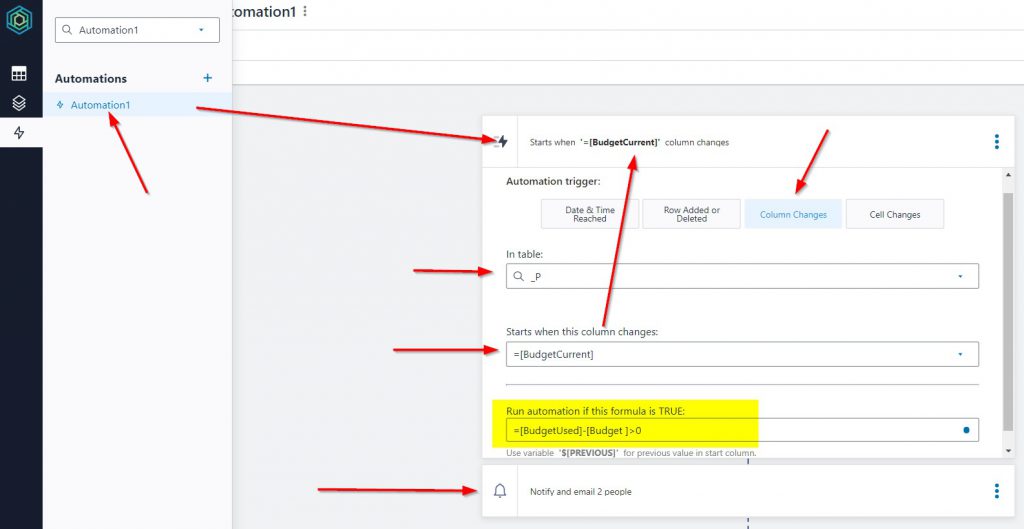
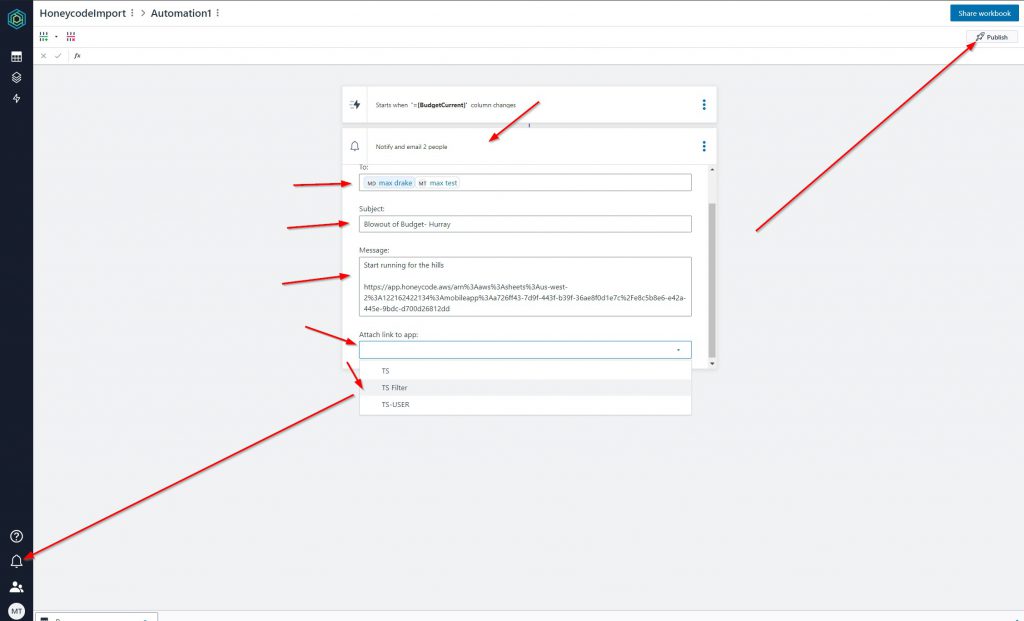
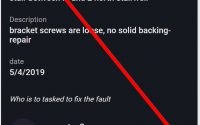
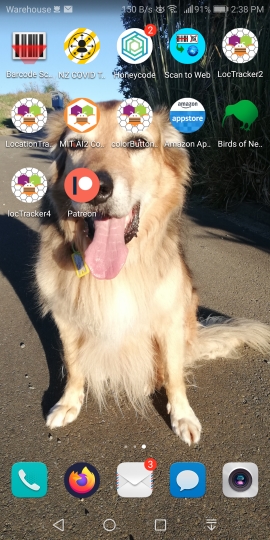
The very bottom attach link to app: you can choose your app that will be notified and this will show in the Bell notification in the bottom left corner of the Honeycode interface on the PC or on the icon on your mobile device (see below) will have a notification showing this issue.
End comment
This has been quite a fun app to build. The Honeycode has some hidden depths that allow it to do some fun stuff.
I enjoyed making this app and there has been a good bit of learning.
I didn’t touch on it above but I did in the video regarding privacy issues and what you choose to display on the app. Also data in the tables and privacy is based on who has access to the actual build of the app. Maybe you use dummy data while collaborating with other when building the app and then UNSHARE/REMOVE them from accessing the AppBuid when the app goes live.
Ultimately you may need to build 4-5 apps so that specific privacy issues are managed.