3D PDF from Revit creation workflow
I’m developing a series of 3D PDF’s for an As-Built phase of a commercial project. I wanted to split the set into Architectural model, structural, specific services and a general fire model (passive only so where fire rated walls are located).
My initial workflow was messy and hard to replicate so I wanted to make a record for the future, hence, this post and also video below:
This workflow mainly focuses on creating the 3D PDF’s rather than the Revit set-up for the models, although there are a couple of comments regarding that below.
3D PDF separate models
As I am developing these to be used by people not used to working with 3D models I wanted to break them down into separate files so they would not be too large.
I’m using SimLab Revit PDF Exporter plugin to create the PDF’s from a 3D view in Revit. I use the “Export Current View” button and select all the cameras that are there. I then generate the PDF’s with all of the views.
I need to setup the Revit model to display the specific information by highlighting a specific item, such as Electrical outlets and lights, which I will colour, and I’ll make walls semi transparent and maybe even remove the roof so that items are more easily seen.
After creating the PDF file I will use Adobe Acrobat to actually setup the views that I want. These pre-set views make it convenient for people to quickly navigate around the model.
They can use other tools within the 3D PDF viewer (I recommend Adobe Reader) to create different views and slices through the building, and I have a video link to demonstrate how they can do this.
Splash Screen in 3D PDF
3D PDF files cannot be viewed inside a browser, but you can put a 2D pdf splash screen at the front with some information about the file and how to use it and this can be viewed in a browser. So I was planning to do this for all the files.
There are a couple of ways to do this and I think I tried a few, getting it wrong along the way quite a few times until I got a workable process.
Creating Images for Splash screens
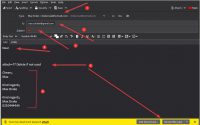
I started off using GreenShot and Snagit to create the Images for the splash screens. I would create text blocks and add the text I wanted. Greenshot to capture images of model, these I then opened in Snagit and pasted into the splash screen image. The text blocks were created inside Snagit and then saved to a JPG file. The problem with this is that as soon as you closed Snagit, on next opening that image, you couldn’t open the text box to re-edit the text to re-use for other similar images.
In the end I went to GIMP. I like GIMP, but it is very feature rich, and unless you are using it all the time it can take a while to get back into a productive mode in the programme. Overall though it is better for this job as you can save as a separate file and re-edit all the text you want, so far more useful. I only figured this out after I’d spent a lot of time trying to do it in Snagit.
Image size. This is a real sneaky one. The PDF’s are set-up for an A3 format, but doing this is pixel equivalent is sneaky as it depends on your DPI (dots per inch) output. So all you can do is get the proportions right and scale the image later. So 4381 x 1684 px or 1191 x 842 px are the ratios. Better to go for a bigger pixel size and reduce as resolution should be better than scaling up.
Inside Adobe Acrobat you can create a PDF from a file, so you select an image file and it will create a PDF, unfortunately it is at its own scale (I never quite figured it out) so if you combined with another PDF file that was in A3 format say, the page size would be different on both of the pages. A bit of a pain.
My solution to the above was to create a blank page at the front of the combined PDF and then insert an image onto the blank page (which was same size as the other pages in the pdf (all A3 size) and scale the image. That worked fine
Process 1- Splash screen inside Simlab plugin
There is an option when creating settings for 3dpdf export to add an image to the front of the PDF file. This can be done in the 3D tab of settings for the plugin.
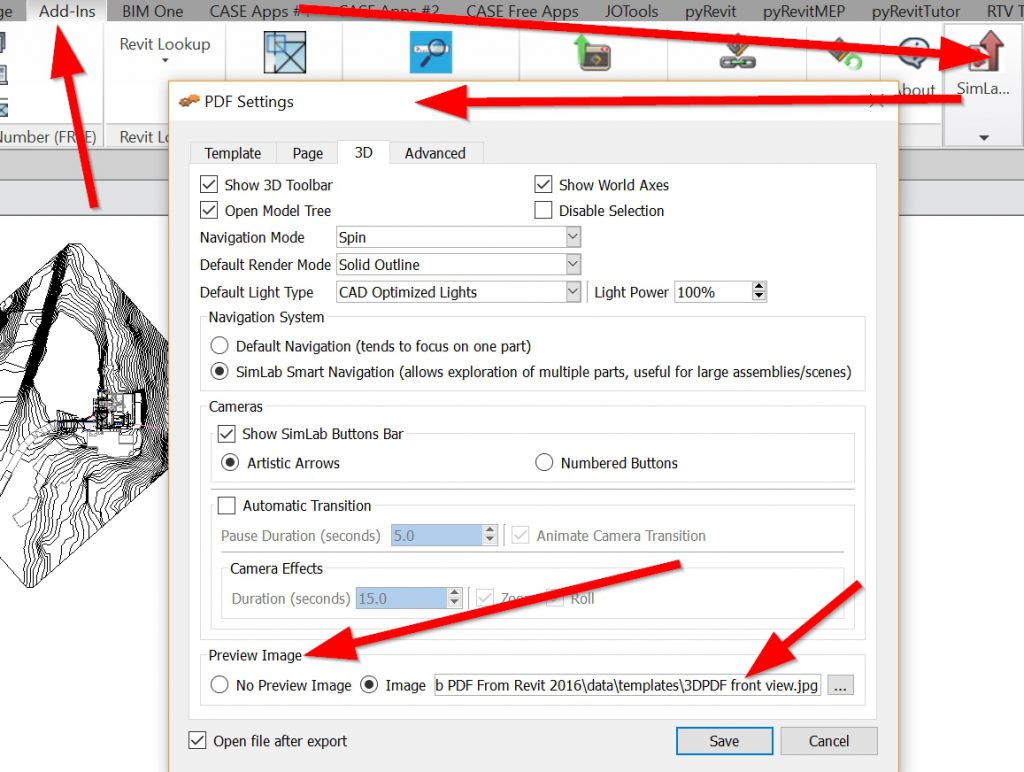
So you have to create a specific image that is relevant to the file you are creating.
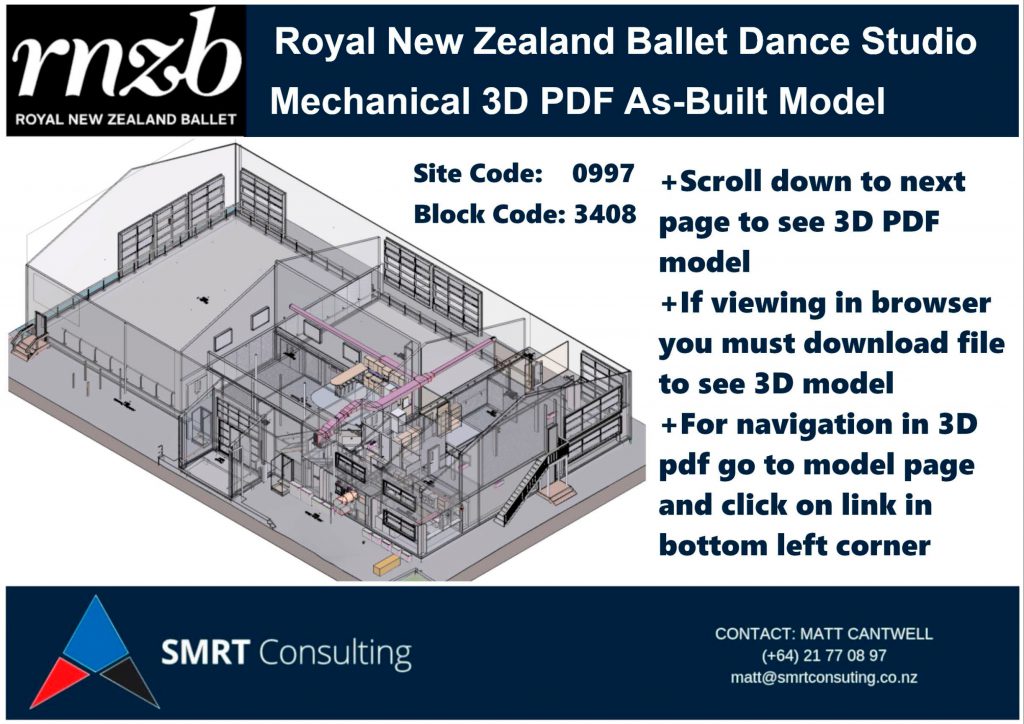
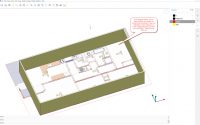
On the front image I want to display a few things, 1/ Title of the file, the building name and the discipline it refers to, the job code, an image relevant to that discipline, a logo (same for all) and some notes on where to find information such as tutorials and issues with browser views, see image below:
Part of the process is to add a screenshot of part of the model, so you’d need to do this from Revit to add to the image for the splash screen.
Although an easy way of combining the splash screen and the model, you still have to build all the views of the model that you require. Also, if you have one for structure, one for architecture, one for mechanical etc, you need to have a separate image for each. So have to have these already set up.
In the end I found this was not a particularly effective way to go about this. It was better to set them up separately and then combine into the relevant PDF file later.
Process 2. Using Adobe acrobat to combine pages
A better workflow was to create the 3D PDF files without a splash screen, then set-up all the views that you want for the model, then add a page to the front of that file with the 2D image.
This broke the workflow down into 4 separate areas:
- Create 3D PDF files from Revit of 3D Model
- Use Adobe Acrobat to set-up all the views that you want in each of those files
- Create Splash screen image in GIMP and export to png files
- Combine splash screen images to front of specific discipline files by inserting onto an added blank page at the front of the file.
With the above workflow you can concentrate on any individual step above, or else follow one file through all the steps. For setup you’d go through all the steps but for the later files you could focus on one aspect of the workflow and speed up that part of the process through repetition.
The added bonus was that if you didn’t feel that the Revit export file was right, you could just repeat the first 2 steps to make a new file, the other parts were already setup and didn’t need to be done again. Same with image and different text/information, this could be redone without redoing model view setup.
That would not be the case if you used the first workflow above, all the work becomes abortive and you have to go through the process from scratch.
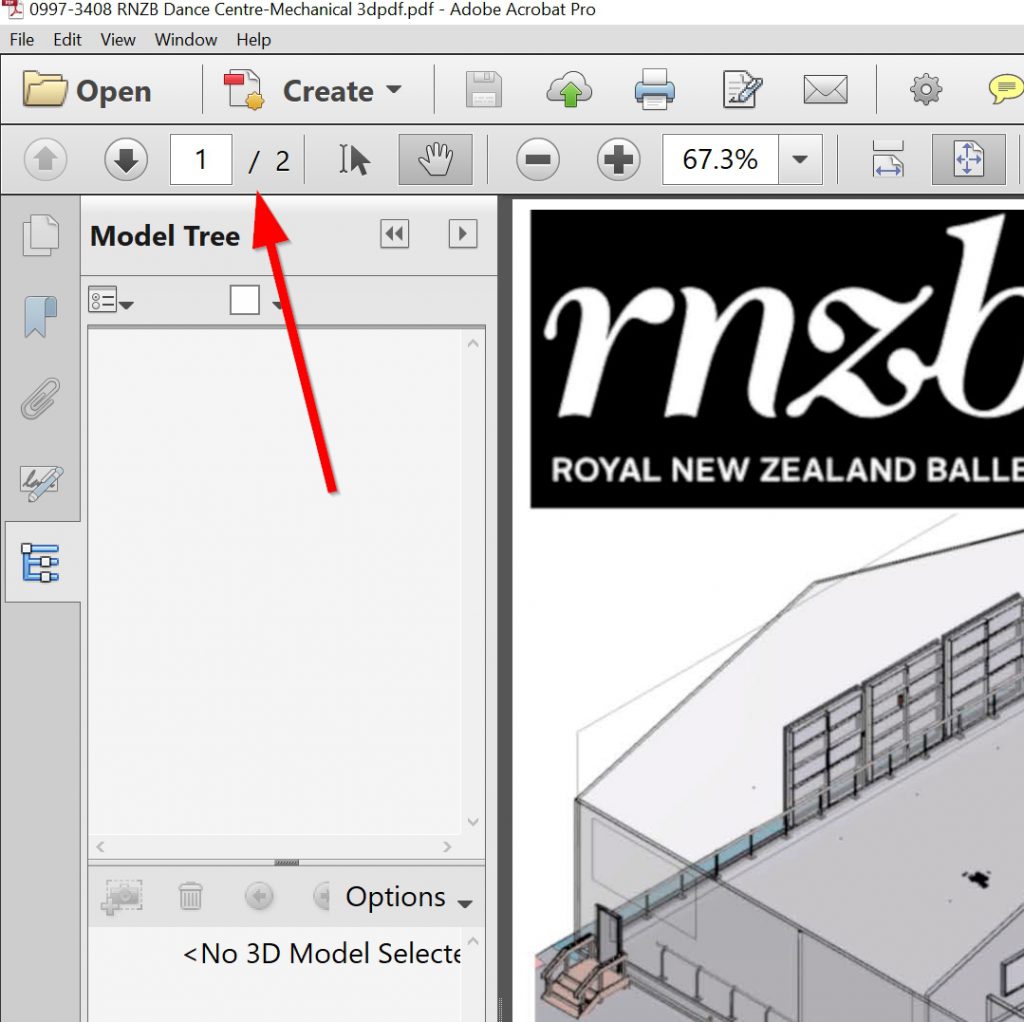
An added bonus of combining files in Adobe later is that you get 2 pages. The first page being the splash screen and the 2nd the 3D model views, so you can click between the front view and model. In the first process you only get one page and are shown the splash screen. You have to click on splash screen to be taken to model, once in model you cannot get back to splash screen, so if you want to check on information on the front screen you have to close and reopen file. It can also be slow getting from splash screen to model view too.
Testing 3D PDF file viewing
I tested the viewing of the PDF files in a couple of ways:
- I put a file onto my VPS (virtual private server) so that I could look at the file over the internet. With the splash screen you could view the file in the browser, but only the first page. On that page there were instructions to download file to view on PC to see 3D model. So that worked fine.
- Next I used file:///C:/st.pdf to see if I could view a file on my PC hard drive. I abbreviated the file name and put it in the root directory C:/ so that I didn’t have to type a lot

Linking to other information in SimLab PDF add-in
A concern I have is getting more information about 3D PDF navigation to help users unfamiliar with them. In early 3D PDF’s I added a couple of help pages from Adobe about navigation to the end of the file. They were a bit heavy going.
This time around, when setting up the Template sheet for the models I wanted to put a HTML link to a video on YouTube to show how to navigate around the 3D model


In this way, in the sheet setup there will always be access to the help file (if you are connected to the internet) and also there is a link to download Adobe Reader.
Different PDF viewers
I did a bit of testing on a couple of other PDF viewers, some free, others not, and some of them do not show the model tree or the viewing bar in the 3D mode, some did not even do the 3d view. So I decided , in the sheet setup for creating the 3D PDF’s, to add a link to free download of Adobe Reader that does have all those features built in.
Revit view setup
This particular model had a few links to it. MEP, Structural, Site and a couple of other smaller links.
I used the Visibility Graphics override (VV) in Revit to adjust some of the views. Things that I utilised:
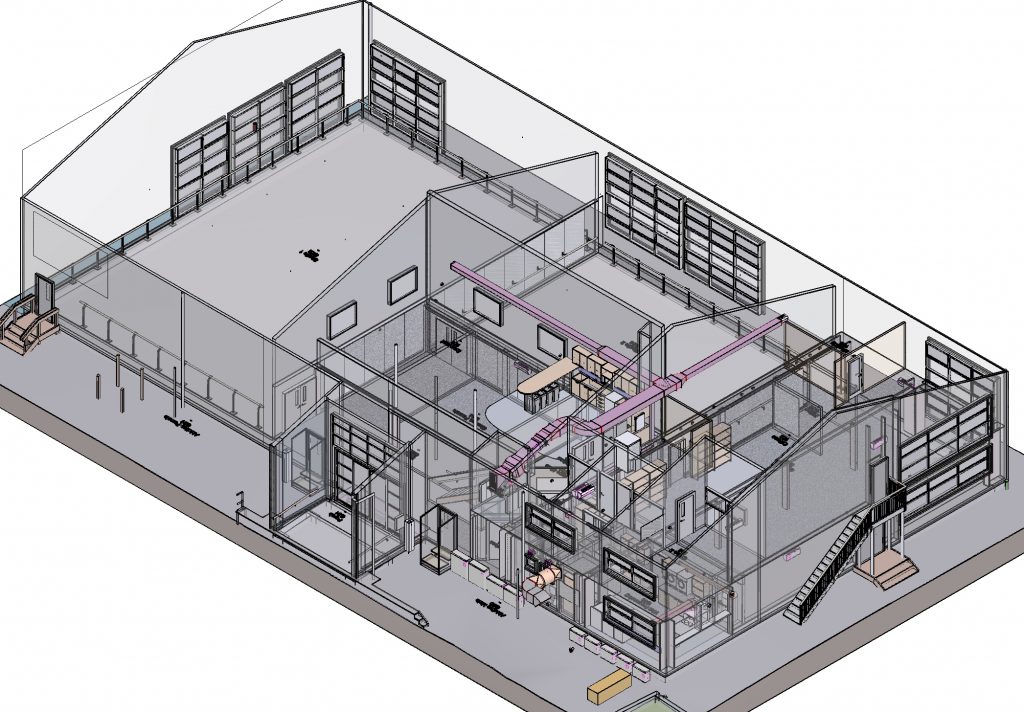
- Turning Categories off, such as Roof, so easier to see in the model. Also turning other services off so you could focus on one service only ( this is a balancing act as you may need to view some coordination/access issues)
- Changing Transparency on elements such as Walls, Floors and ceilings, so you display them, but for services you need to indicate where they are in relation to these bounding elements
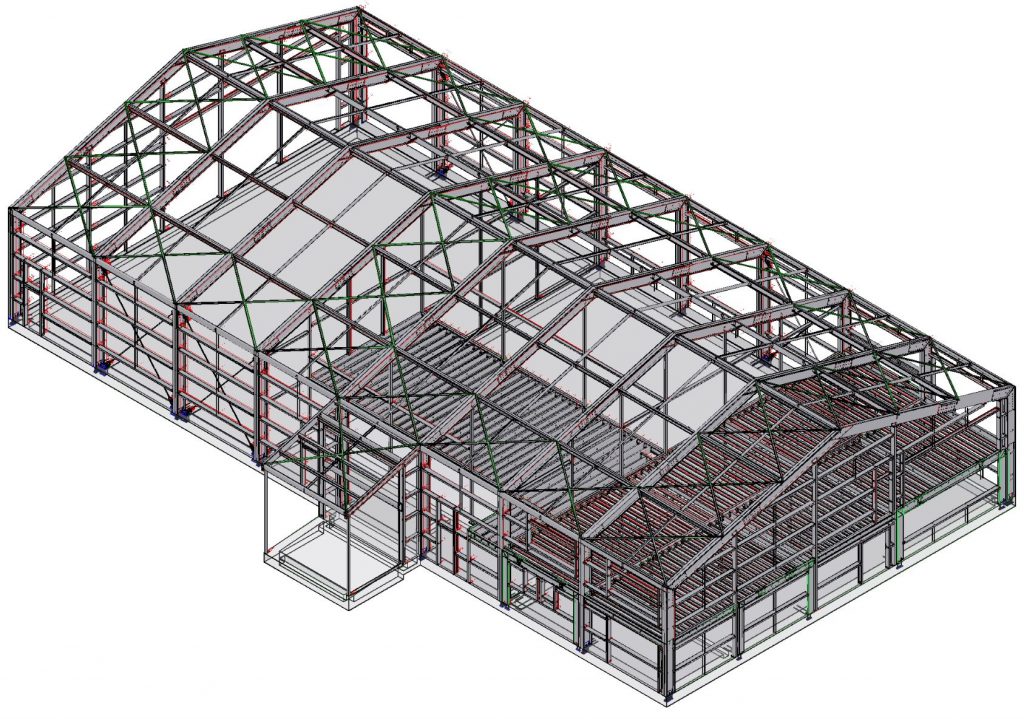
- Lines & Patterns. In Hidden Line Display you want to show some colour. So you can highlight structural Elements by colouring Lines RED (linetype SOLID) to highlight them, and maybe BRACING as Green to clearly define the structural component parts
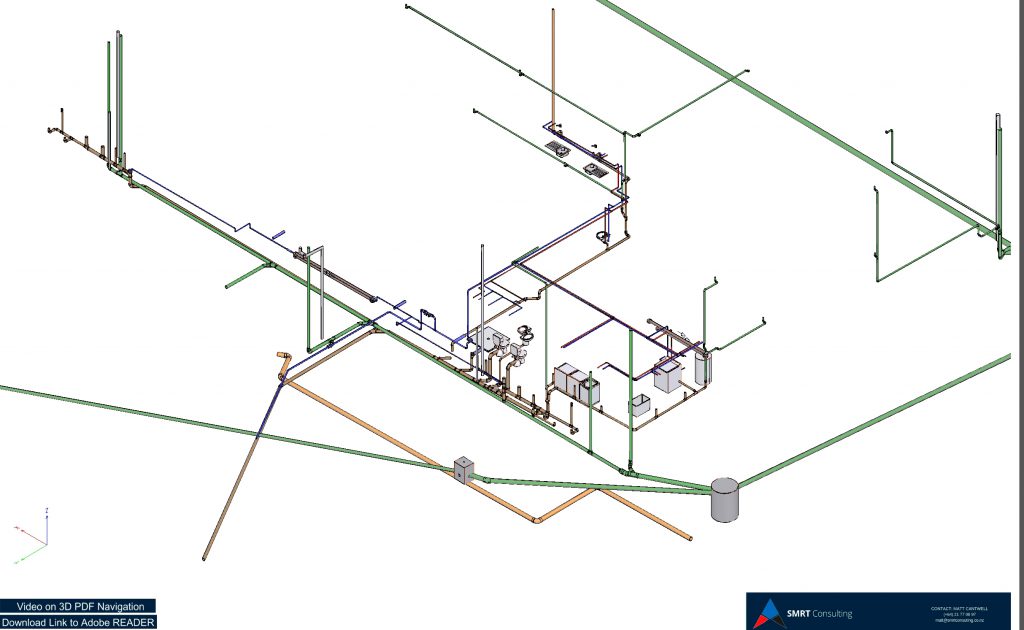
- For pipes and ducts they have a “system” designation, these may have been set-up in their own colours so its best to show these in SHADED display option so that the colours of the systems are displayed differently (otherwise all pipes will be the same colour if you use the VV Lines Option.
End comment
This has been a LONG process. The early process was quite inefficient and very time consuming. I am pleased with creating a workflow that can be done in different stages so that you can focus on one part and complete all the setups for that part. So if you are not happy with one part of it you can just re-work that part only. In the long run it speeds up the process.
Also, I now have GIMP templates for setting up splash screens more quickly which will save time in the future.
Free BricsCAD SHAPE Lesson 1. Basic walls, command line, underlays, orthographic & views.
Ultimate Windows 10 tweeker, Vimium add-on to Firefox & SuperNotes