OpenMAINT locating Assets in Building/Complex structure
After setting up the
- Complex,
- Building,
- Level,
- Unit,
- Room
and the associated relations between them, the next part is to decide where to put elements associated with these items, such as:
- Doors,
- windows,
- wall substrates,
- wall finishes,
- floors types,
- floor finishes,
- ceiling substrates,
- ceiling finishes,
- external wall types
- external wall finishes,
These need to hang off some part of the location schematic above.
I found the CMDBuild Administrator manual of use as a reference for some of the setup items.
Playing around with trying to attach wall types to Room, you can create an attribute for wall types, but cannot associate a condition with that wall type, so this didn’t seem to fit what I wanted to do.
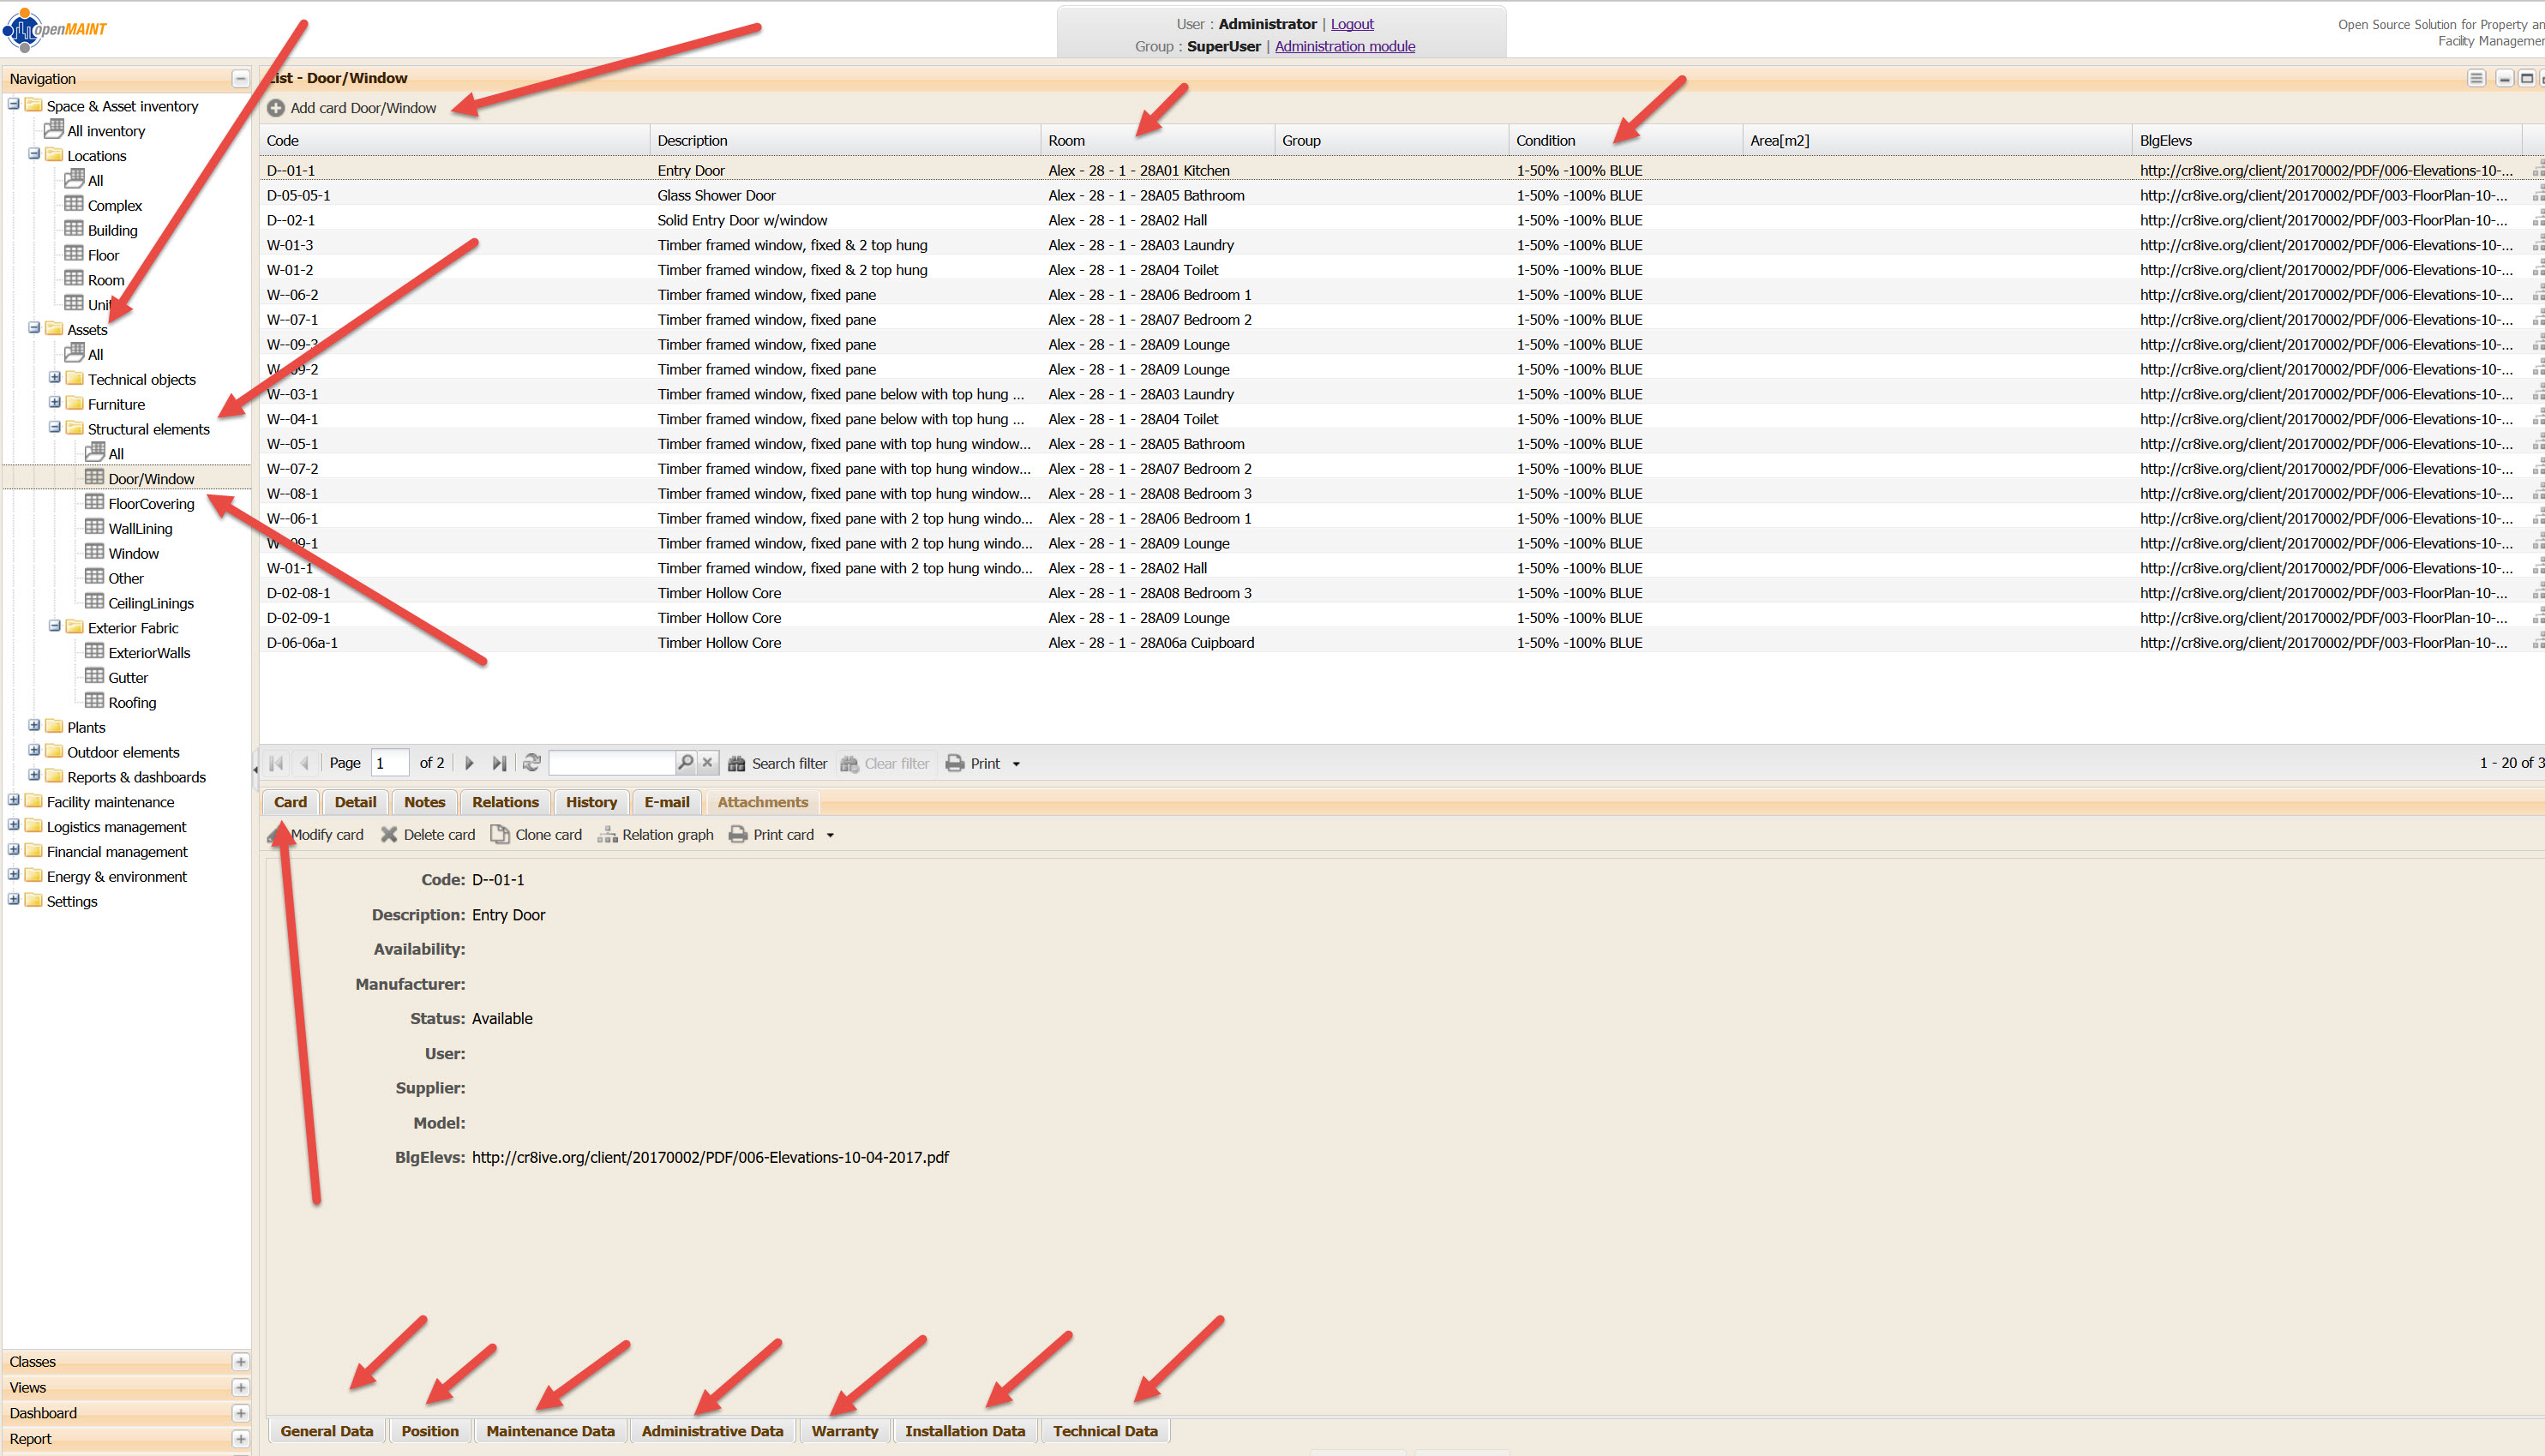
So I looked at the Door/Window class that was already set up.
This seems to have all the elements that I would want, it has CONDITION for the item, it has a RELATION and it has tabs for WARRANTY and other technical data.
So the Asset Schema seems to fit into:
A– Location- Complex, Building, Levels, Units and Rooms, which locate WHERE things are
B-Assets-Directories with Technical Objects, Furniture, Structural elements, Plants, Outdoor elements, Exterior Fabric, which show WHAT the Assets are, and what they are grouped under.
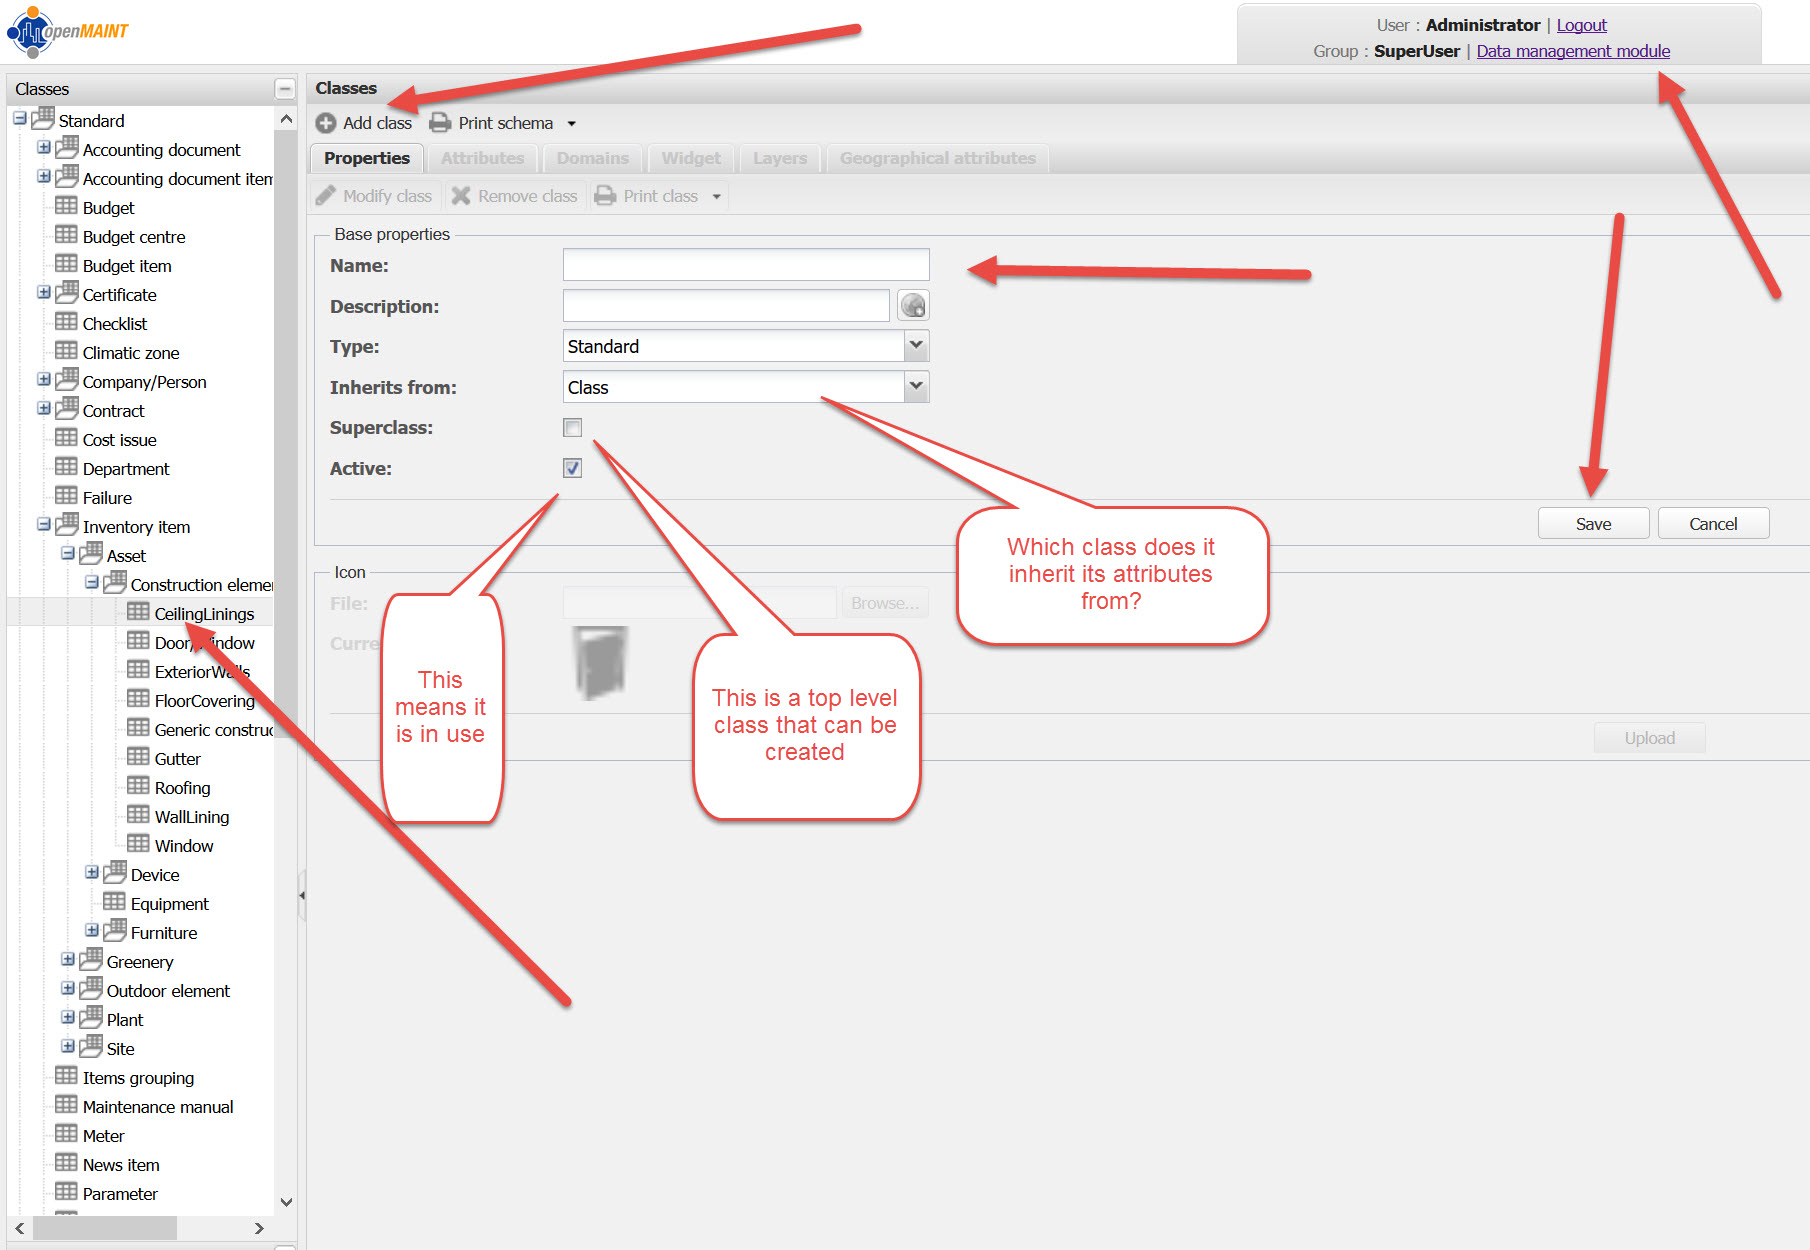
When you create a new Asset Type, say Wall Linings, you create a new CLASS.
To set this up, you need to go into the Data Management Module under an Administration/Superuser login. There you can create a CLASS and associate it with a location at some point in the location tree.
When you add a CLASS, and associate it at some level in a tree, there are usually other CLASSES already associated at that level, and they have ATTRIBUTES associated with them. When you create a new CLASS item at that level, you can inherit all the attributes from another CLASS at the same level. This is handy as it creates all the same MetaData Attributes. If you need to add more attributes (say the inherited class has length in meters and you want area in m2, then you can add this attribute to either your specific class instance or to the Class that you are inheriting all the other attributes from.
I followed what was already there regarding structural arrangement. Under construction Element was Door/Window, so I put other elements in the same hierarchy.
A small aside on Hierarchy of Asset Data
I am revisiting this post after I have been working with Workorders. In the workorders exercise I have just carried out, Blog here , you can select a location for an element that needs some attention.
But you couldn’t drill down to select the element (say one of 3 Wash Hand Basins) in the room.
Looking at the Inventory Ite m structure, to the left, the spaces are linked to the Site.
Whereas the Elements & Components and linked under ASSETS, and then a relation is created between the assets and the spaces.
The way the current hierarchy is setup the Items with the RED ARROWS are superclass Classes. So that items under them can inherit their Attributes and permissions, but note the BLUE ARROWS are not superclass items, so :
1/ They cannot have items under them, so cannot be associated at that level
2/To make them superclass items they need to be deleted and re-inserted. This can only be done if there are no assets or items in the database relating to them. So you would need to make a clean database and clean setup to allow that to occur. This may be a consideration for anyone developing a schematic for the system from scratch
3/ As this has come over from an IT Management system, the assets are mobile, so the rooms are spaces in which those items reside, whereas finishes and substrates are fabric items of that space. So a different method of looking at the relation with the items. Furniture could be treated like an IT item, but I think Fabric should be treated differently. I would also put doors and windows in this class.
4/ Other items such as external fabric , I would link with levels , rather than building, as materials (say a wall finish) on the 4th floor will cost more to paint than the walls on ground floor as you would require scaffolding to get access, so the rate for painting would be different, as would a repair on the external fabric on the 4th floor compared to one at ground floor.
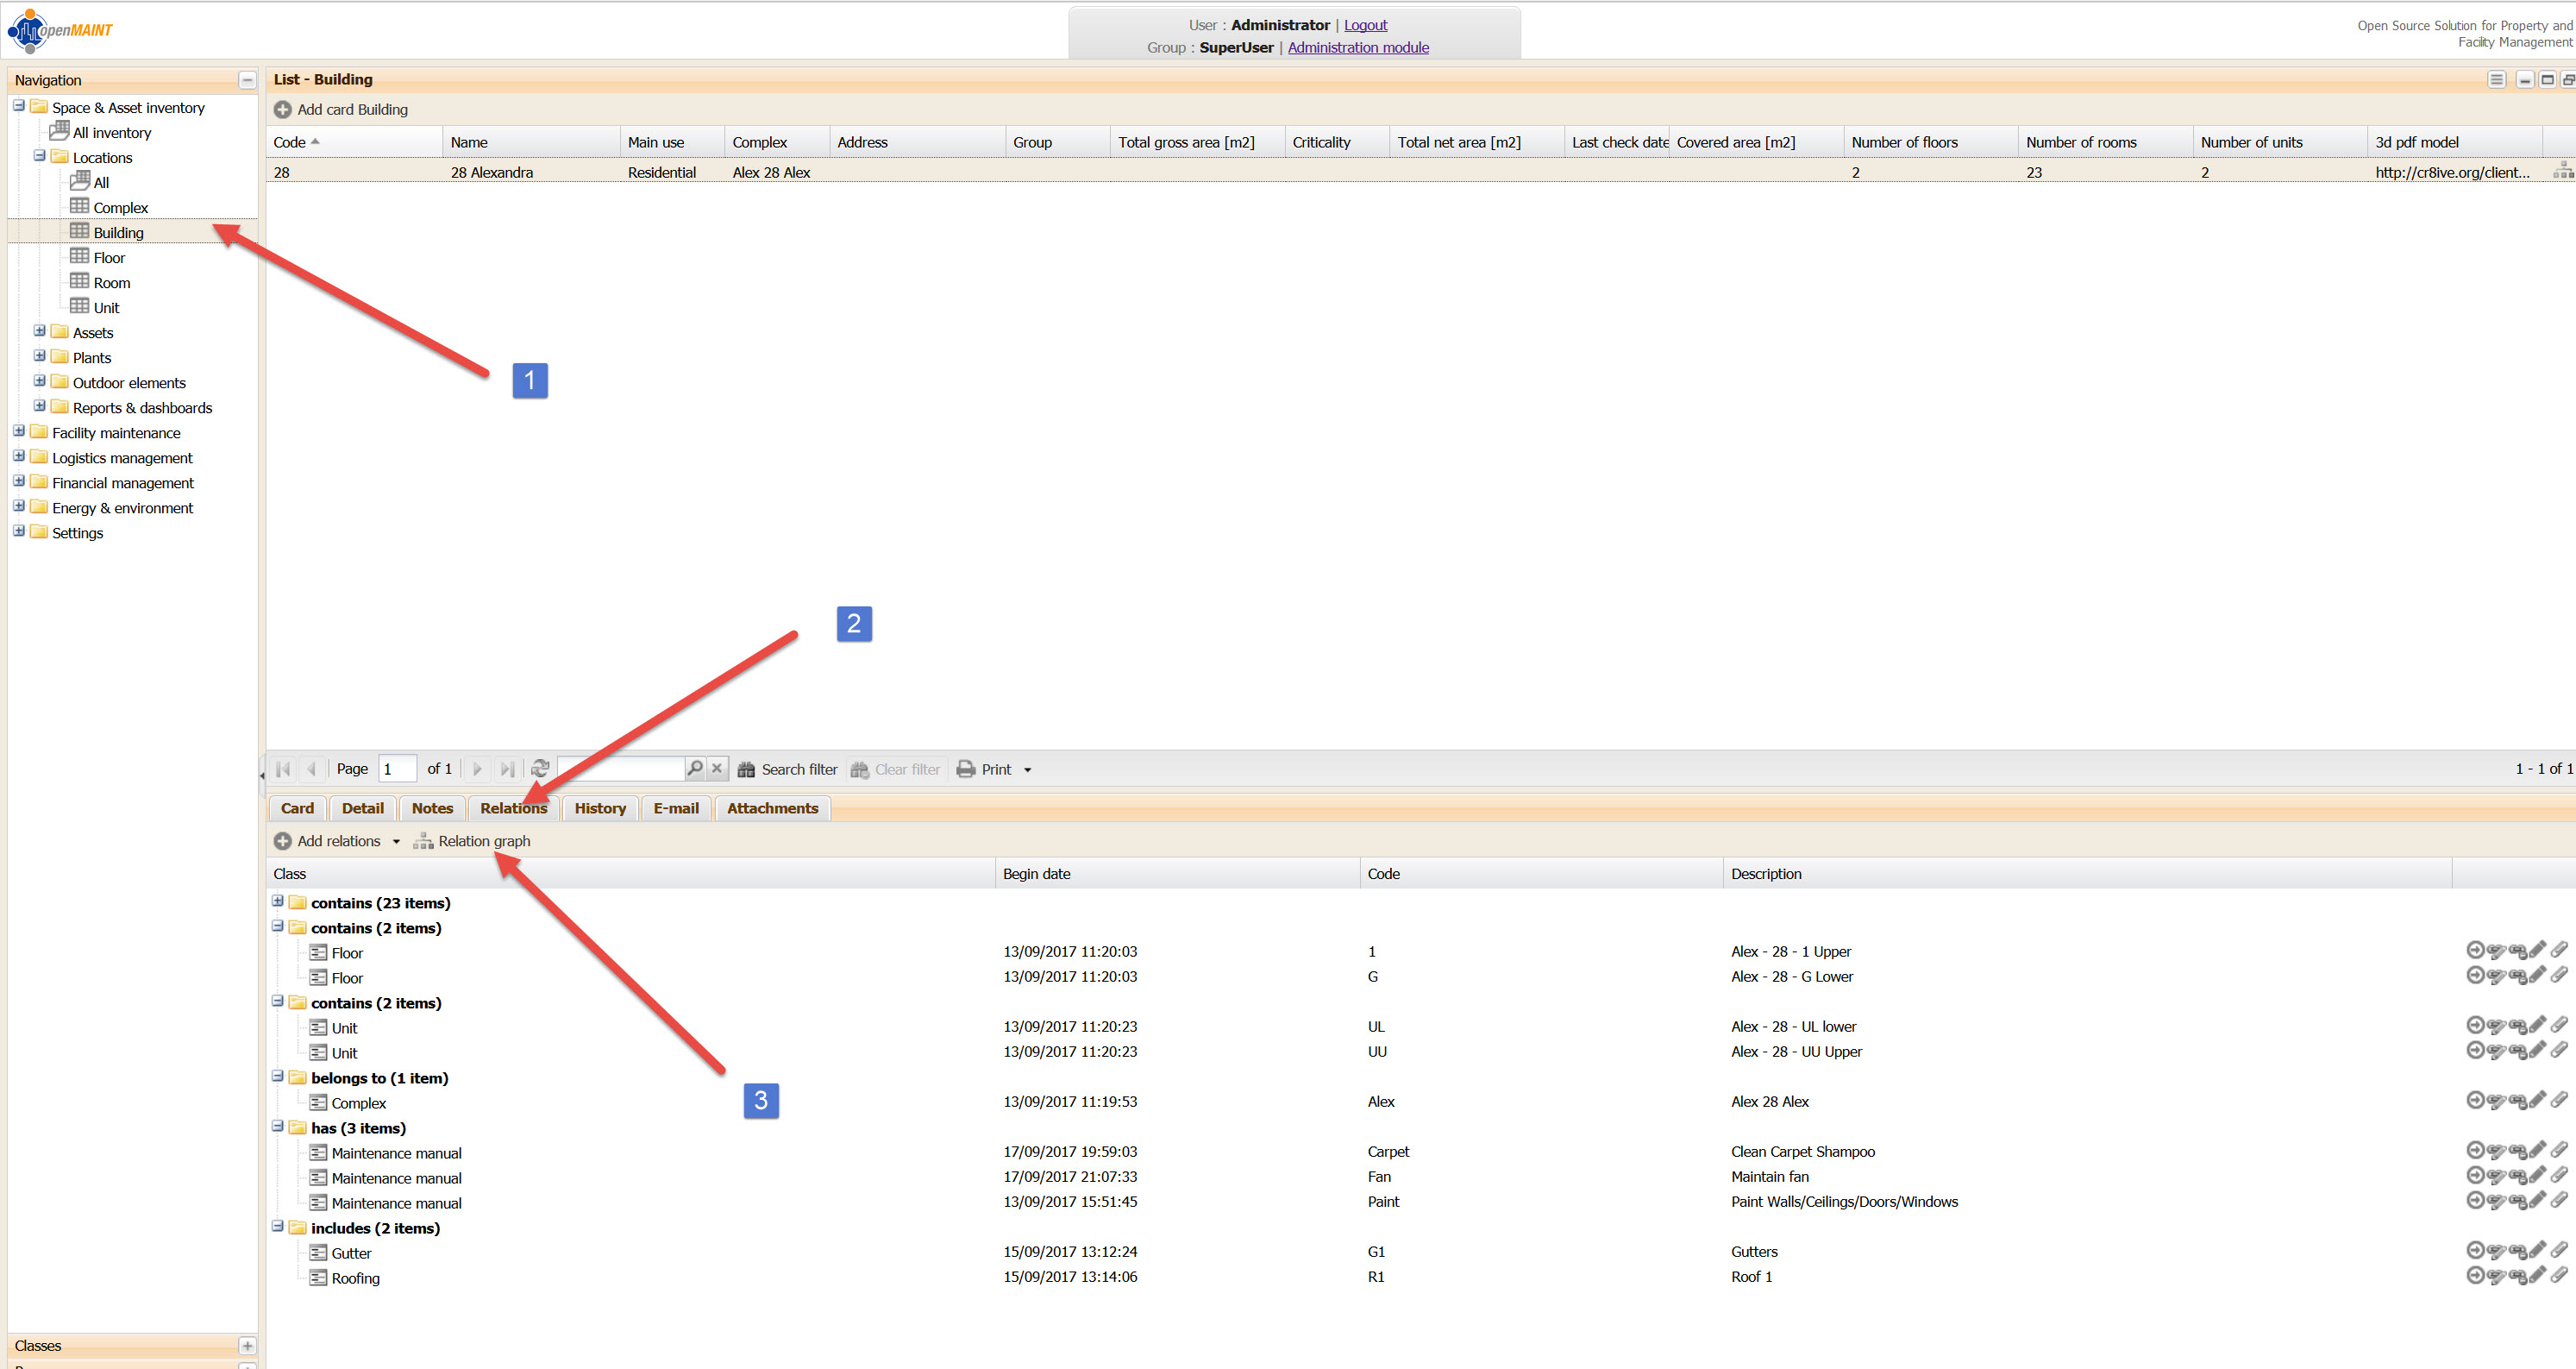
Back to the Plot
So we’re going to locate items together in similar areas, there were already the Asset/Construction Element, Asset/Device structures setup, so I followed that system to get an Asset Structure up and running. Look to the table on the left. This is a first cut. IO am using a residential house as the pilot project with an upstairs and downstairs flat. So some of these things (such as Conveyor Device) are not relevant, but would be on bigger projects.
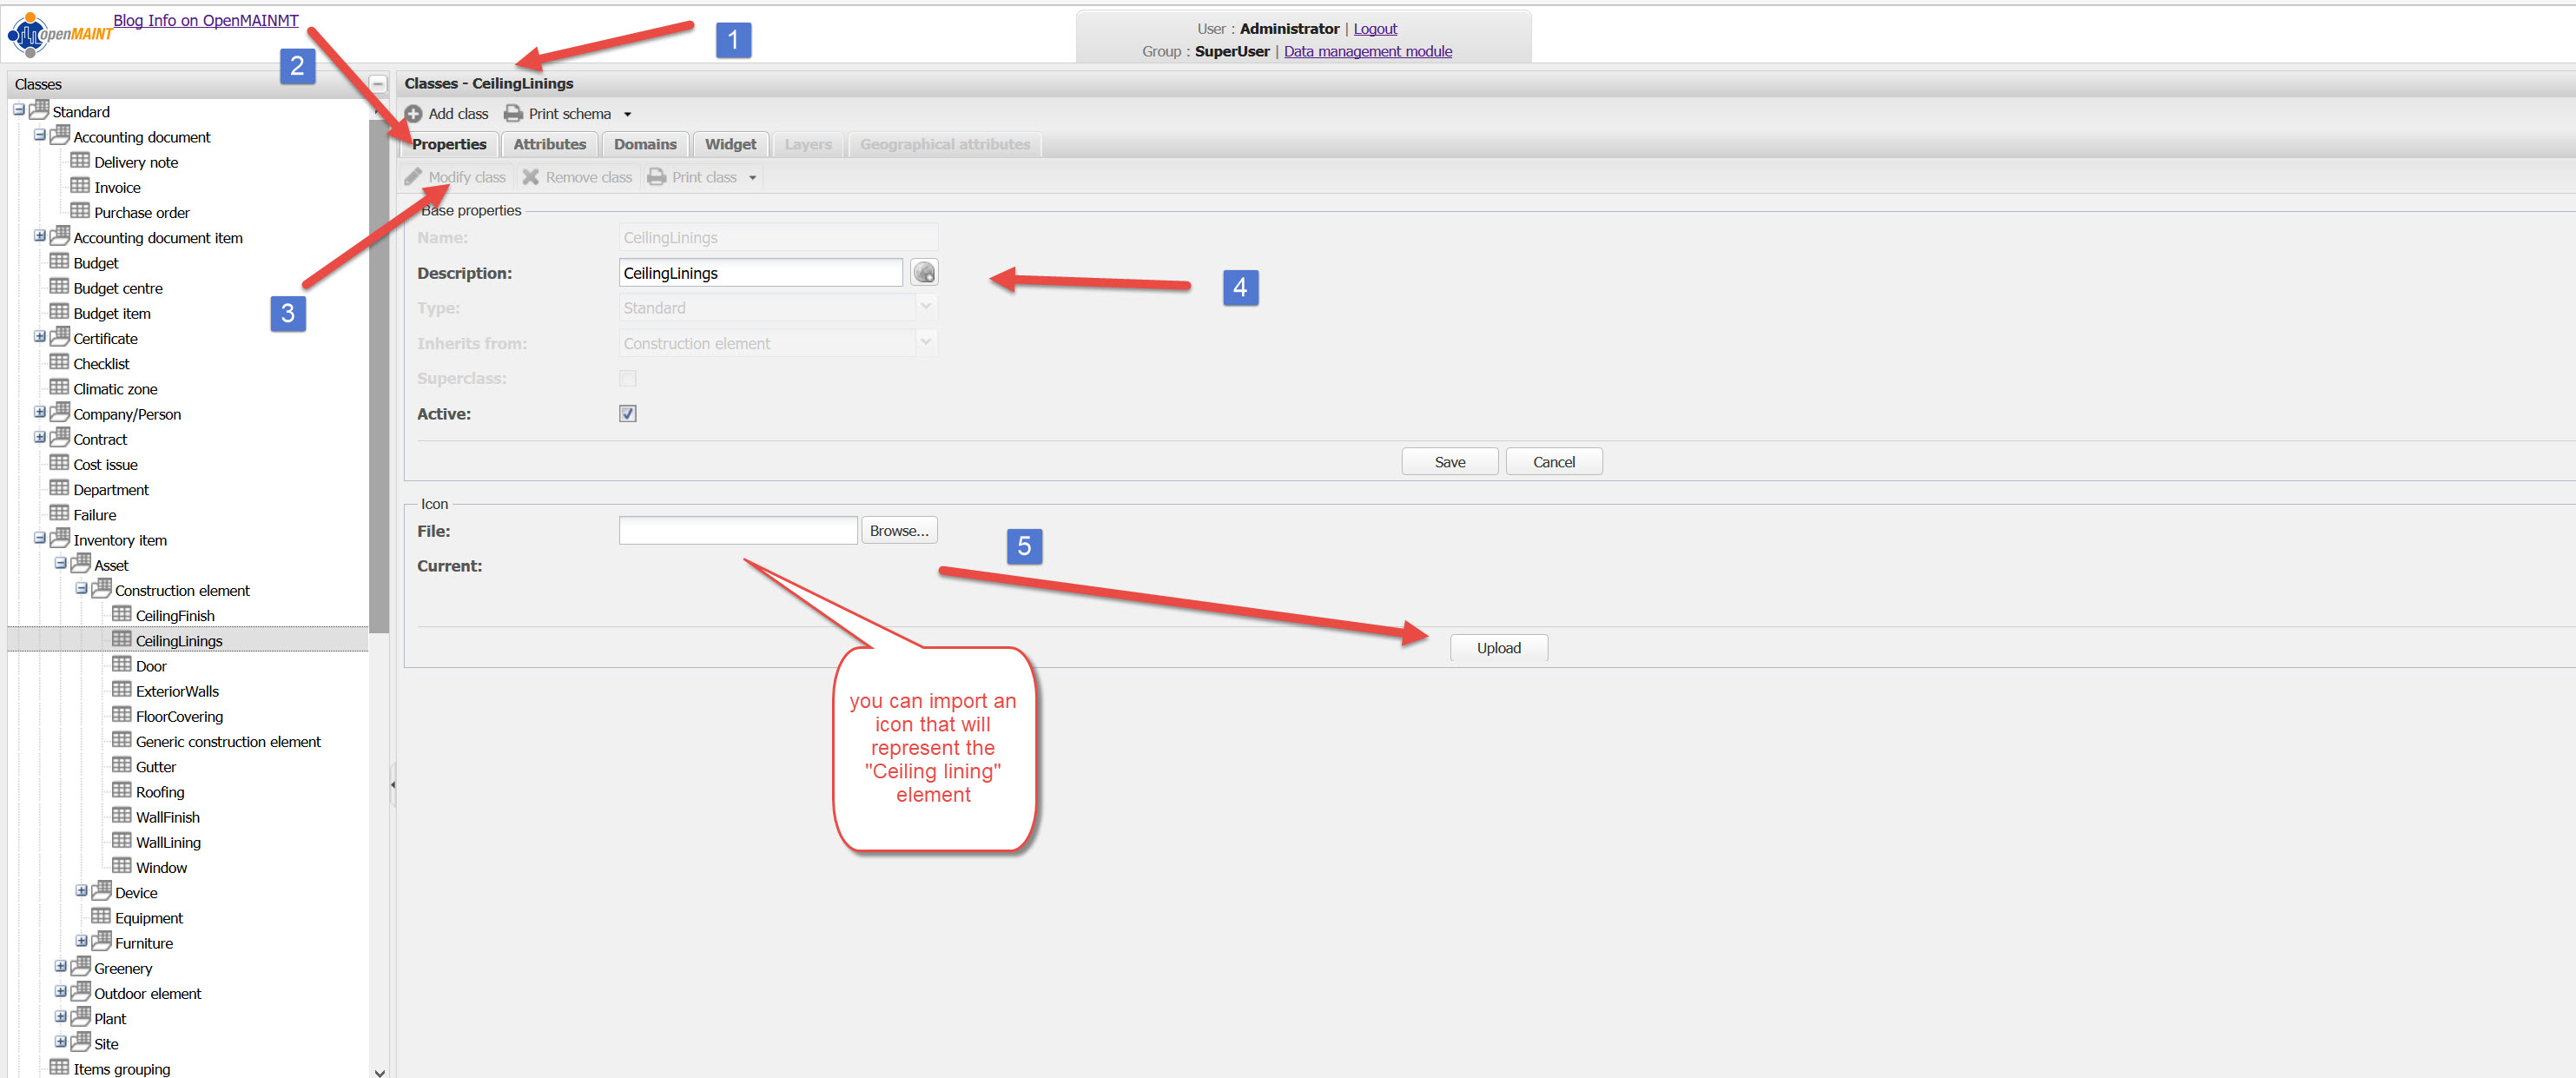
Clicking on the Properties tab and Modify Class tab below the properties tab we get the above image.
The icon file relates to the relations graph. This can be found in the Administration Module for an item
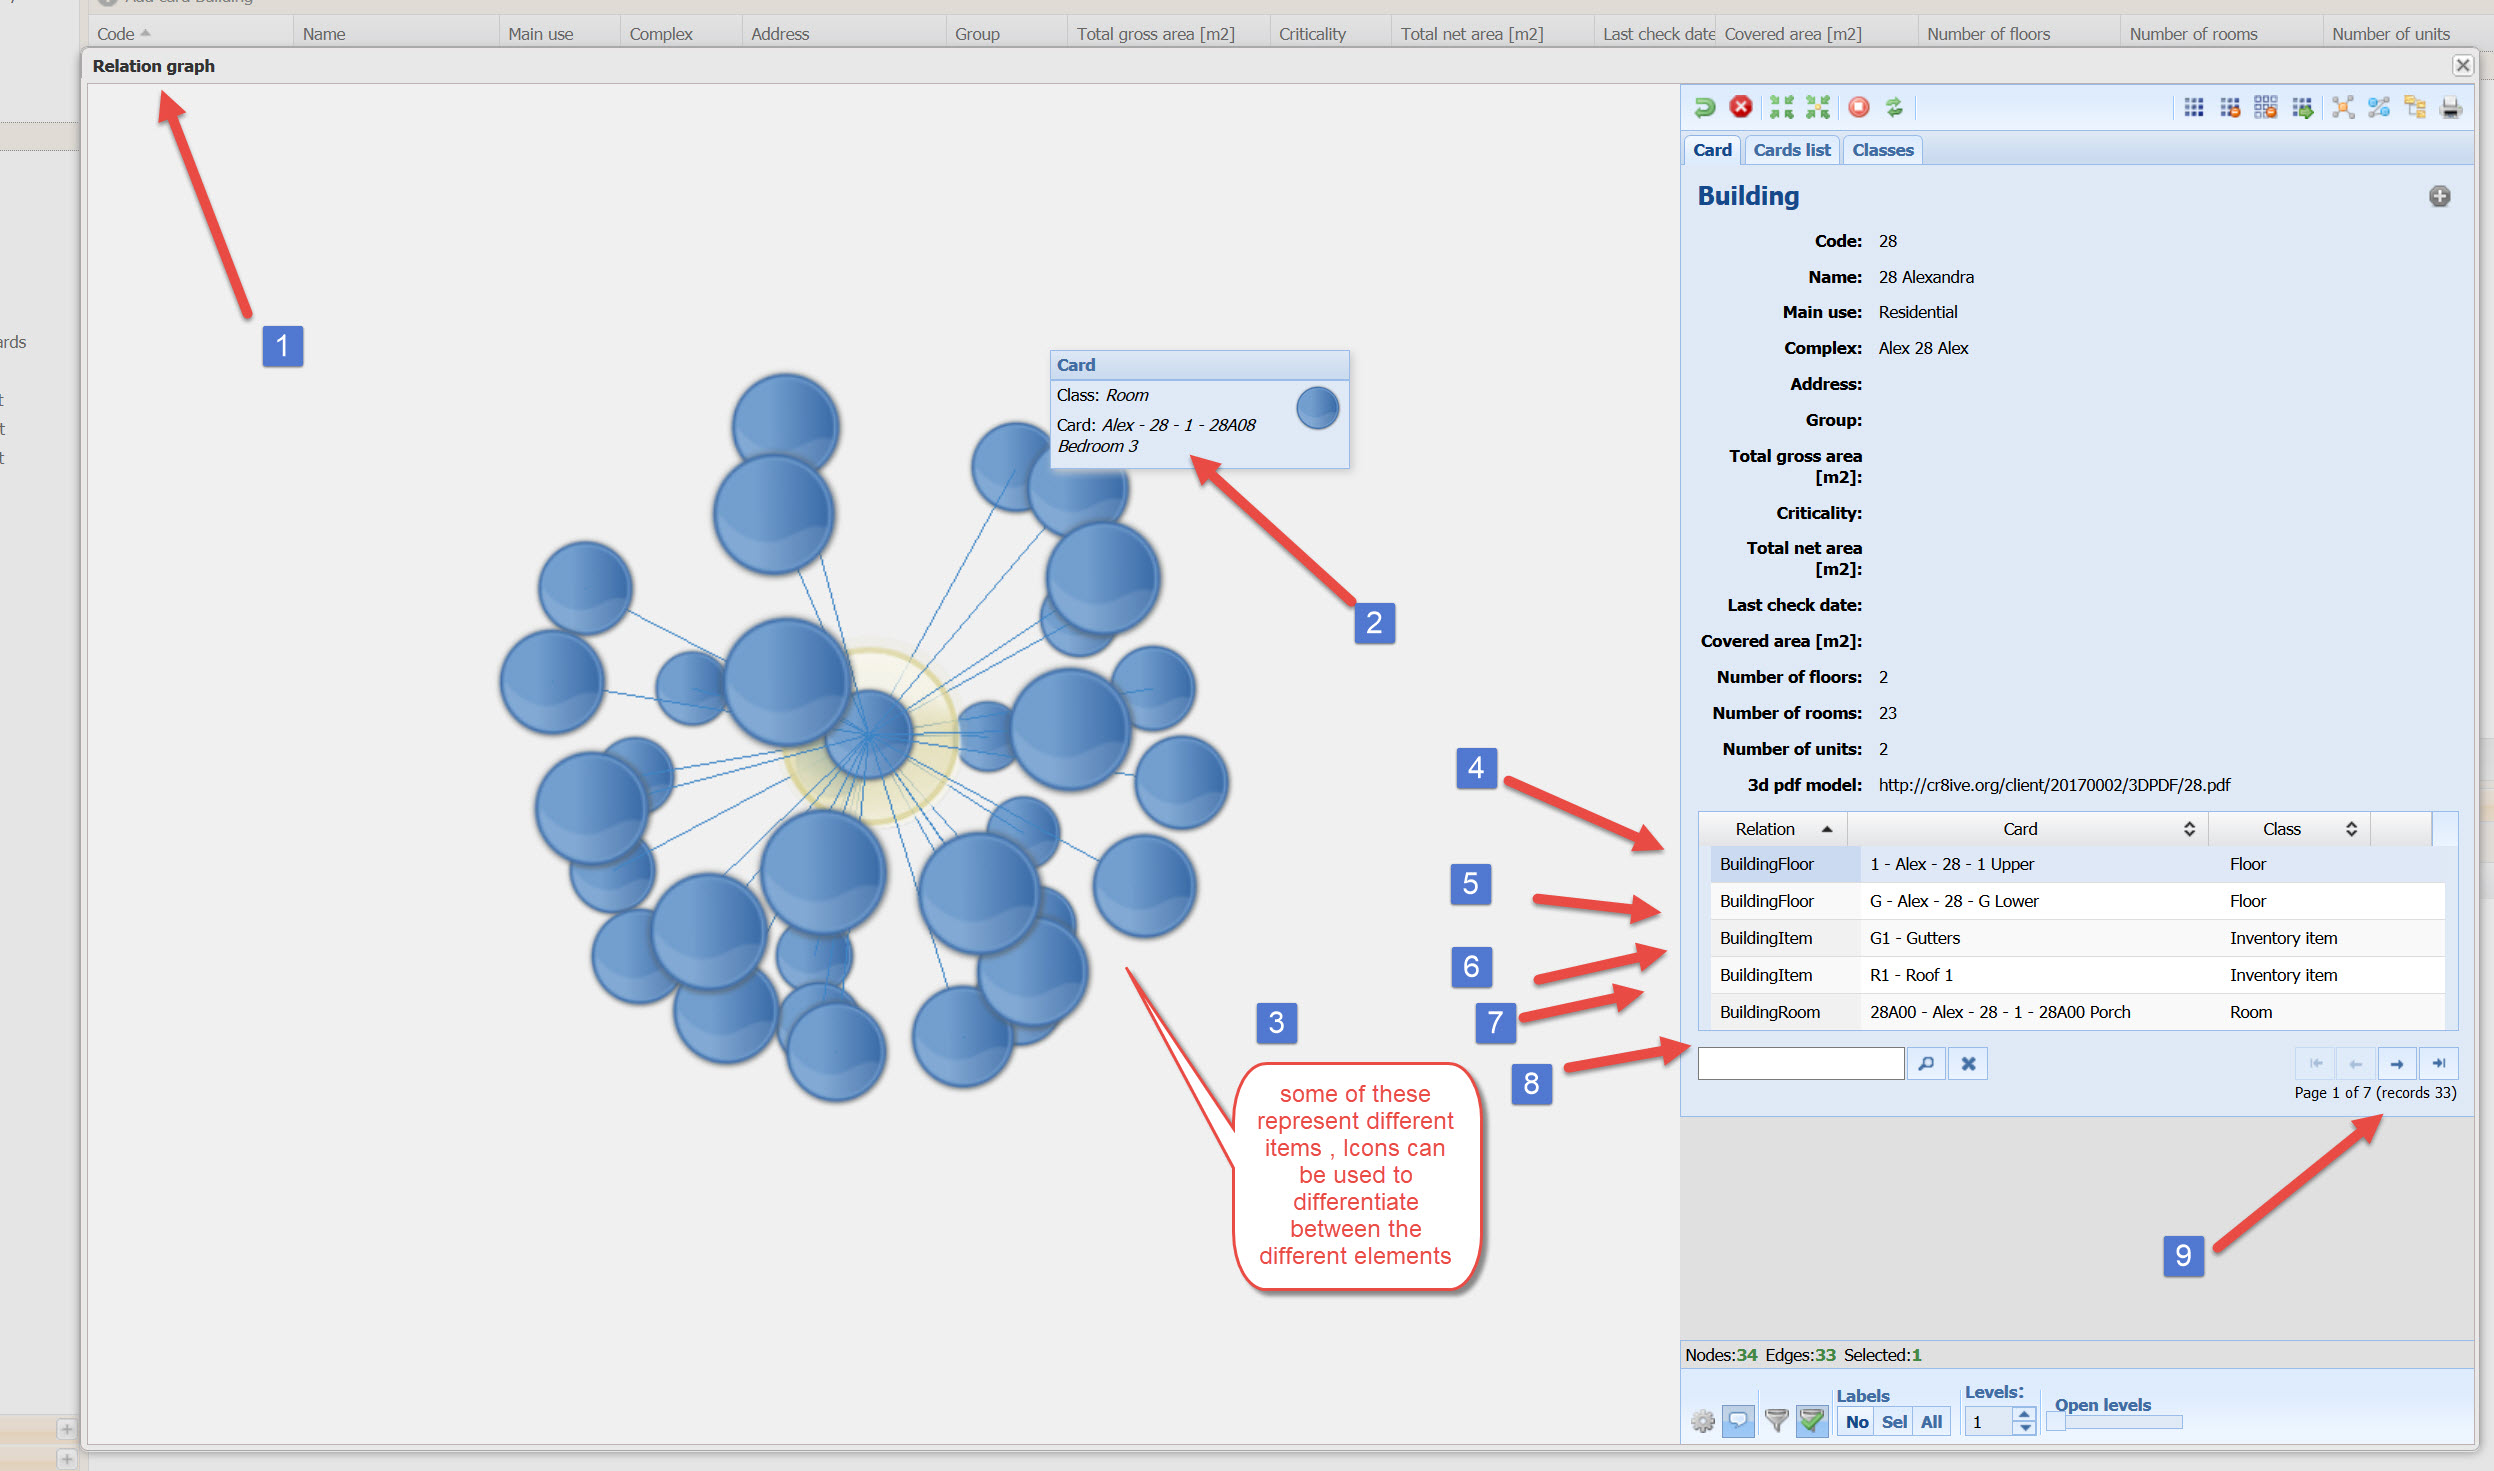
I think this has more relevance to IT Assets than to building assets, but for more complex organizations it may be of some relevance.
I am a little wary of the icons as I played with them to explore the relations graph but when I populated the Database with the residential example and copied it across to other installations on another computer and onto VPS’s it seems that the icons do not come across (so not in the database, but are only referenced from the database) so I get errors relating to not being able to find icons, annoying.
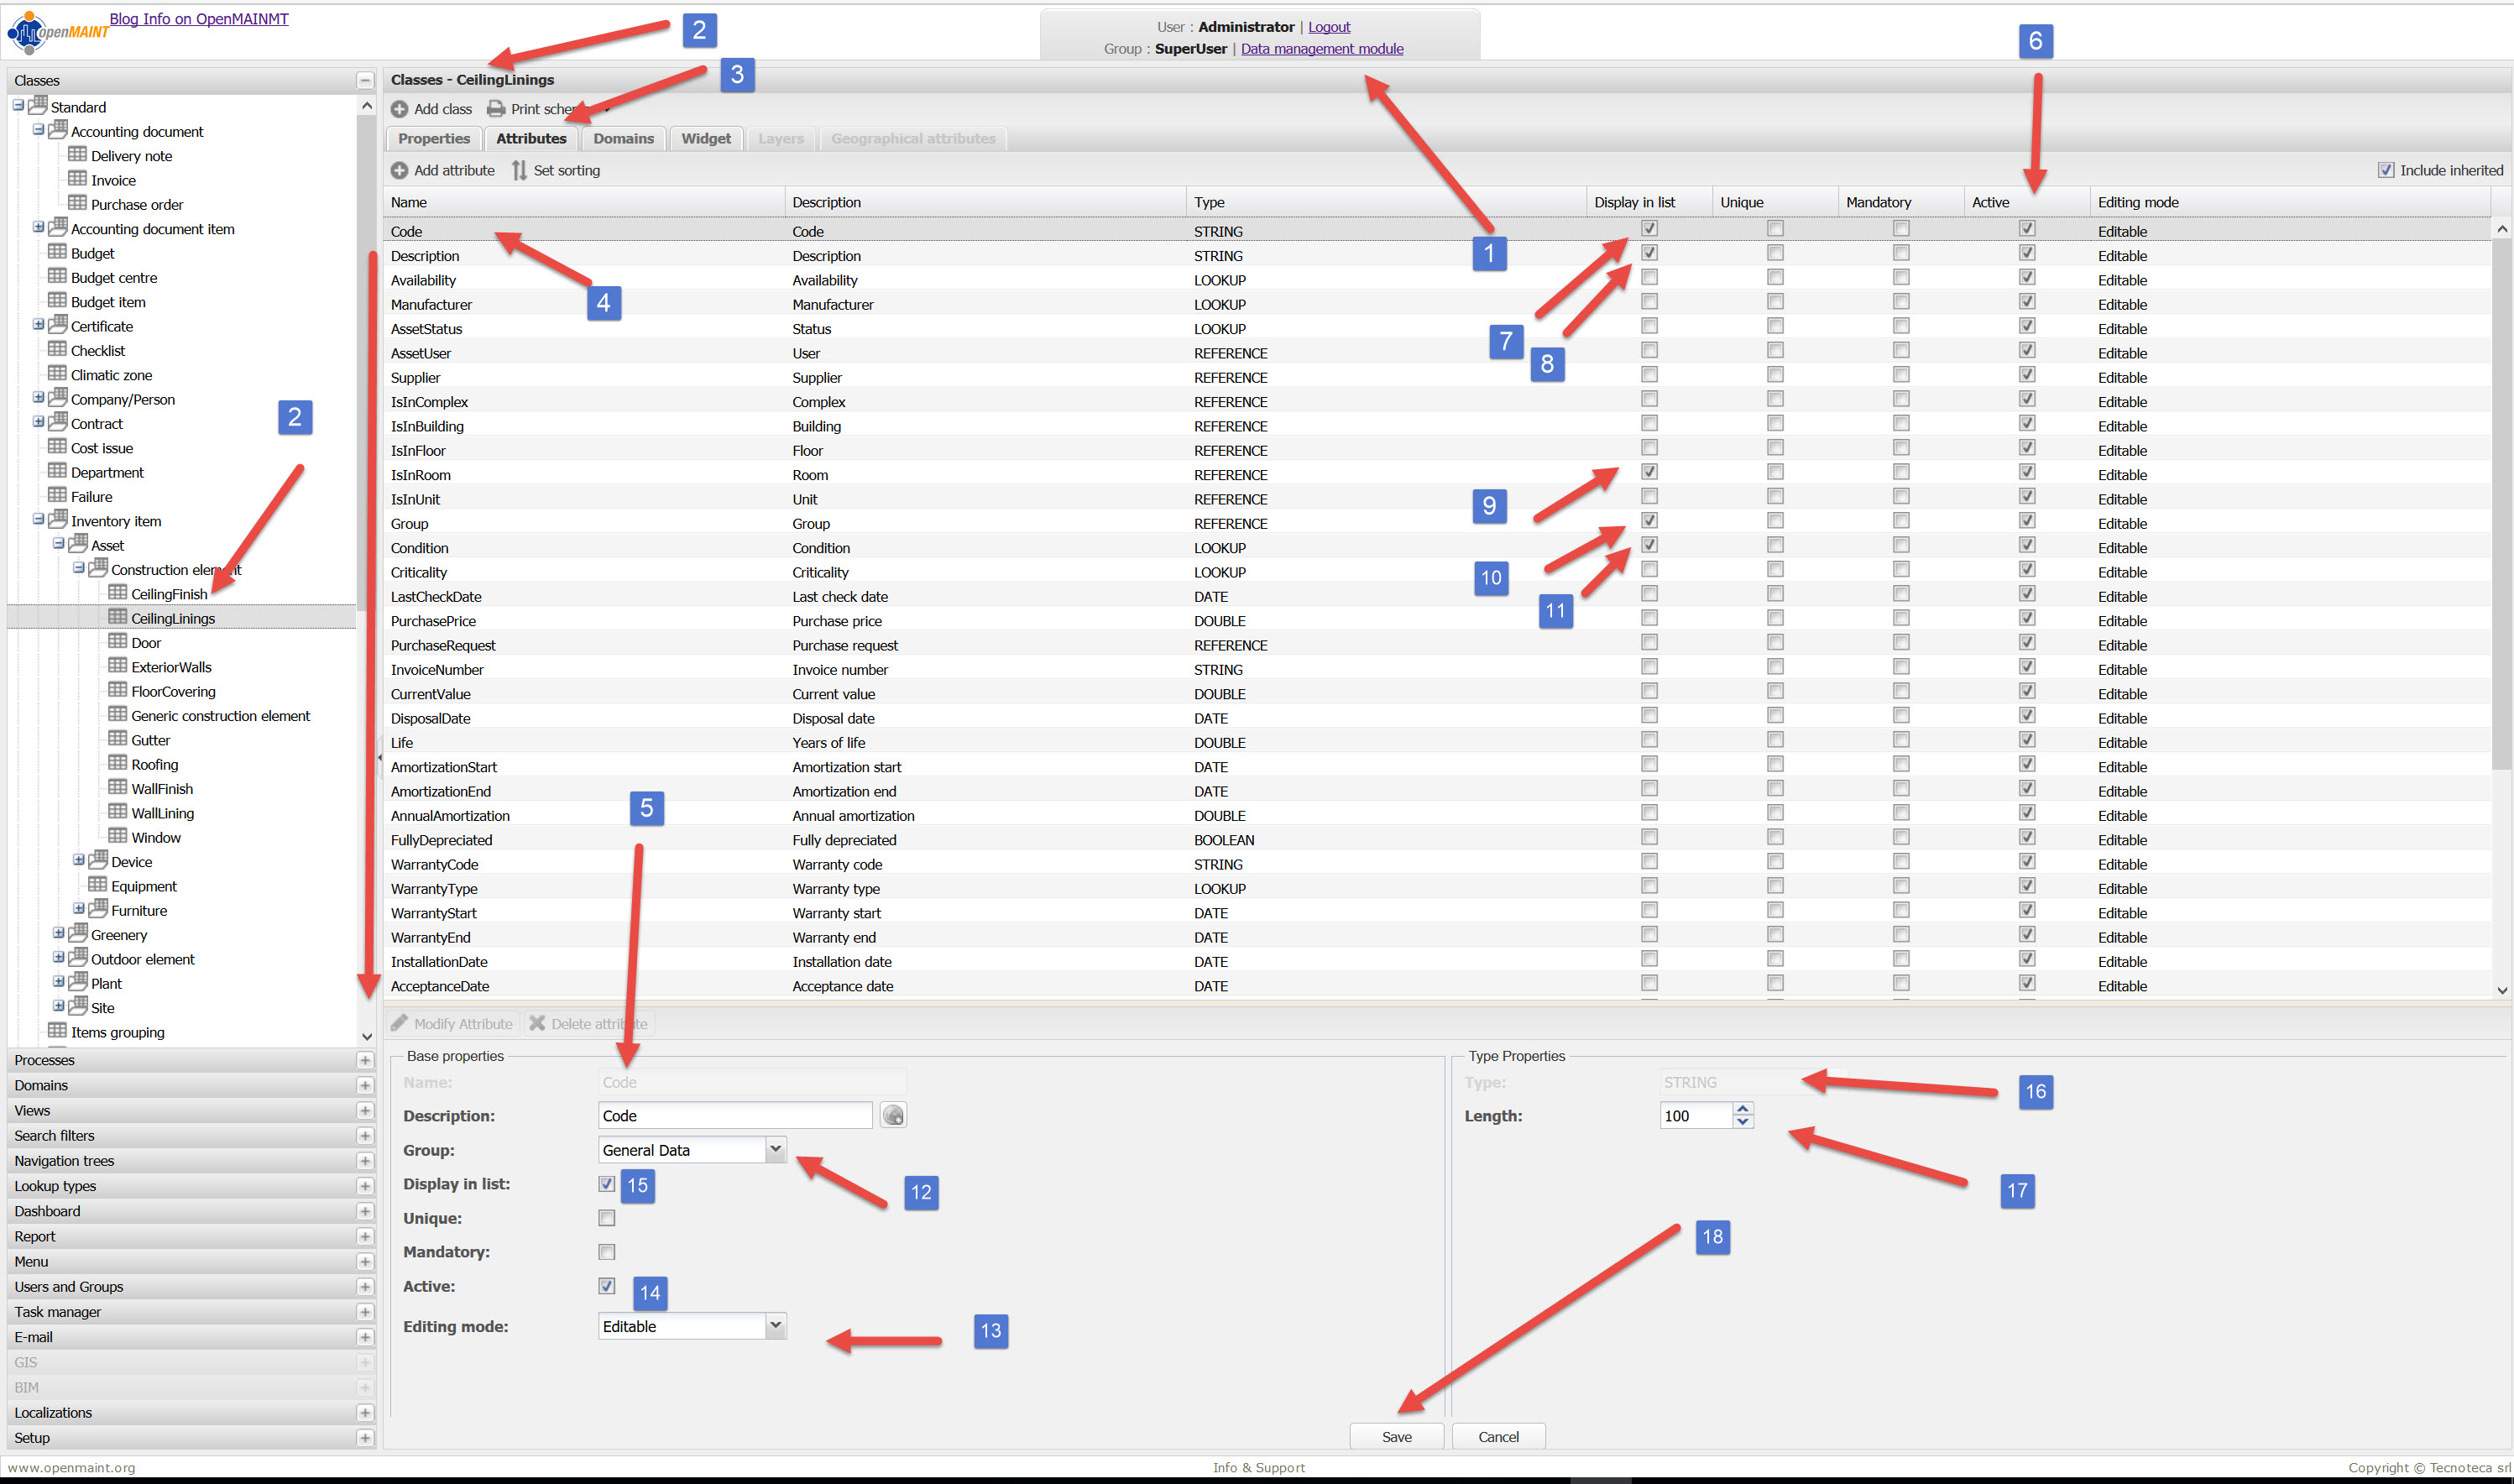
Below, the attributes tab are the main powerhouse of the Classes. These define the characteristic of the element you want to describe. These are inherited from the SuperClass above it (in this case the Construction Elements and you can choose whether the Attributes are active (6) below and whether you will display it in the list (the rows of the same element).
The other great thing with Attributes is that you can create a new attribute that is specific to your needs, it can be a Reference/Lookup/Integer/Double/ Text (this is good for URL’s) , and you can use it across all of the other items under that superclass if you create it in the superclass item. It then percolates down to all the items below it.
I still haven’t quite got my head around domains, they work & I leave them alone. They seem to create relationships between two elements. Maybe I need to be making the relationship between the new elements I am creating (Ceiling Lining/ Ceiling Finish and associating them with say Rooms. These may need a little more study. The cardinality I need to understand a bit better too, maybe these are 1 to 1 and 1 to many and many to many relationships.

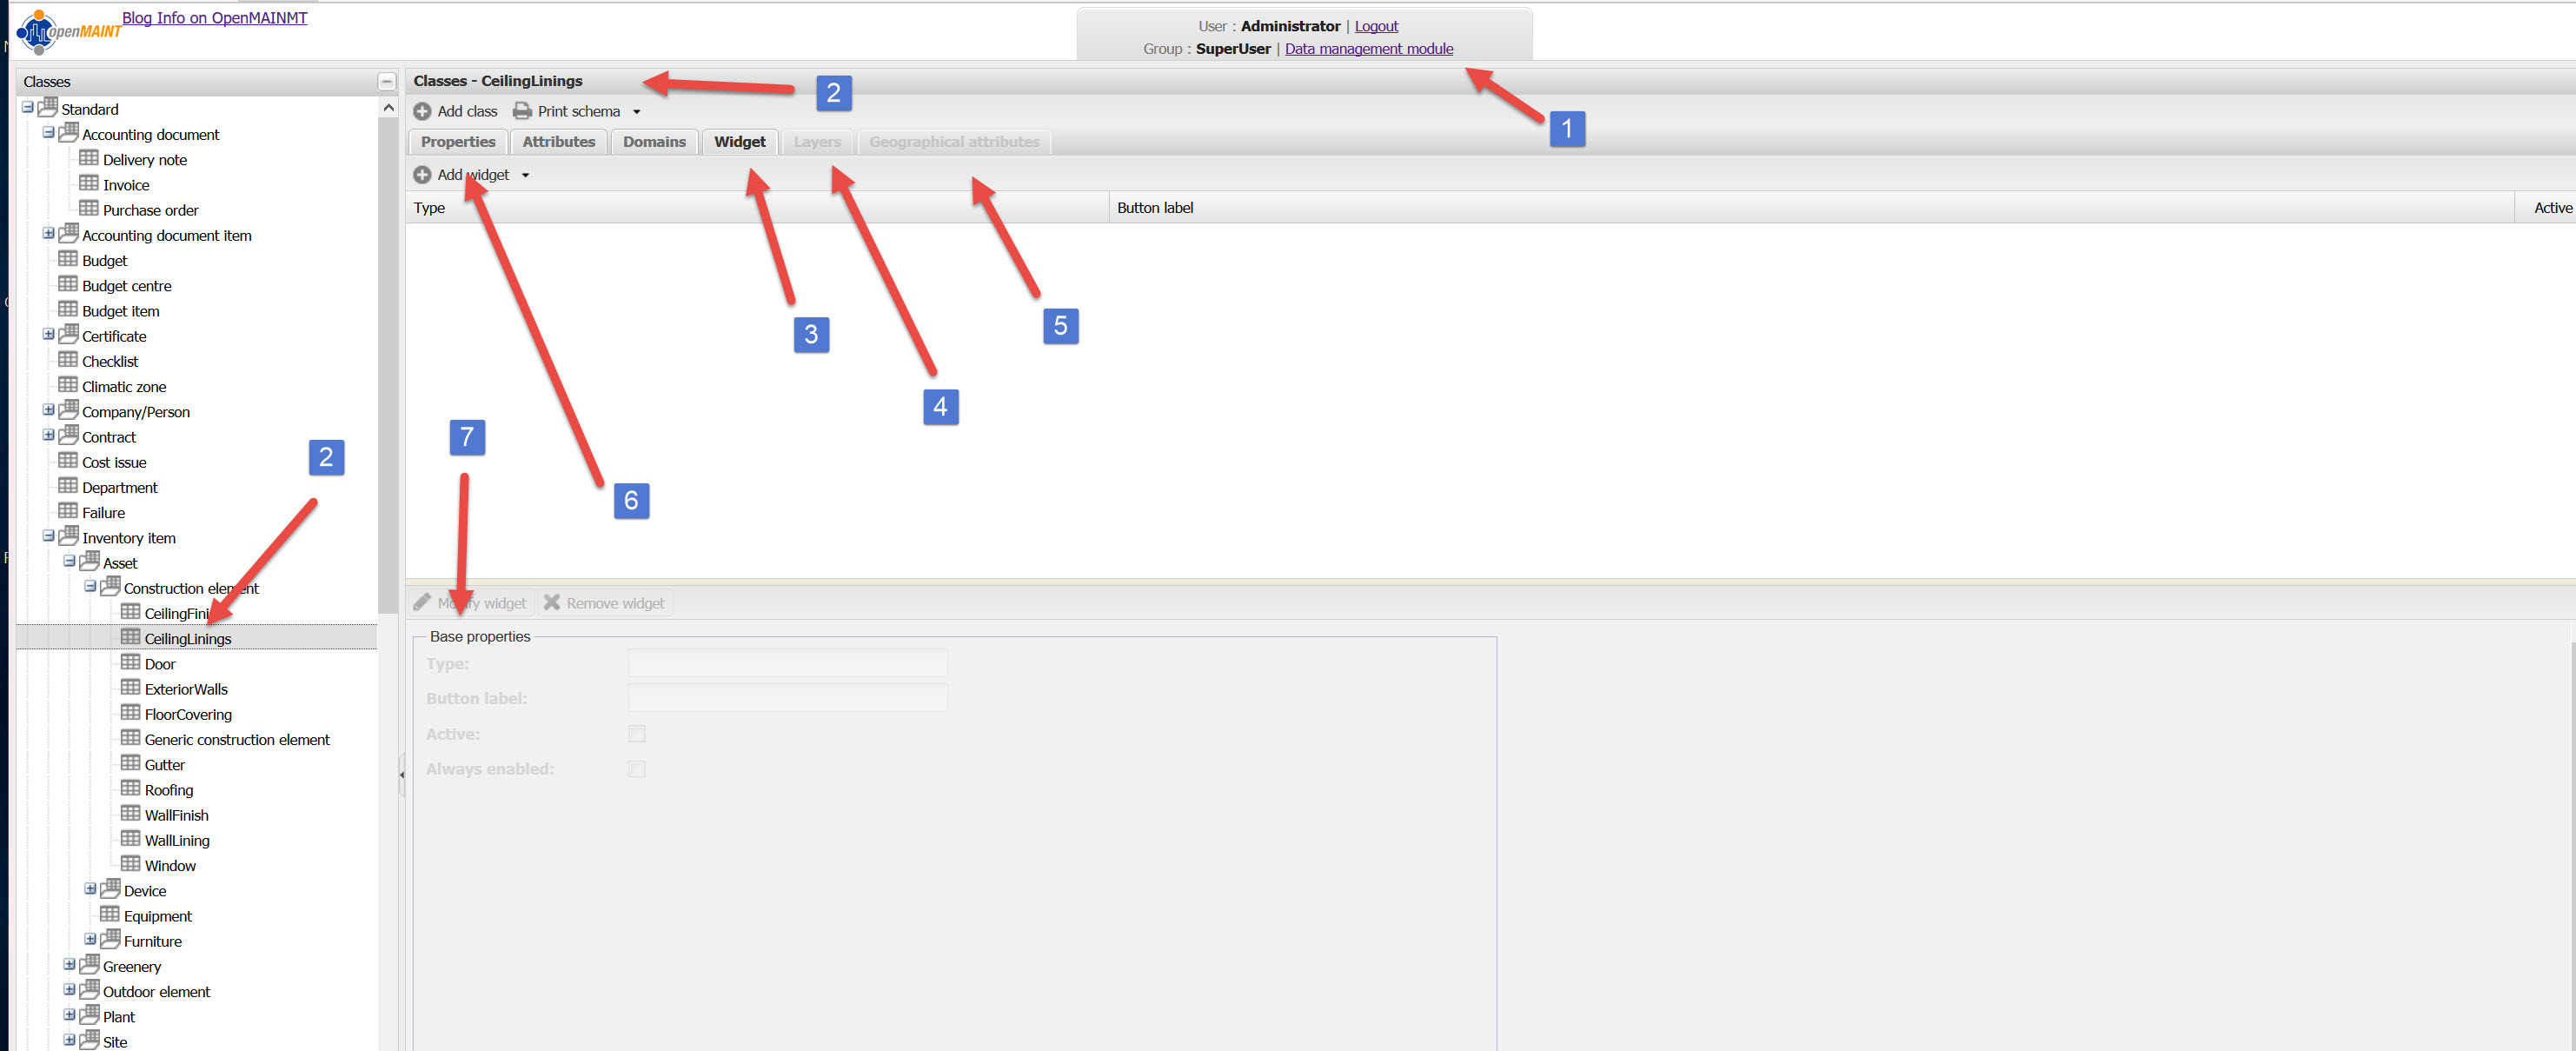
There are a couple more tabs, Widget (I think are buttons to simplify tasks- I haven’t delved too far into these yet) and Layers & Geographical Attributes. The last two are greyed out as they relate to the GIS and BIM Server components that I have not got operating yet [4] & [5] in image below.
OpenMAINT Email Part 2 -Working on Localhost
Totally FREE Property Management Information Site Part 2