How to create subscription lesson plan with WP & MailChimp
Background
I am closing down one of my web hosting sites, and have migrated to another site with the same blog and revised demonstration site.
Although I have had the new site up and running for a month or more, and have informed people visiting the original blog to check out the new site, there is little indication that this is happening.
I have been looking at my Google Analytics for the 2 main blog sites and there are very few visitors to the migrated site even though I have been putting later blogs on that one.
The current http://cr8ive.org site will be closed at the end of January, so I would hope that most visitors will find their way to the new site https://max-drake.cc.
The main topic that visitors go to are ones about OpenMAINT. The open source FM programme. So I thought I would condense and tidy my blogs up into a series of lessons that I could send on to people who subscribed to the emails. I started writing the first few in December 2017 & had previously dabbled with using an Email posting process that I could use to send information to subscribers.
I had previously added to the sites a signup for a Feedly or RSS feed on the blog site, directed to the new site, but have had few signups for that process.
So when reviewing the plugins for WordPress related to sending emails to a subscriber list, the one that stands out is MailChimp. If you have been following any of my blogs, you will see that I prefer free versions of tools, if they are available, rather than using a paid service, if possible. MailChimp does have a free service , with a paid version as well.
Idea of lessons
So, I had written a bunch of lessons, now I want to distribute them.
If like me, you get really irritated by pop-ups and other annoying distractions such as flashing banners etc, then you’d understand that I was looking for a gentle way of getting my message to visitors who may be interested in the lessons. I found that there is a MailChimp Top Bar plugin that you can install. That is not too loud, but it can sit up the top as a reminder if people are interested in OpenMAINT, and will hopefully subscribe.
In the emails I planned to re-iterate the moving of the website to the new location as well.
I also wanted to just send the lessons at a regular interval, so that I could keep up with the lessons over time. So I chose a week as the interval for sending the following lesson.
I have done some academic teaching, and I appreciate that I do not write well under pressure, so I started to develop the first 5 lessons, just to get a feel for the structure, and also keep me ahead of the process.
Process
First, you need to go to MailChimp and create an account. It is free.
Also, you need to download and activate on your site/s the following 2 plugins (if you want the top bar, only the first, if you do not):
Once you have created an account in MAIL CHIMP you can then start setting things up.
- When people subscribe, their information goes into a LIST. You can create different lists, for different reasons.
- In MailChimp they talk about CAMPAIGNS. So the notion is that each CAMPAIGN will use a LIST of collected subscribers, that the information will be sent to.
- In the Campaign you can have a single Email, or Multiple Emails, for instance, a weekly newsletter, or in my case a lesson plan.
- The emails can be sent at specified INTERVALS, based on the notion of a TRIGGER.
- There are also email TEMPLATES that can be developed, either boiler templates from their selection, or you can set-up your own TEMPLATE.
LIST
First, I went to the LIST tab, you can create a list name, and this will be the Bucket that all the3 subscribers will land in, if you point the subscription sign in to this LIST ( you will do that in the MailChimp Top Bar Plugin at the end. )
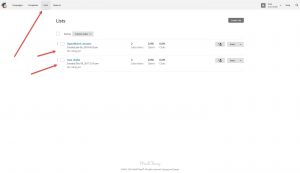
The LIST contents will look like the following image. There are a few tabs to look at, but to date, I haven’t needed to.
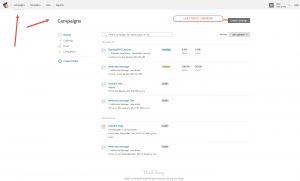
Campaign
This is the main thrust of the process, it is here where you decide on your emailing strategy.
As stated above, I wanted to do an initial email on signing up, sending the first lesson, then a week later, the 2nd lesson , a week later, the 3rd lesson etc. Here is a YouTube video link of the process setup.
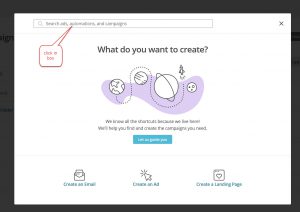
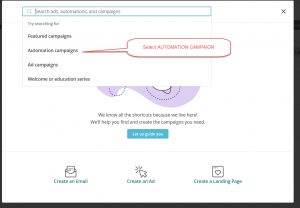
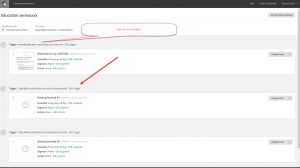
So on the CAMPAIGN tab you look to set-up a CAMPAIGN. I went around in circles trying to set up a regular campaign when what I wanted was an AUTOMATED CAMPAIGN, so I had to delete a few instances until I got what I wanted. It does not give you the AUTOMATED option in the menu below the page header CAMPAIGN, you have to use the search box, which, when you click on it, will drop down with other options.
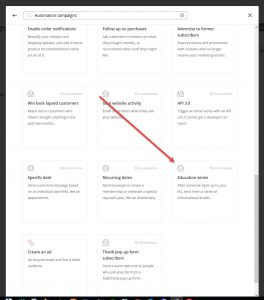
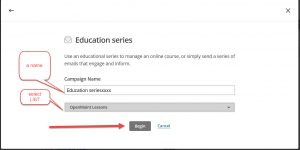
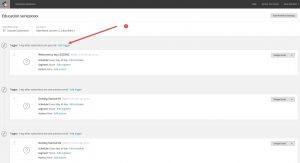
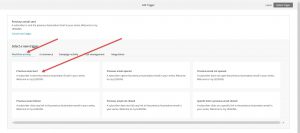
After clicking the AUTOMATION option you get a POP-UP with different types , I chose the Education Series Automated Campaign.
 `
` 
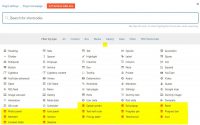
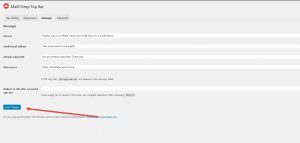
Select Template for creating email, you have lots of different options,
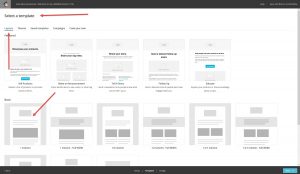
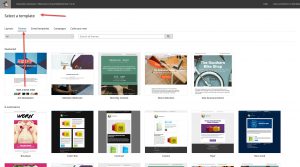


I just used a very simple one to begin with, then saved it as a TEMPLATE and used it for other ones. Later I may try other options, but I’ll stick top the KISS principle for the moment.
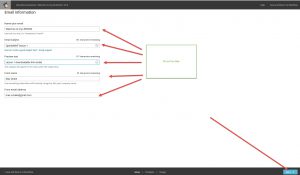
I will not go into the editing mode of setting up the email. It is pretty easy and there are videos on YouTube to explain the process. I used the Test Email to send it to a chosen email address and tested all the links before finally being with the end product. I suggest you use the Preview Email & Test Send too.
My email template ended up like this:
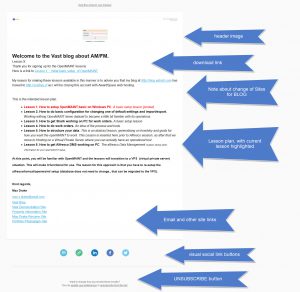
So, after setting up the emails, I just saved the first as a template and changed the links to the downloadable PDF’s for the 5 emails
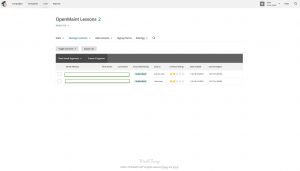
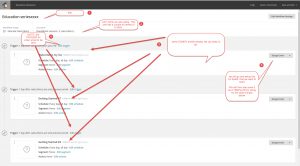
TRIGGERS
I then looked at the TRIGGERS of the emails.
The first Email I want to be TRIGGERED when the visitor SUBSCRIBES. They subscribe and the Email is sent immediately with the first lesson.
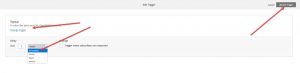
For the following Emails, I want them sent at WEEKLY Intervals, so for the next email the trigger will be set
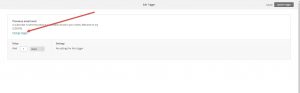
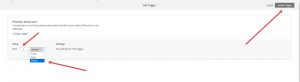
So this email will be sent a week after the first email went.
The later ones are based on the previous email, so they will be sent at weekly intervals too.
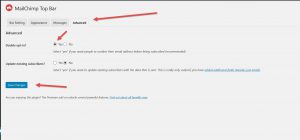
Workflow Settings and Start Workflow
Check your workflow settings, some are pre-ticked, I left them as is and then you have to make sure the Workflow is running. A way I have found for this is to try and leave and it asks you if you want to finish activating the workflow, it shows you the setup , click ok then its ready to go.
Note, when you are in Edit mode it PAUSES the Workfolow, so you have to re-Activate it or it will not work.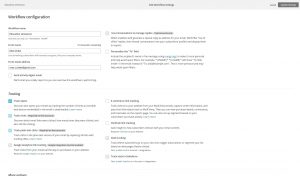
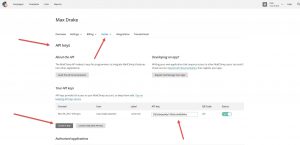
One thing you need to do before you do that is to setup and get the API Key. You will need to insert this into the MailChimp plugin in WordPress on your site
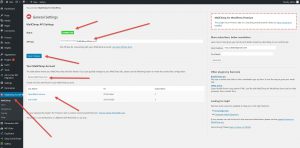
WordPress Site Plugins
Now go to WordPress and the MailChimp plugin and put in the API key. This then shows you are connected to MailChimp. You need to be connected to MailChimp so that you can choose which LIST you want all the subscriber details to go to.
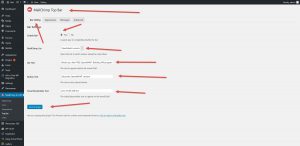
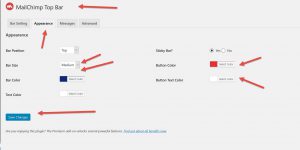
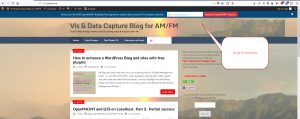
 And finally, on the top of the blog page is the Top Bar of Mail Chimp.
I did a couple of tests to make sure that the process was running for the first email. All seemed well. I will set a calendar event to see whether the 2nd email comes a week later.
A interesting tool.
aText-WordPress Keyboard Shortcuts Hack

400 Posts – (at 421)