Physical Ms Flow button -IoT part 1
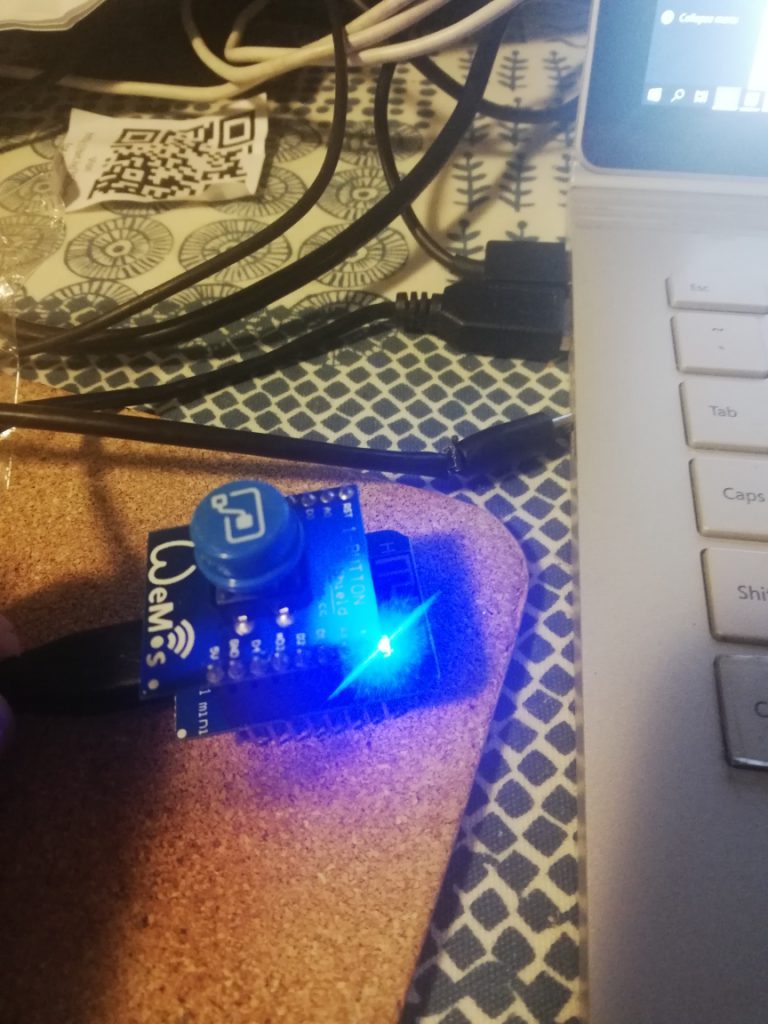
I went to a Dynamics 365 Saturday event with lots of talks on Microsoft platform. There was a goody bag with a ESP8266 microchip device and a link(QR Code) to a web page & video on how to set it up as a “Panic Button” which will sent a message to your phone when pressed.
I went to one of their talks on IoT connectors & uses and it looked pretty cool. Their advice is to start small, get something to work, then grow. So I thought I’d give the tutorial a try and follow on with the tutorial.
Note- I’m using the trial version of Flow, so the workflow will expire.
I initially plugged the switch unit into power source with a Micro USB cable then reading down you plug it into your computer, that powers it up as a blue light comes on.
The first thing the tutorial says is to go to https://github.com/ramimounla/Flow_Button and get the code.
That is only a script, but in the video it goes to this site:
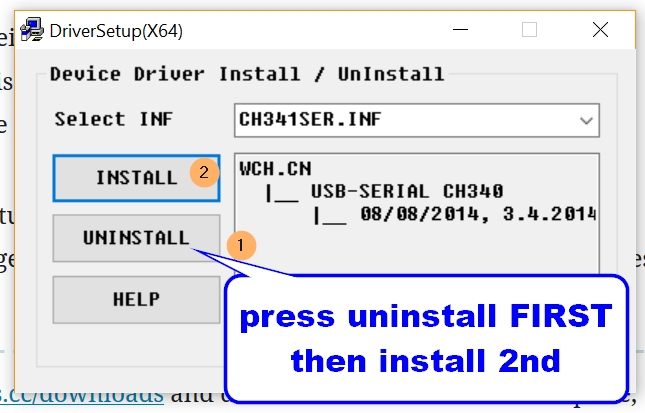
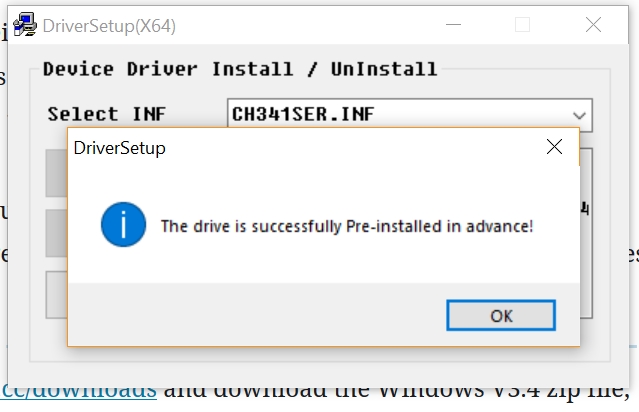
https://wiki.wemos.cc/downloads and download the Windows V3.4 zip file, unzip it . There is a CH341SER.EXE that you need to run there
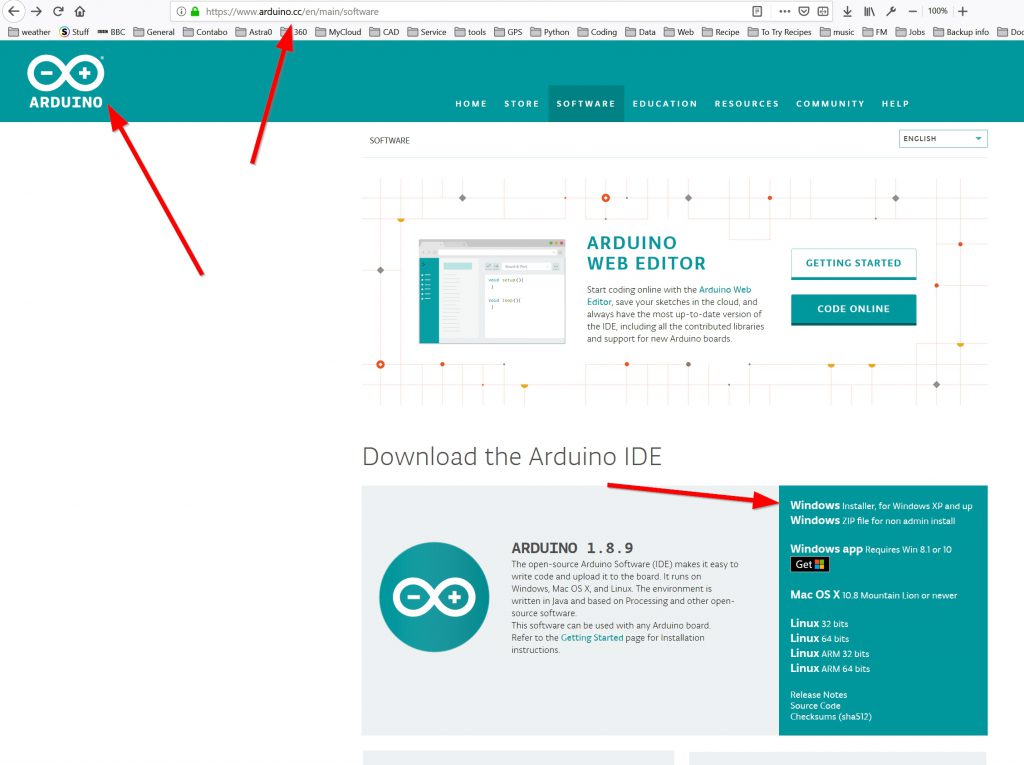
so then go and download arduino IDE and install for windows , I installed version 1.8.9
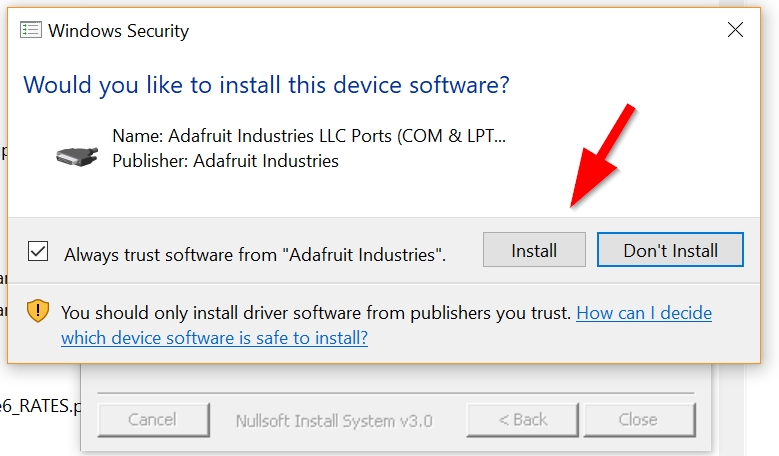
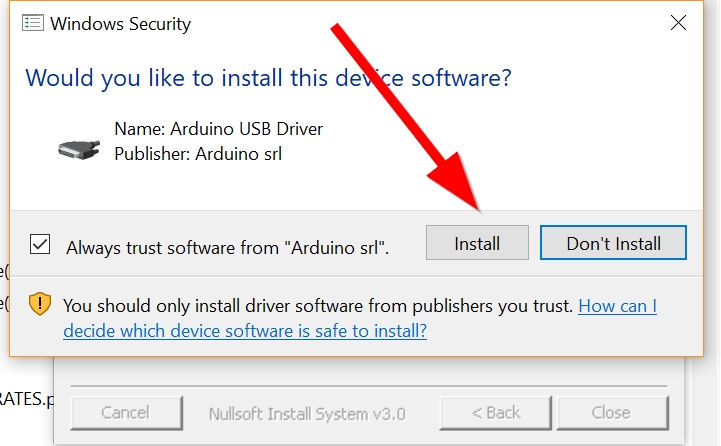
On the install it comes up with some pop-ups asking if you want to install some things, I selected install (the video showed this)

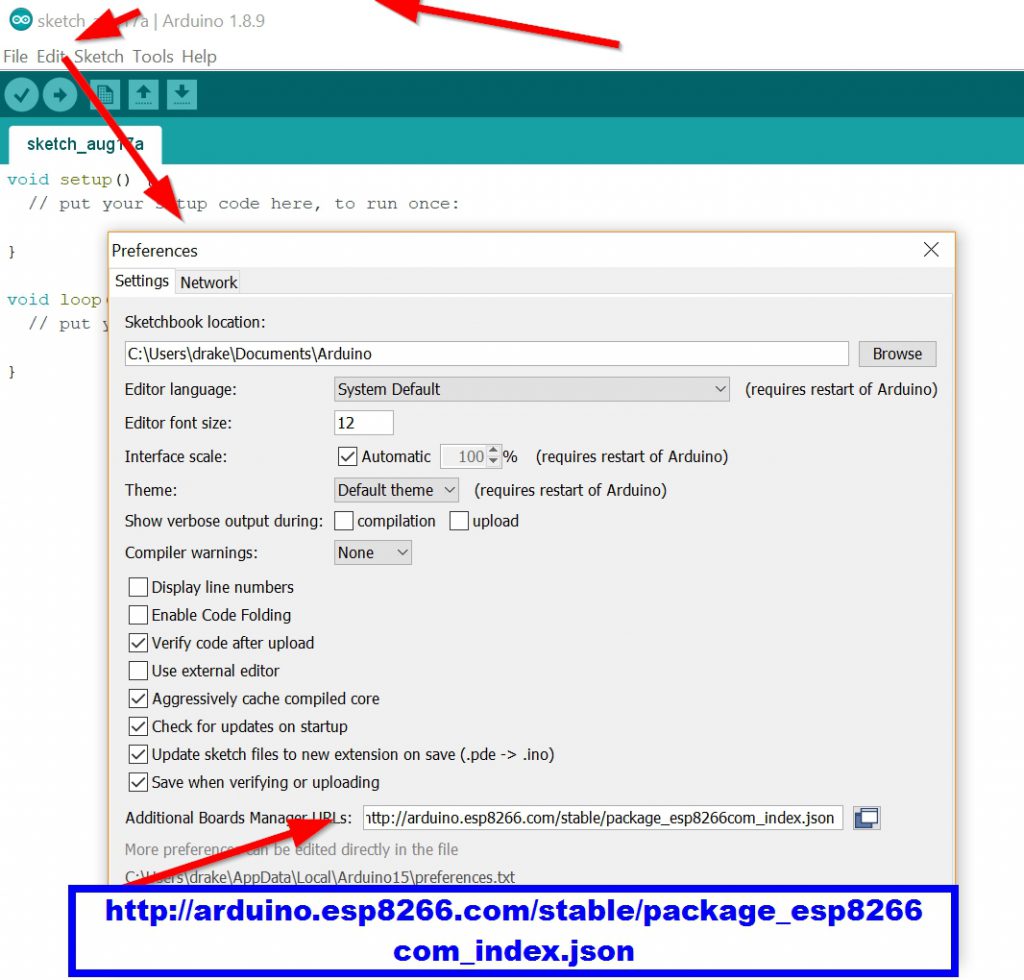
Then I opened the Arduino IDE.
Once installed launch it and navigate to File > Preference and enter the following URL in the Additional Boards Manager URLs http://arduino.esp8266.com/stable/package_esp8266com_index.json
Go to Tools > Boards > Boards Manager search for and install the ESP8266 board.
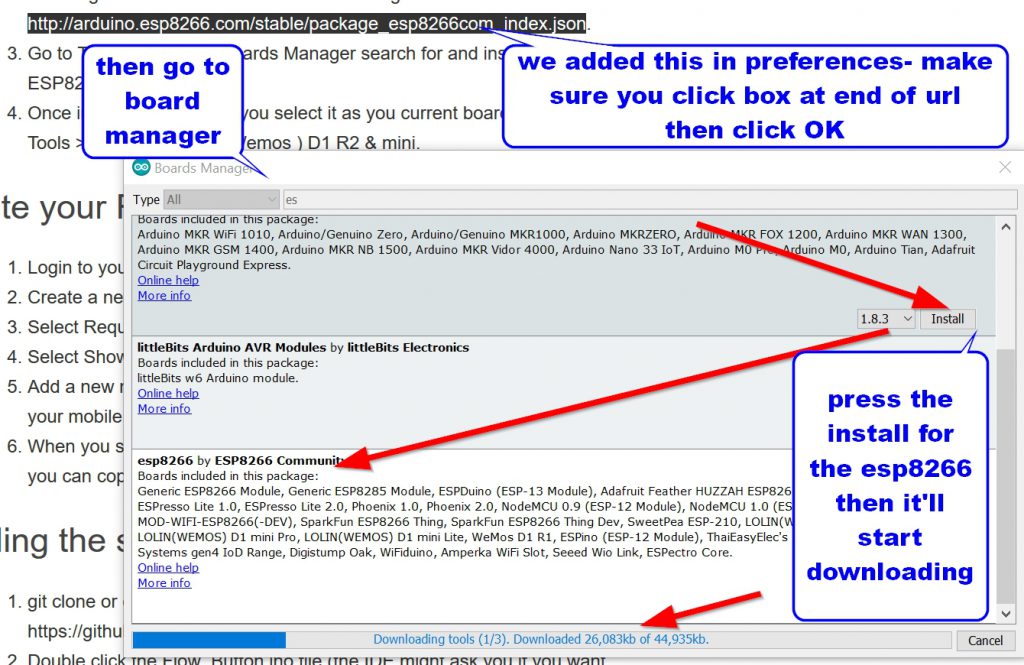
I didn’t quite get the steps right and had to go back and do it again.
Once installed make sure you select it as you current board by going to Tools > Boards > LOLIN(Wemos ) D1 R2 & mini.
Create your Flow
- Login to your Office 365 environment and navigate to Flow.
- Create a new blank Automated Flow.
- Select Request as the trigger point.
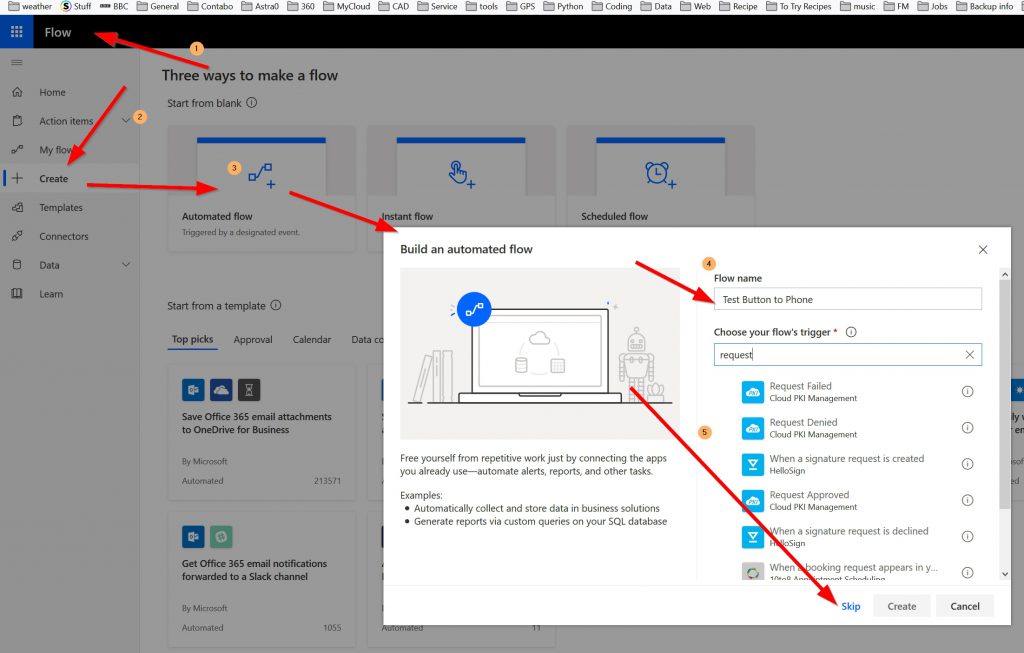
I had to use another account to get a free trial of Flow (some components of Flow are free but the HTTP REQUEST is a Premium feature, so can only access via a trial (unless you want to pay for it))
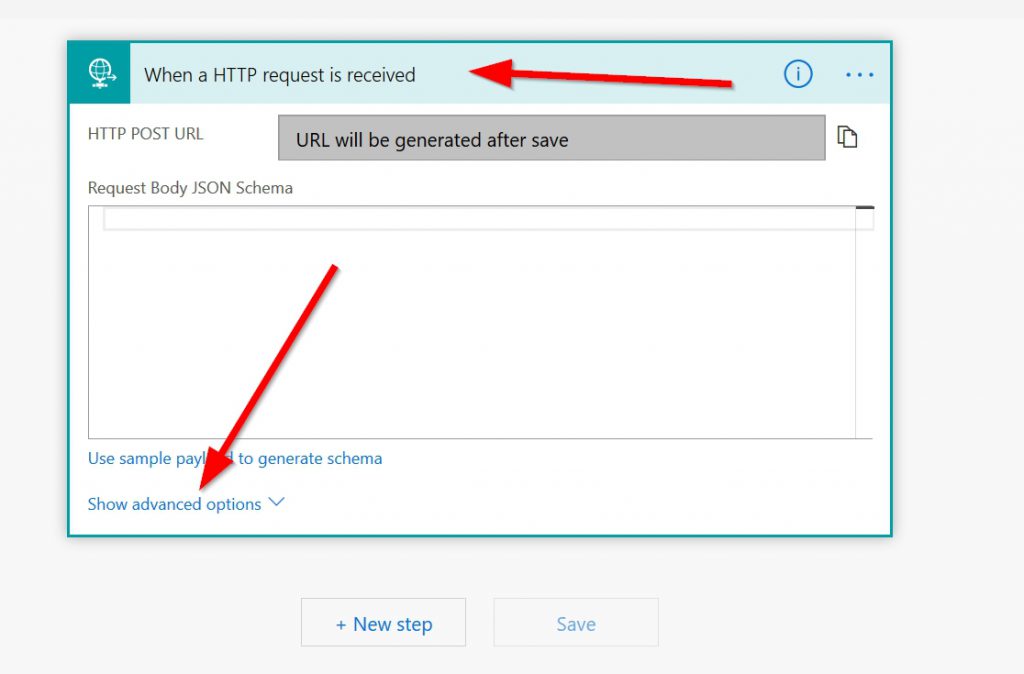

- Select Show advanced options and ensure the method is set to GET.
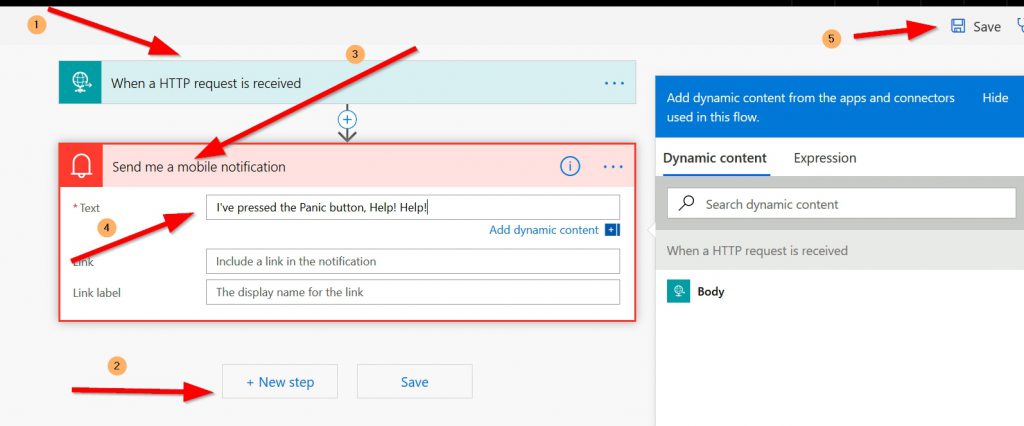
- Add a new mobile notification step to send a message of your choice to your mobile. -this step can be substituted by your automation of choice.
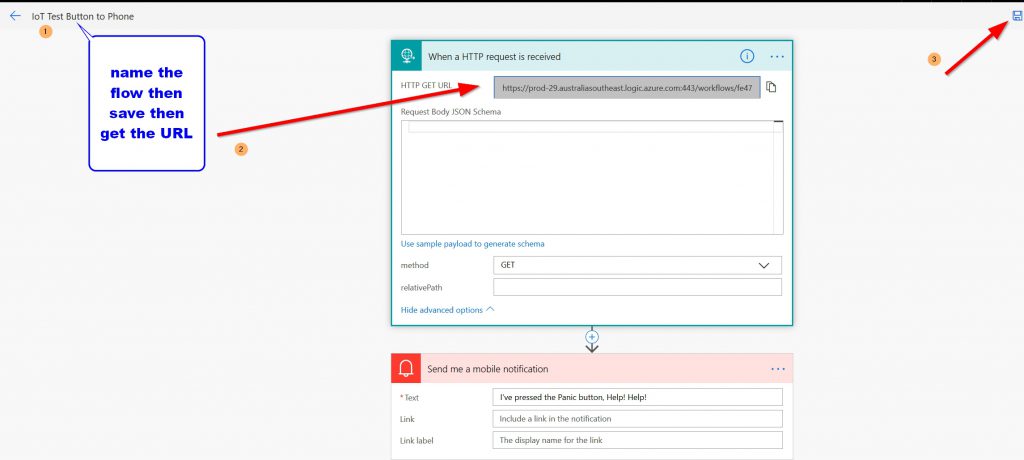
- When you save your Flow, the Request card will populate the URL that you can copy and paste for future use. (watch the video , it goes through this very well)
A bit of stuffing around, but following the video got me to the point where “if I press the button I get feedback of the trigger in Flow” but no mobile text or anything. So I don’t think I have Setup in Flow correct. The video is not too specific after this point, so you are left hanging. Where to proceed from here.
Issues
I was trying out different Com ports available (9, 10 & 3). I think I reset the IoT device so that it stopped. When Running the Arduino IDE I had a bit of confusion for WirelessSSID and WirelessKey values and eventually figured out this was Wifi Address & Password . I had quite a few stabs at that. In the end I figured that after compiling it was polling but I had the wrong Wifi Address & Password so once sorted it sent message through on button push.
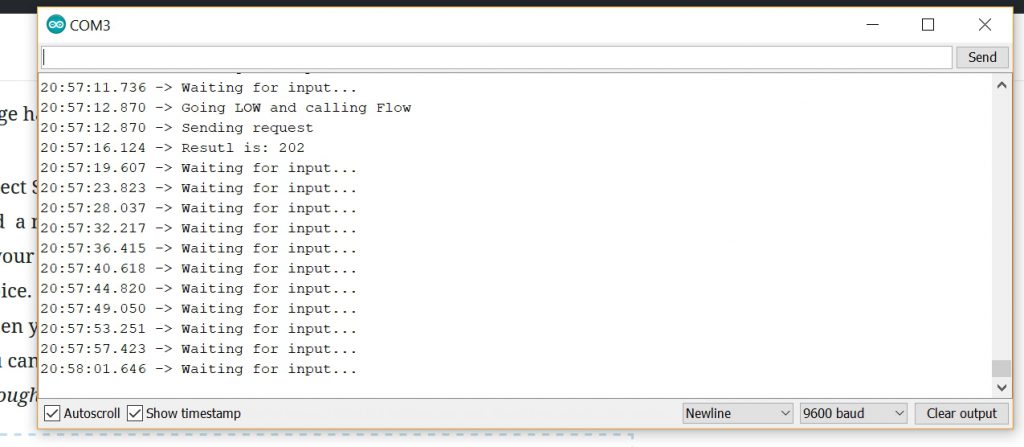
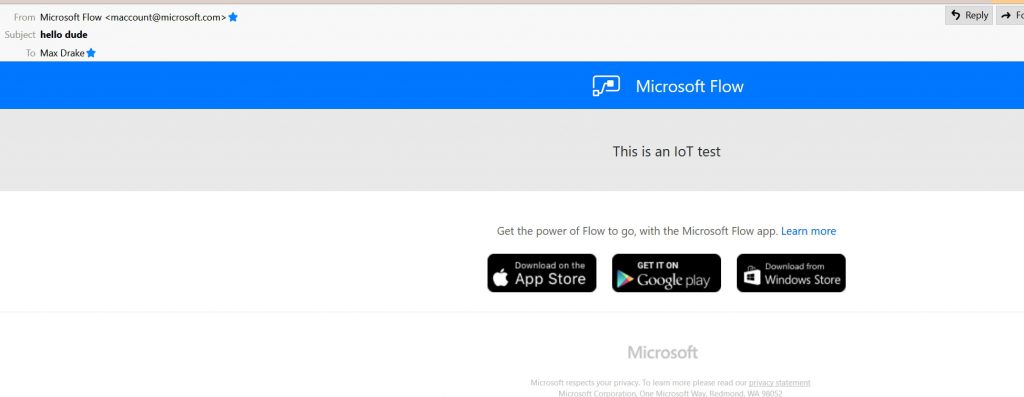
So I reconfigured Send to mobile to send to email and I got some results, as in a message from Flow to my email address for sign in to the account.
End comment
I think the tutorial was pretty good. Unfortunately the Send me a mobile notification didn’t work at first glance, so I need to explore that, but the send an email worked fine.
I’ll play with other triggers based on the button pushing action within Flow, as well as setting the code in the Arduino IDE to different settings eg duration, flashing light and looking at tweaking code (and mogadoring it).
Then I’d explore connecting to other items, such as what events you could trigger with pushing a button (or not- put a delay- eg Dead Man’s Switch
Another thing that got me excited in the talk was using python for some of the scripting, that used a ESP32 SoC with MicroPython.
This appeals to me for the python coding, and looking on the websites the chips are pretty cheap. I just need to got one with a MicroUSB connector for powering up the chip.
I think I need to tinker with my button first and get familiar with it, then move on to other coding. I need to email the person who posted the blog to say thank you.
Also there were talks about using IoT for monitoring temperature in a warehouse to Site in a truck. The temperature was sent, in remote areas, where no wifi, via radio signals from the IoT device to a receiver (Spare or Vodafone) that then sent the info to the specific wifi address. That was pretty cool.
So the question is, what do you want to monitor, and what IoT devices are available, at what cost, to monitor the items? Where to store and how to display data? This could be my next field of interest if there is sufficient help videos on how to do this stuff.
Google Sheets Macro Recorder & Web App

Python Webscrape Grocery Comparison Reordered Part 2